Creating a Widget
UMG Designer
In this tutorial, we’ll guide you through the process of creating a Mages Widget, and using it inside a level. We’ll create a simple widget which will consist of a button and a text block. Pressing the button will change the text block.
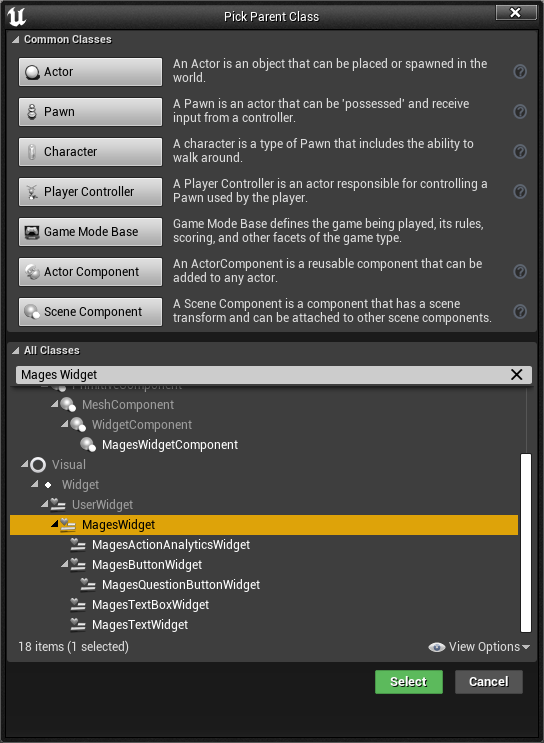
First, create a new blueprint deriving from the Mages Widget class:
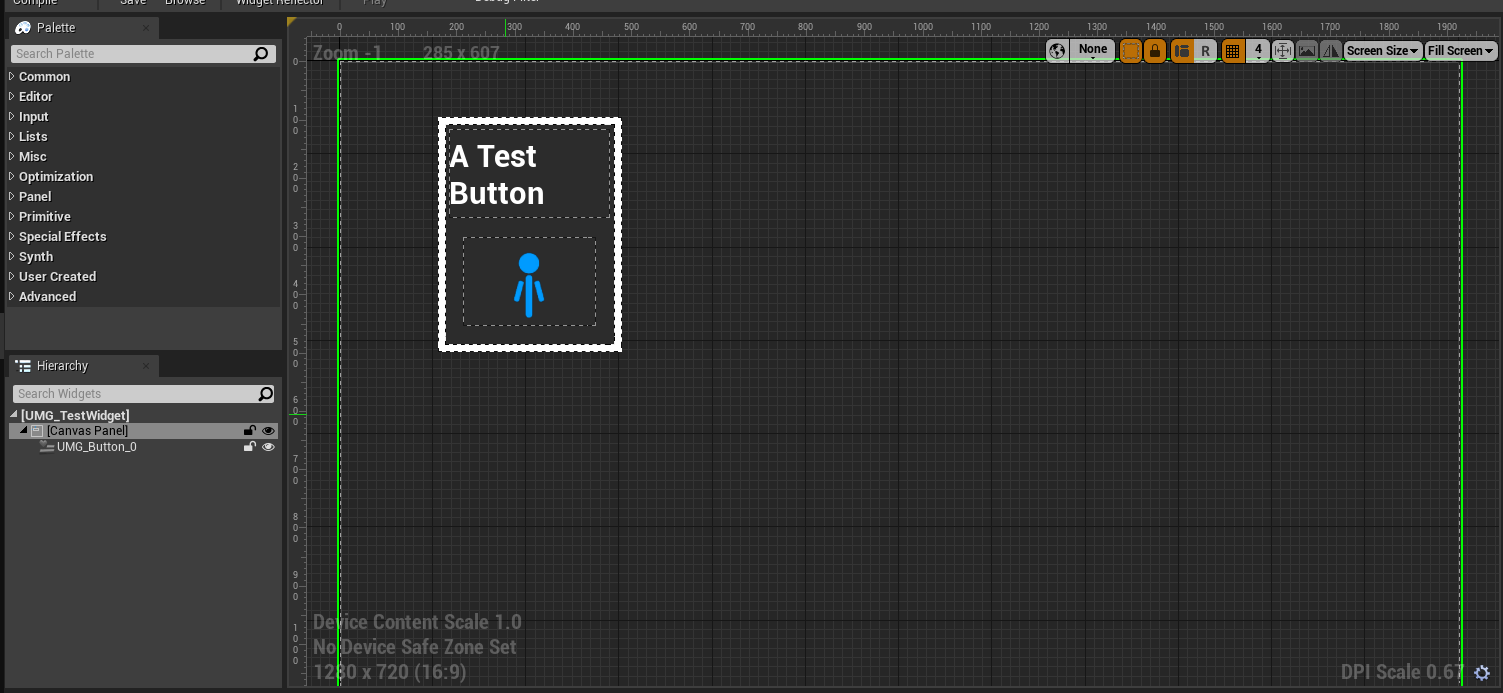
Add a canvas panel to hold our widgets, and a UMG Button widget under it:
Note
UMG Button is a template that encapsulates the functionality and design of all of the buttons used in our applications. You can create your own template button for use inside of your interfaces by creating a subclass of the Mages Button Widget.
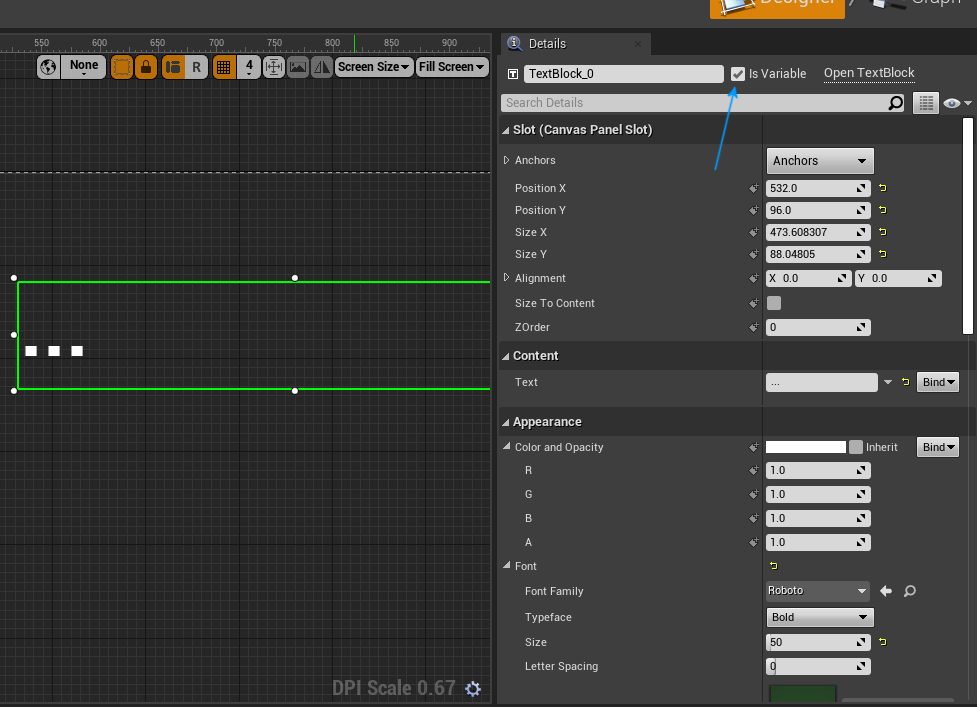
We’ll also add a text block and mark it as a variable so that we can change it later:
UMG Graph
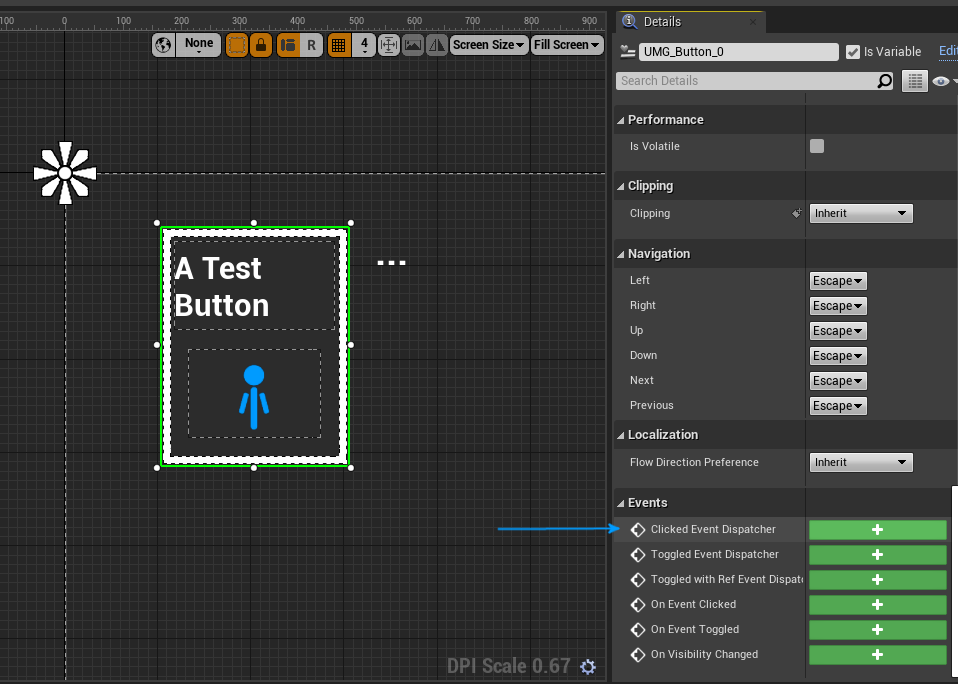
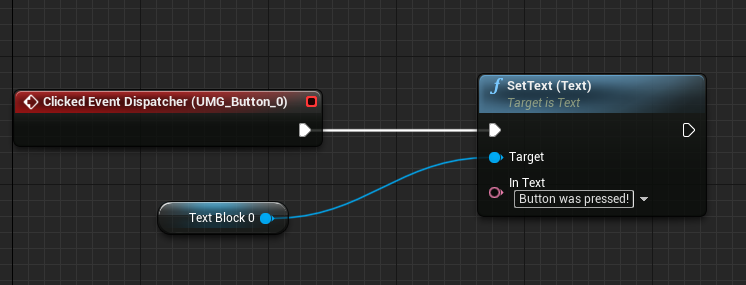
Click on the button widget, and add an event for the Clicked Event Dispatcher:
Here’s the implemented event for the functionality we want:
Adding it to the Level
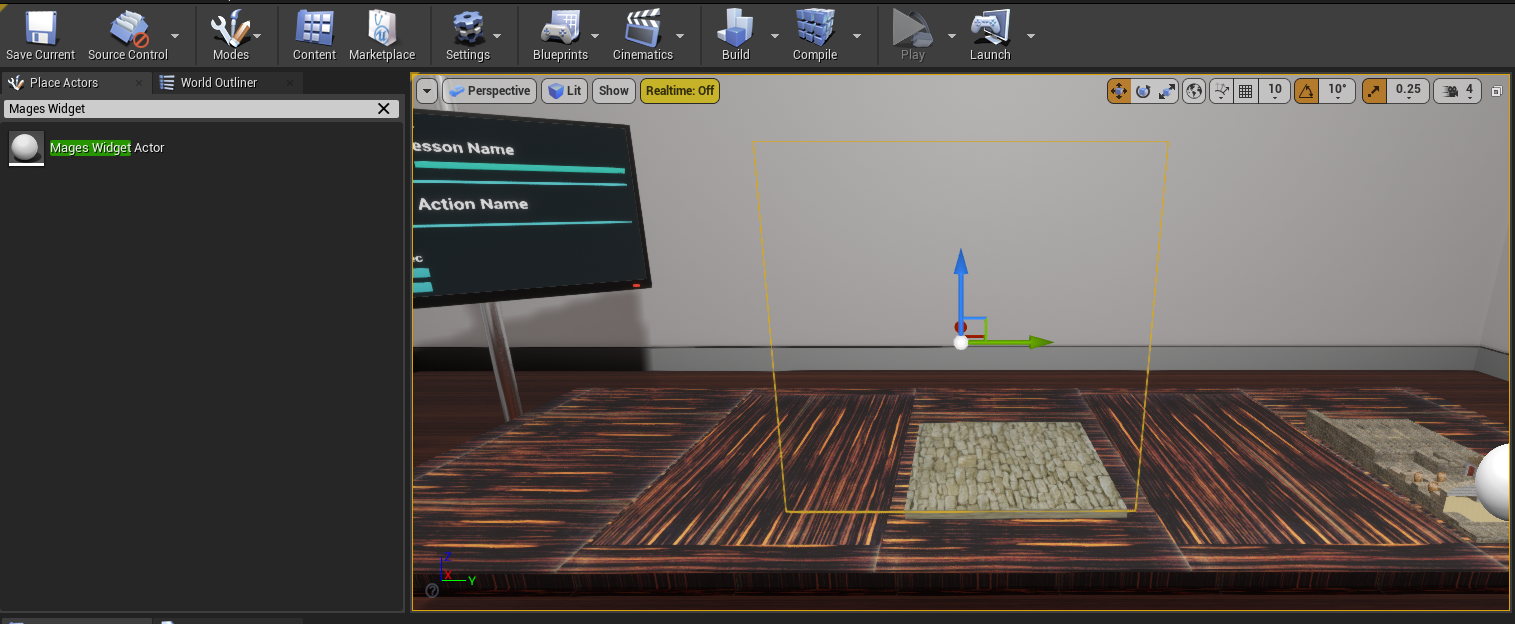
Inside the level, add a new Mages Widget Actor from the “Place Actors” panel.
Note
The Mages Widget Actor, is a simple actor that wraps a Mages Widget Component. If you need a blueprint that contains widgets with different 3D transforms, you can use the component instead of the actor.
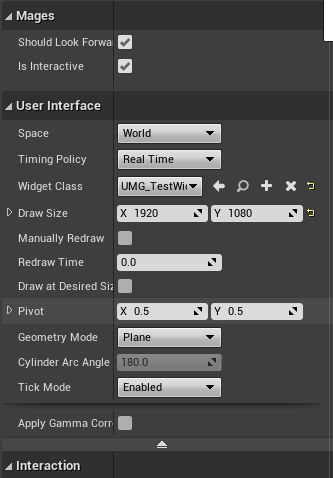
Afterwards, configure the actor to display our widget with the proper size.
Done! You can now preview the level in VR and see that it’s working.