Soft Bodies
The MAGES SDK supports real time soft bodies as a part of its standard features
Note
Soft bodies are used to simulate soft and deformable surfaces like the human skin, liquids, internal organs, cloths and any other deformable surfaces.
You can read here more information about our soft bodies.
In this tutorial we will demonstrate how to set up the soft body behavior on a human bowel model (small intest and mesenter).
Tutorial overview:
Exporting the model from Maya
Unity importing
Soft body setup
Run-time and interaction
General discussion
Exporting the model from Maya
The image below shows the bowel model in Maya.
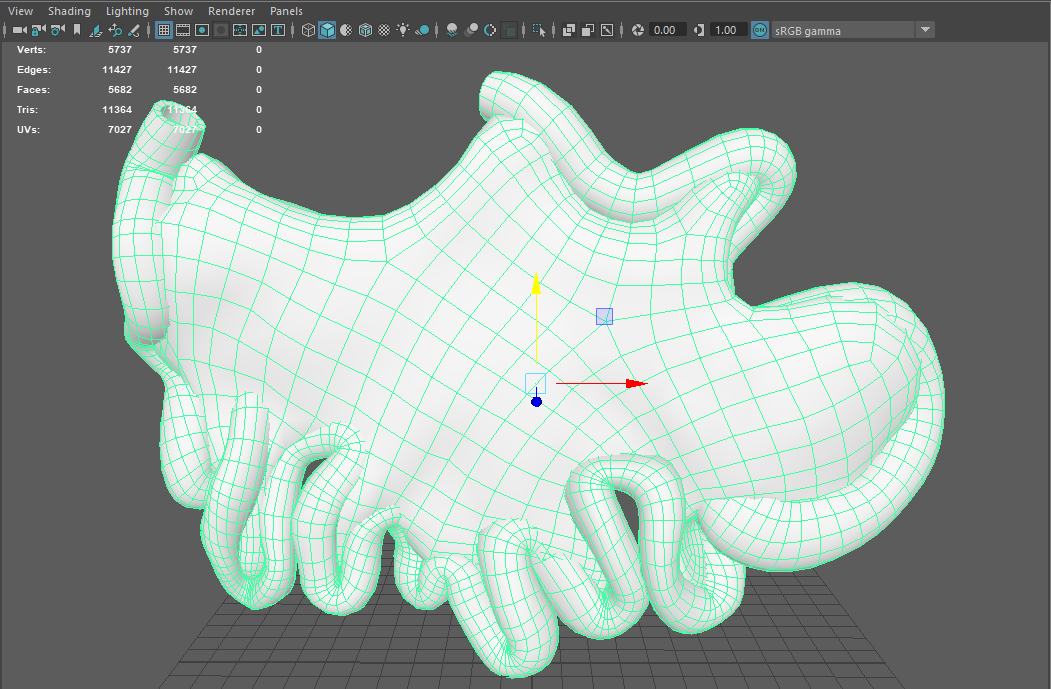
This model has 5700 vertices. The number of vertices is really important in our soft body system both for the real-time simulation updates and the preload configuration and caching preprocessing time. Both operations (pre-processing and real-time updates) all depend heavily on the number of vertices under processing
Make sure to do a cleanup before exporting the FBX. In the cleanup window select the 4-sided faces, Faces with more than 4 slides and the Nonmanifold geometry.

Then export the model using the FBX format.
Unity importing
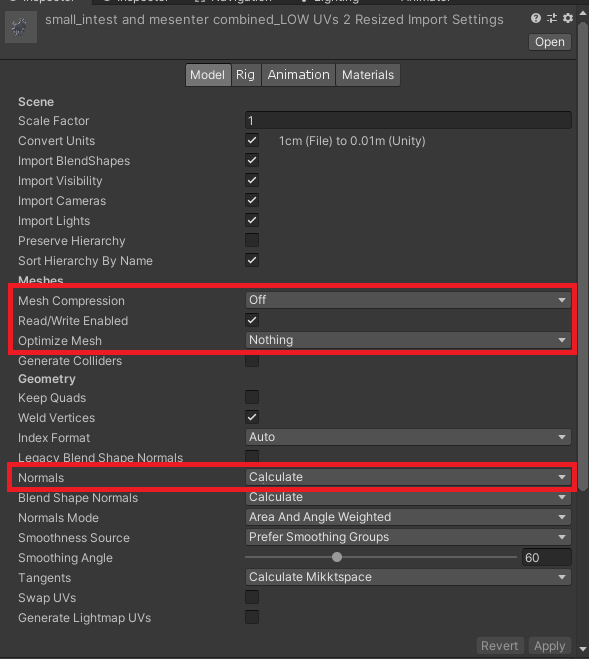
When you import the model to Unity make sure you check the following parameters:
Mesh compression should be off
Read/Write Enabled should be checked
Set Optimize Mesh to Nothing.
Set Normals to Calculate.
If you face any other issues with the model e.g missing vertices when starting the application, consider reviewing those configurations. The underlying geometric topology plays an important role in the final quality of the simulation.
Softbody setup
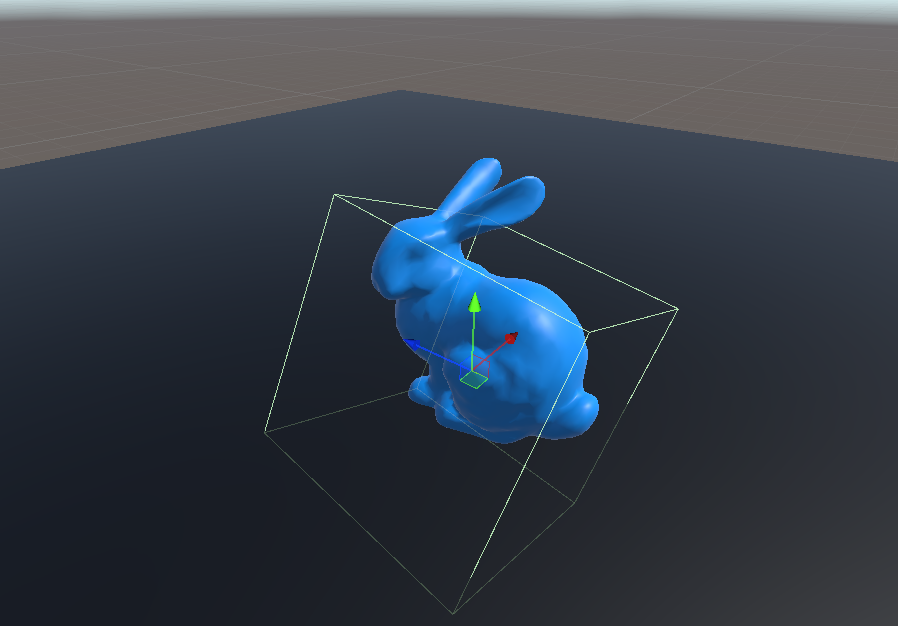
Drag and drop your FBX model in the unity scene. In this example I will be using the Stanford bunny model.

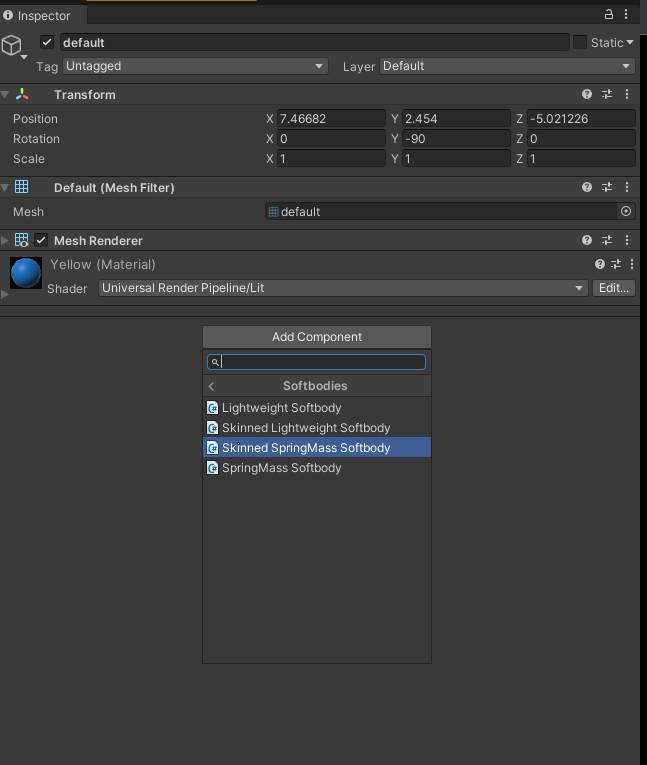
The first step is to attach the most suitable simulation method. While having the object with the mesh selected, click Add Component → MAGES → Physics → Softbodies and select the script variant you need. For the Bunny I chose SpringMass Softbody.
Note
SpringMass Softbody is the most realistic softbody simulation MAGES SDK offers, but requires more CPU performance than the lightweight version. (Used for static meshes)
Lightweight Softbody a simulation that requires less CPU performance than SpringMass, while creating a good -but not perfect- softbody simulation. (Used for static meshes)
Skinned SpringMass Softbody, Skinned Lightweight Softbody are the same as above but used for Skinned meshes instead of static
You can now see that there are two scripts added in the inspector. The first one is for the skinning process (attaching the vertices to the particles) and the other is for the simulation (connecting particles together). The initialization process consists of 3 steps:
Initialize the Simulation
Initialize the Skinner
Save the generated mesh and object for future use.
We will see more details for each step below.
Initializing the Simulation
The most important part of this step is to configure the Clustering options consisting of the Particle Distance and the Particle Connection Distance. All the other parameters can be changed on the fly and upon experimenting with the softbody in game by simply clicking the Update Particle And Spring Properties Only button.
Note
Particle Distance is the minimum geodesic distance between two particles.
Particle Connection Distance is the max distance two particles can have in order to be connected together. (Meaning that, in game, disturbing one particle will also affect all its connected particles)
Keep in mind the smaller the particle distance is, the most particles will be created and therefore the simulation, although more realistic, will be more computationally expensive.
Warning
After choosing the desired Particle Distance and Particle Connection Distance we must ensure that all our particles are connected. Too many connections will make the simulation run slower and too little will make parts of the mesh unstable or detach completely.
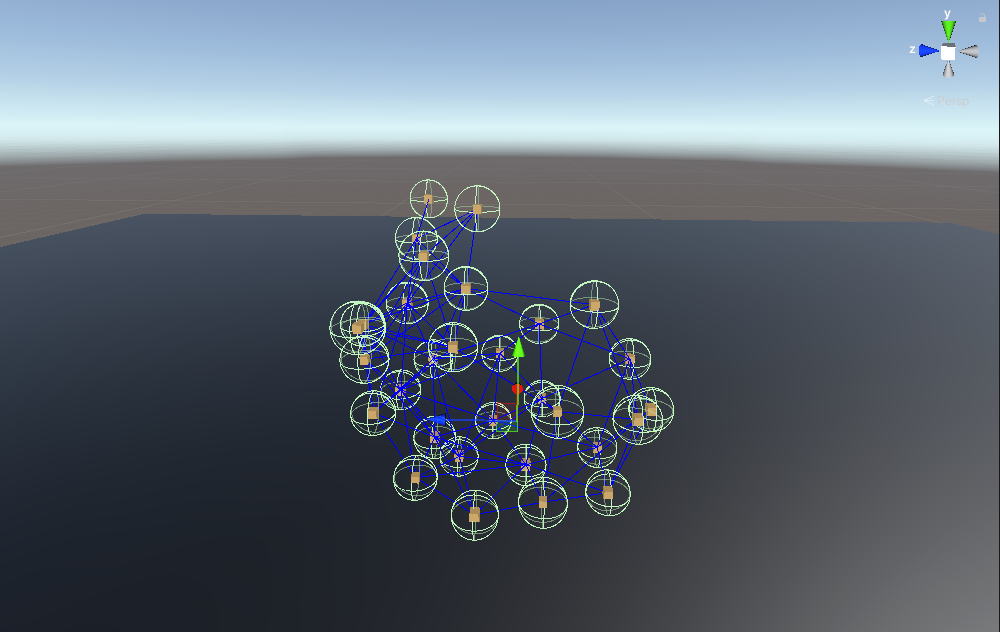
We can visualize and check our connections by checking the Show Particle Connections field.
If we have now Gizmos enabled we must see a result similar to this. (In order to make lines visible we can disable the mesh renderer of our object temporarily)
Here are all the settings used for the Bunny Model:
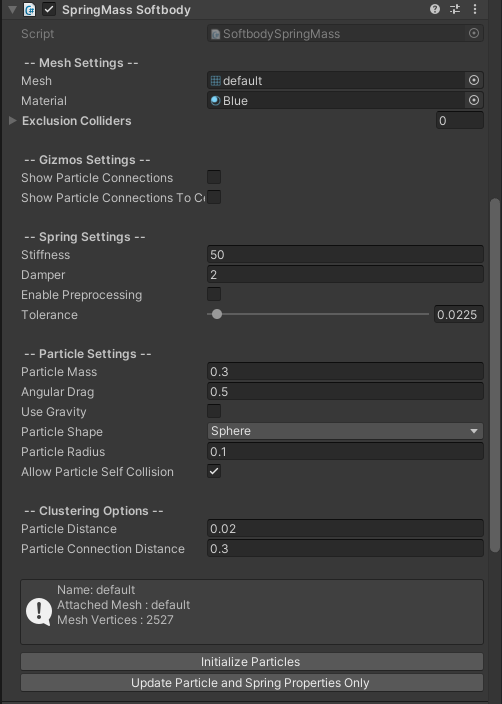
Upon choosing the appropriate values we must click the Initialize Particles Button. When the Simulation is Initialized successfully a message will appear in the Console Log.
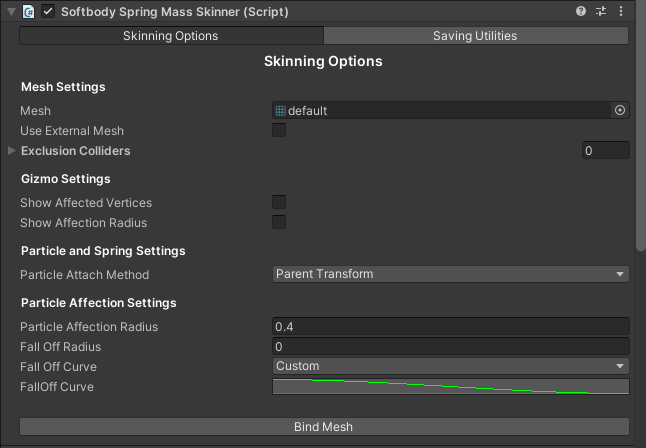
Initializing the Skinner
In this step we will set the way each particle affects the nearest vertices.
Here are the settings I chose for the Bunny.
Note
For best results:
Set the Particle Affection Radius to a larger value than the Particle Connection Distance you have set in the simulation Initialization.
- For the FallOff Curve choose custom and select a sigmoid function similar to the picture below:
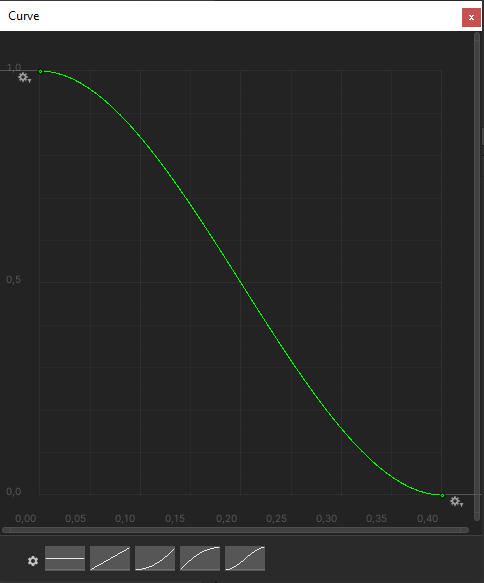
When you have chosen the desired values you can click on Bind Skin button to Initialize the Skinner. This will replace the default Mesh Renderer (or Skinned Mesh Renderer) with a new Skinned Mesh Renderer in which the particles will affect the Mesh movement.
Now you can test the Softbody in game mode (try touching it, moving it, e.t.c.) and change any values if necessary, before continuing to the next step.
Saving the Softbody
In this step we will save the mesh and our object as a prefab for later or multiple uses.
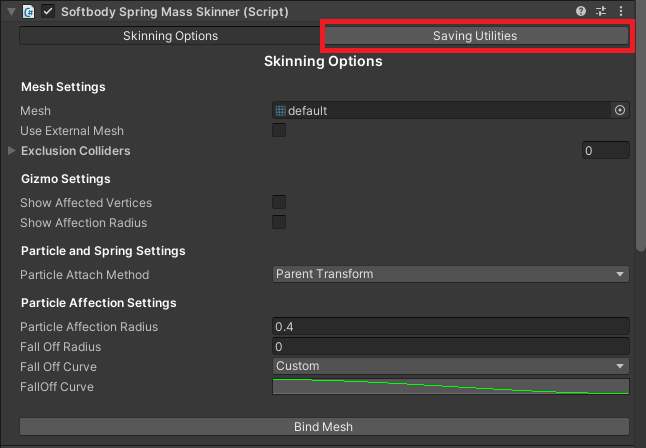
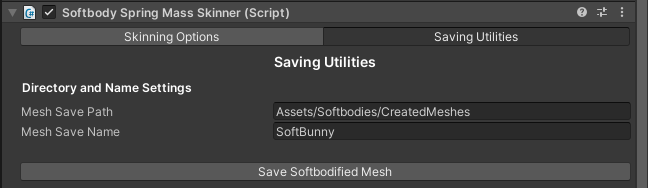
First we navigate to the Saving Utilities tab found on the Skinner Component.
We then fill the path of the folder as well as the name with which we want to save our mesh. I have chosen the following path and names for the Bunny:
Warning
Keep in mind that the Path of the folder you entered must exist in order for the mesh to be saved successfully.
We can now simply drag and drop our object in the Assets and create a Prefab. We can later use the prefab as many times as we want without needing Initialization again.
Limiting particles with bounds colliders
There are cases where we don’t want the whole mesh to behave like a soft body. We may want the Bunny’s body to be solid but the ears to be soft. In these cases we will use Exclusion Colliders.
We create a collider/colliders and place it/them in a way that only the ears are outside. (In cases that this is not possible with one collider we can create multiple such colliders)
We can now attach this/these colliders in our Simulation and Skinner Components in the Field Exclusion Colliders.
The rest of the initialization is the same as in the previous example. First Initialize the Simulation Component and then the Skinner.
Run-time and interaction
When you press start the particles generated will begin the simulation. Those particles will interact with other physical colliders within the scene to simulate soft skin movements. You can further attach the MAGESInteractableItem script in your Softbody and the User will be able to pick it up as if it was a normal Rigidbody. Even more Settings can be changed from the Rigidbody attached in the Softbody Object. ( By default gravity will be enabled with the rigidbody)
General discussion
Soft bodies introduce a powerful way to simulate deformable surfaces. The MAGES SDK offers a plug-and-play solution for particle-based soft bodies in Unity, ideal for medical or any other use.
It is important to consider that real-time soft body simulation uses advanced physics algorithms to calculate the object’s movement per vertex, paying respect to its original shape. This is why you need to be extra careful with the script configuration as well as the model’s topology for best results.