Load a MAGES SDK sample
With MAGES Unreal, 3 sample applications are provided:
Sample App (Cultural Heritage)
Medical Sample App
CVRSB (see here before running)
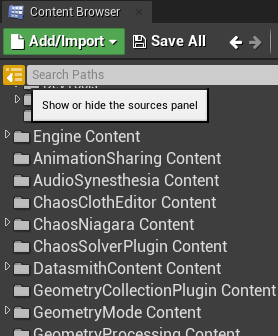
After the editor has launched, in the Content Browser, check if the Engine and the Plugins folders are visible, in the Content Browser. “Show Engine Content”, and “Show Plugin Content” must both be ticked:
Additionally, make sure that the sidebar is enabled, by clicking on the following button on the left side of the Content Browser:
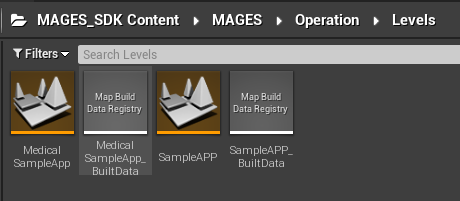
From the Content Browser navigate to MAGES_SDK Content > MAGES > Operation > Levels and open the SampleApp level.
Warning
In case you want to try a level other than SampleAPP, follow the instructions mentioned here
Collision Settings
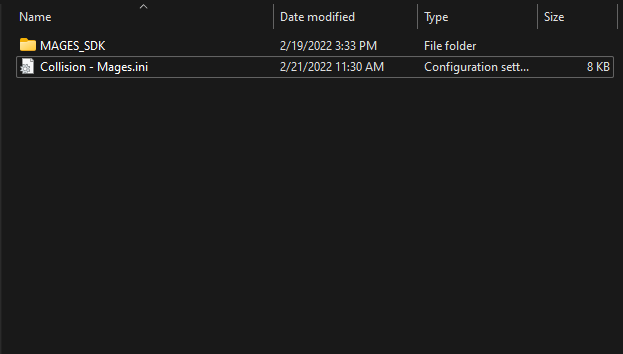
MAGES_SDK uses custom collision presets for some important parts of interaction and hit-testing. You can either choose to import the ini file from here, or set-up collision by yourself.
Import INI File
You can find this configuration file inside the plugin download folder:
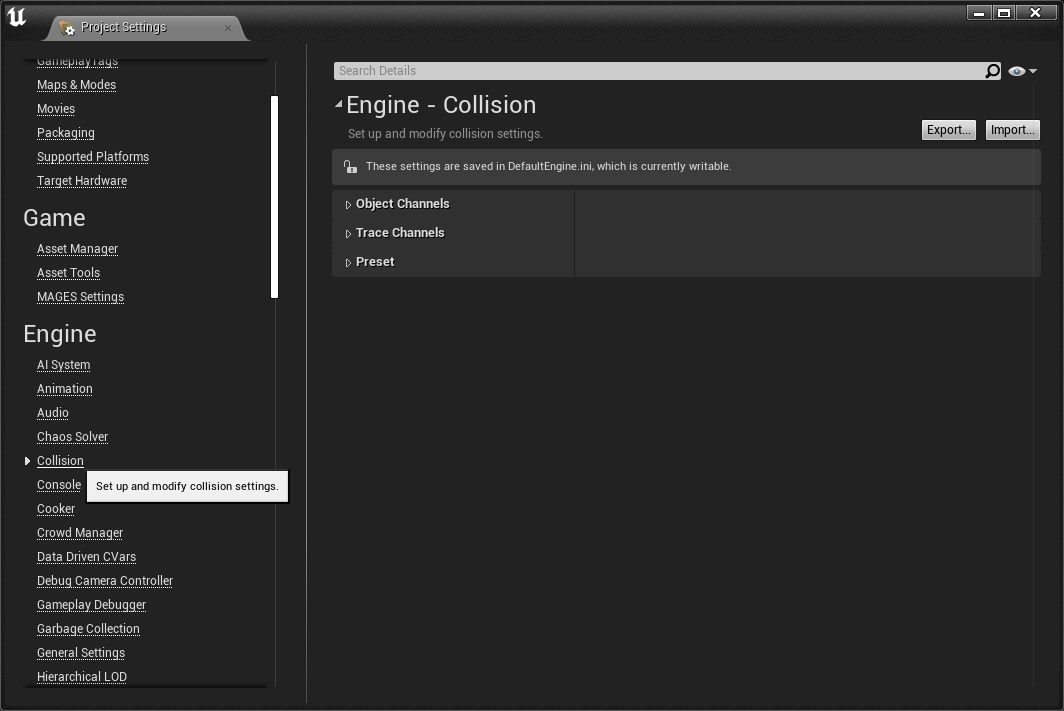
Open the Project Settings, and look for the Collision section in the sidebar:
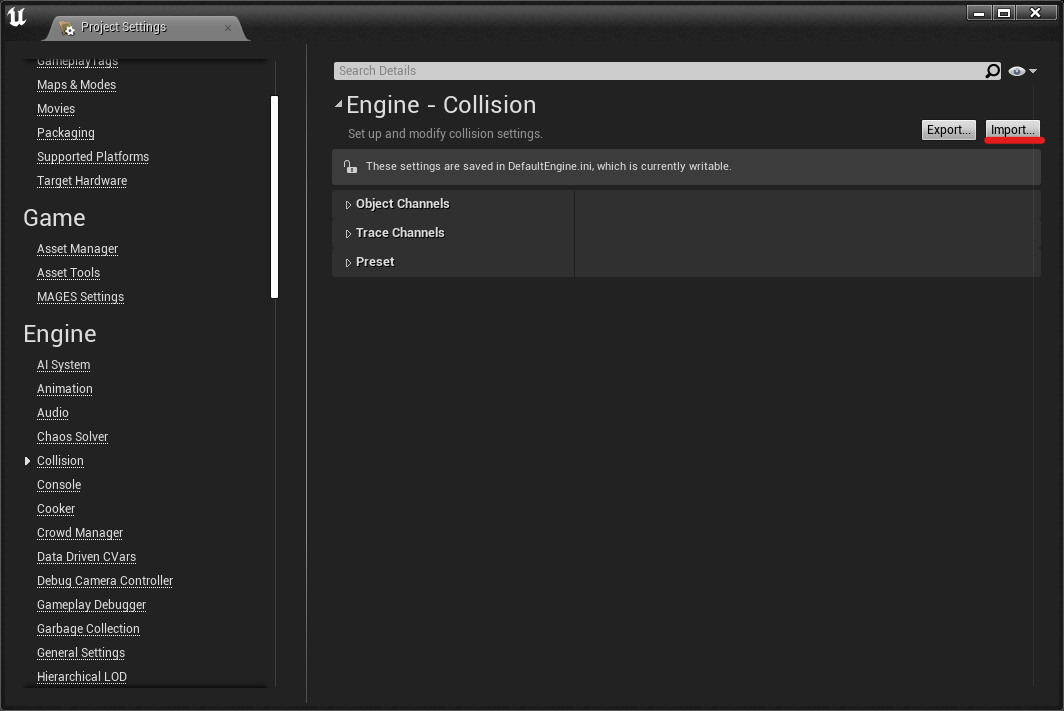
On the top right of the window, click Import and select the file you have just downloaded.
If you want to manually install these collision settings you can find the detailed steps here.
Note
You will have to restart the editor for the collision settings to be applied.
Default Project Settings
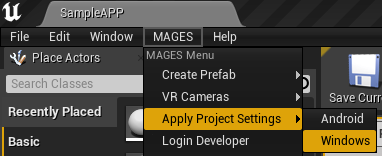
From the MAGES Menu, click on “Apply Project Settings > Windows”. This will configure the project with some good default settings regarding rendering and performance. You will have to restart the editor in order for these changes to be applied.
Place a VR Pawn into the level
Note
You do not have to follow this section if you have chosen to play the sample application in Non-VR mode.
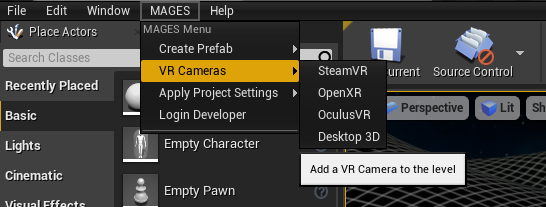
MAGES_SDK supports OpenXR, SteamVR and OculusVR. Based on what VR SDK you selected in the previous step, you must setup the corresponding VR pawn (camera) in the current level.
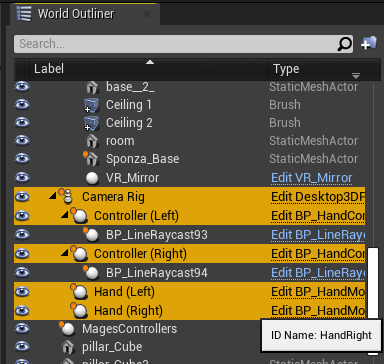
By default, the map will include the Desktop 3D pawn, which allows for testing and running operations without using a VR HMD. To setup a VR enabled pawn, delete the camera rig, controllers and hands that are already present in the level:
Note
To delete any number of actors, select them in the world outliner or in the level, and press “Delete” on your keyboard
Following, we need to select the appropriate camera from the dropdown MAGES menu. Go to “MAGES > VR Cameras” and select the pawn that matches your VR SDK plugin.
SDK License
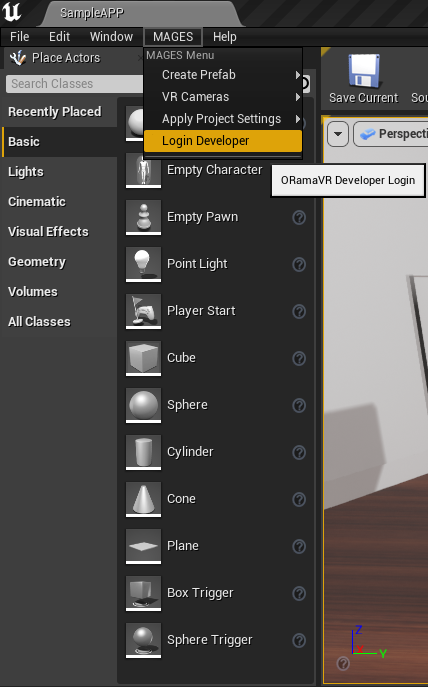
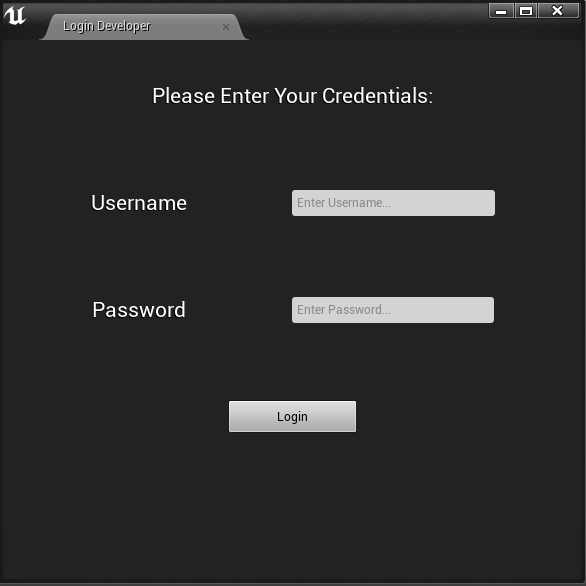
Before you hit the Play button, make sure you have checked out a valid SDK license. To do so, open the MAGES tab on the top menu and click on the Login Developer option.
Controls & Movement
In the table below you can find the controls for every supported platform and headset for playing in Non-VR mode:
Move Around |
Look Around |
Open Radial Menu |
|---|---|---|
WASD Keys |
Mouse |
Spacebar |
Note
You read more about this mode here
In the table below you can find the controls for every supported platform and headset for playing in VR.
Oculus Touch |
VIVE |
Windows Mixed Reality |
|
|---|---|---|---|
Grabbing Objects |
Grip Button |
Grip Button |
Grip Button |
UI Selection & Usage of Tools |
Trigger Button |
Trigger Button |
Trigger Button |
Toggle Movement |
Press Left Touch Thumbstick |
Press Left Touch Thumbstick |
Press Left Touch Thumbstick |
Positional/Rotational Movement |
Left/Right Touch Thumbstick |
Left/Right Trackpad |
Left/Right Thumbstick |
Toggle In-game Options |
Press Right Touch Thumbstick |
Press Right Touch Thumbstick |
Press Right Touch Thumbstick |
Next/Previous Step |
X,Z Keyboard Button |
X,Z Keyboard Button |
X,Z Keyboard Button |
How to Play in Desktop 3D
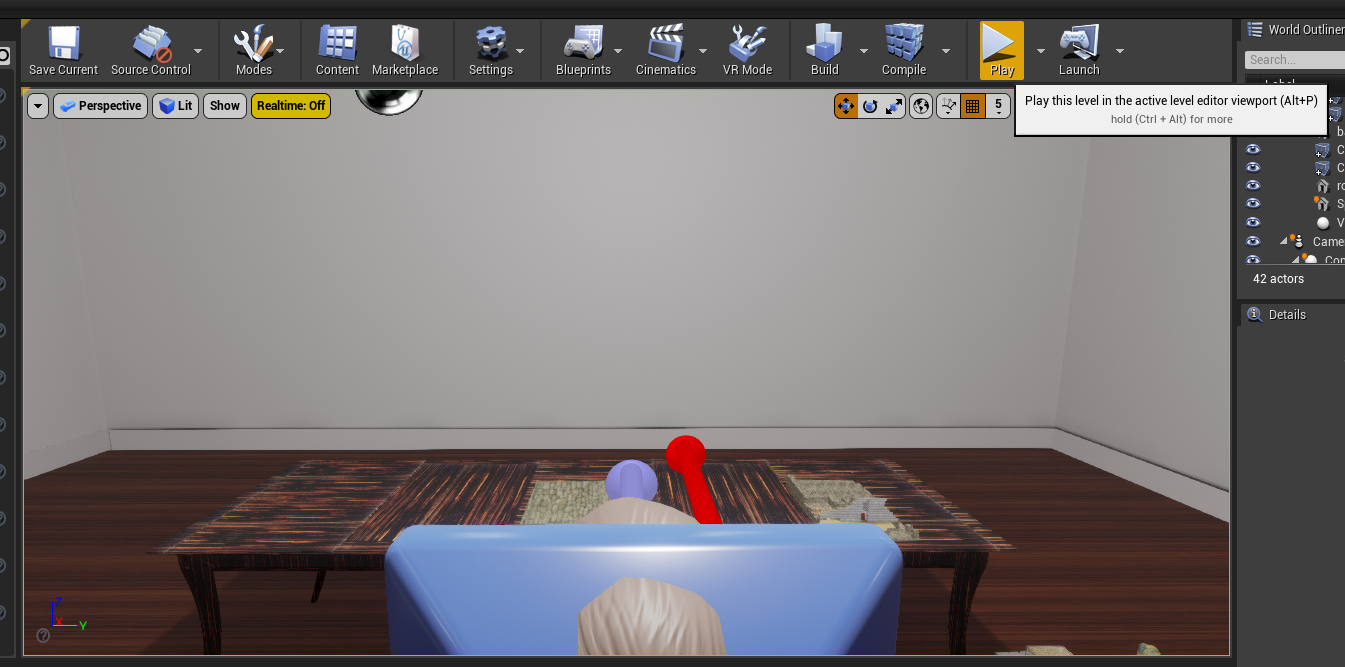
If you want to try MAGES in Desktop 3D mode simply click the play button.
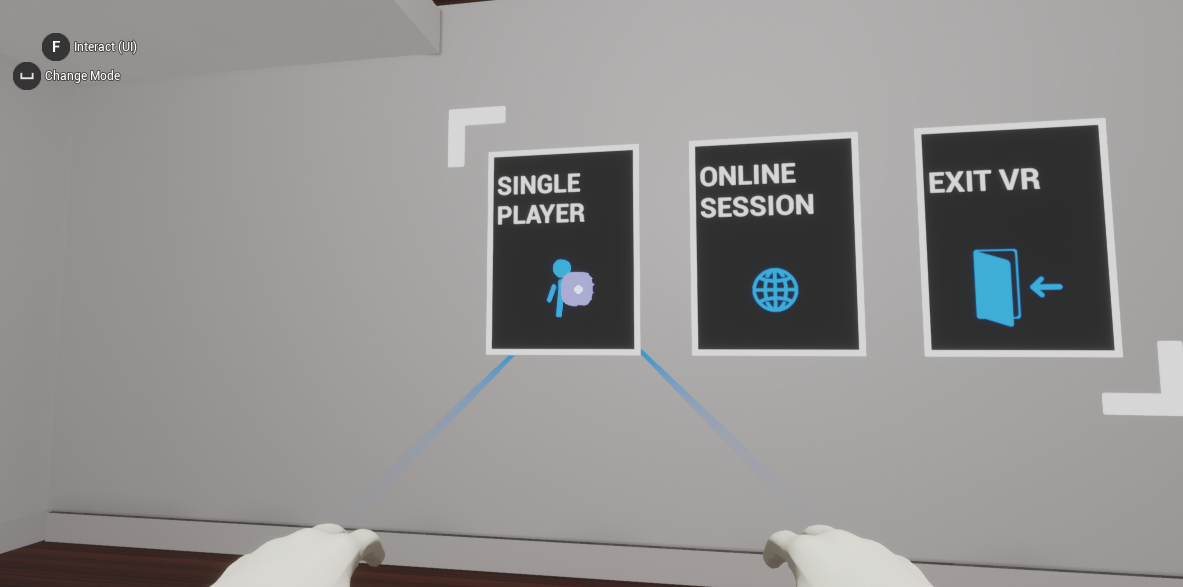
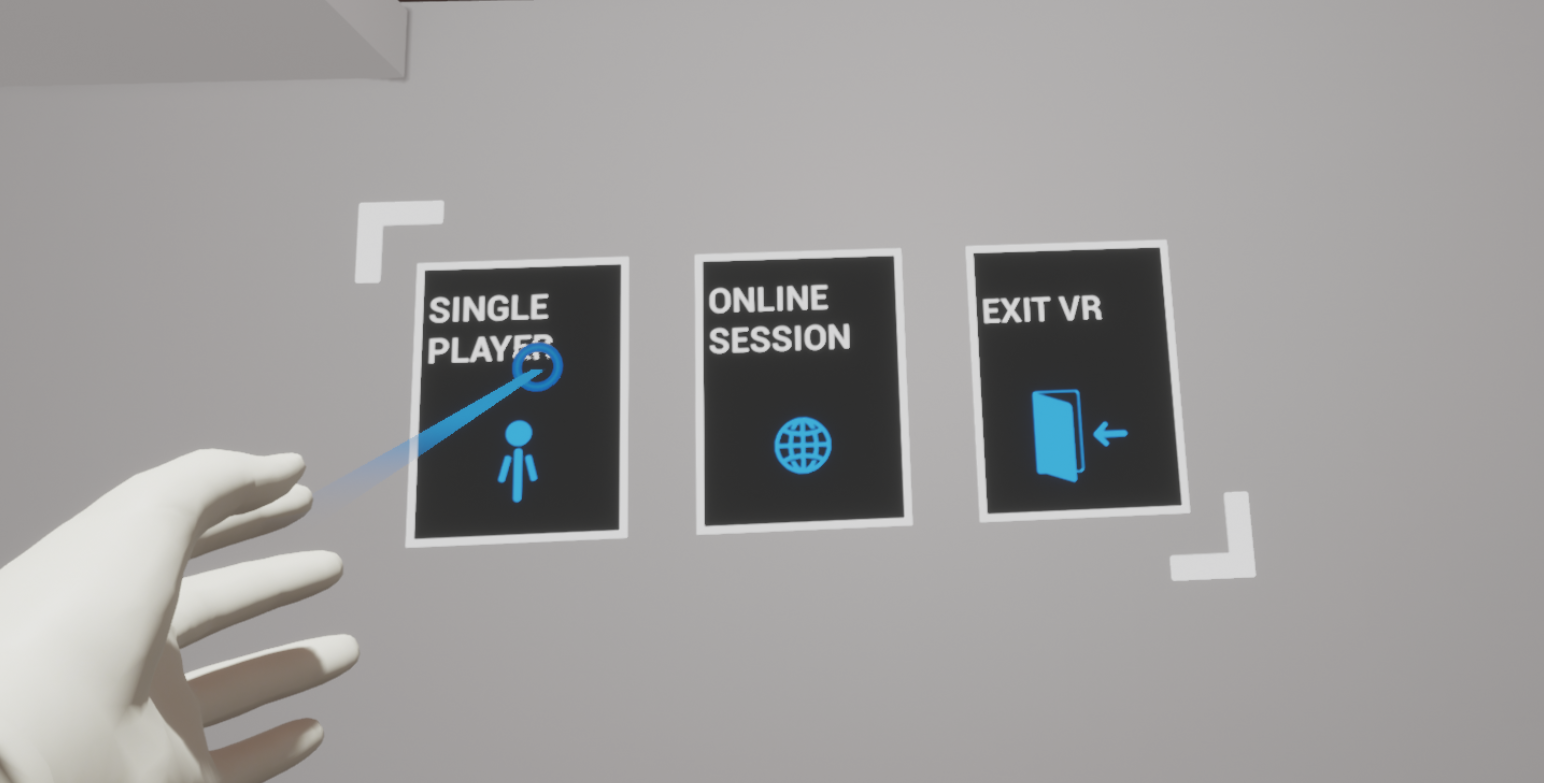
A menu will appear, offering multiple buttons as options.
Each of the user’s virtual hands, has a ray which starts at the top of the hand. These exist only for debugging purposes. In the middle of the screen you will notice a small circle. Point this circle to the Single Player button and click the left mouse button.
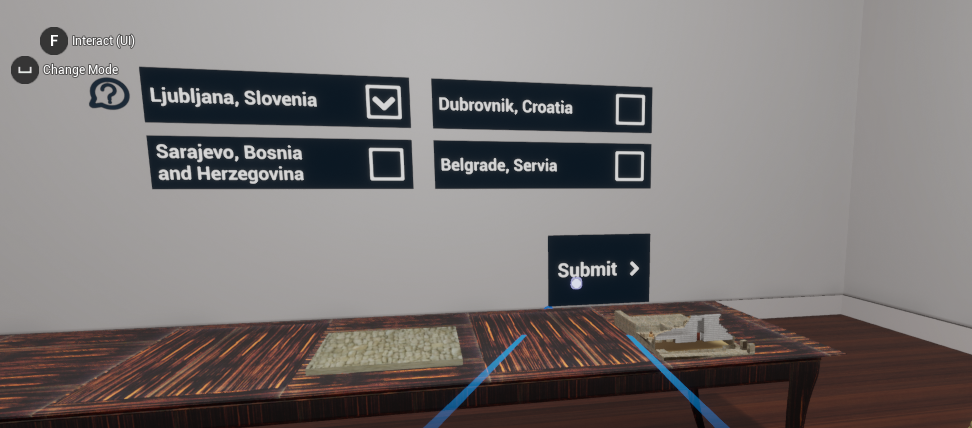
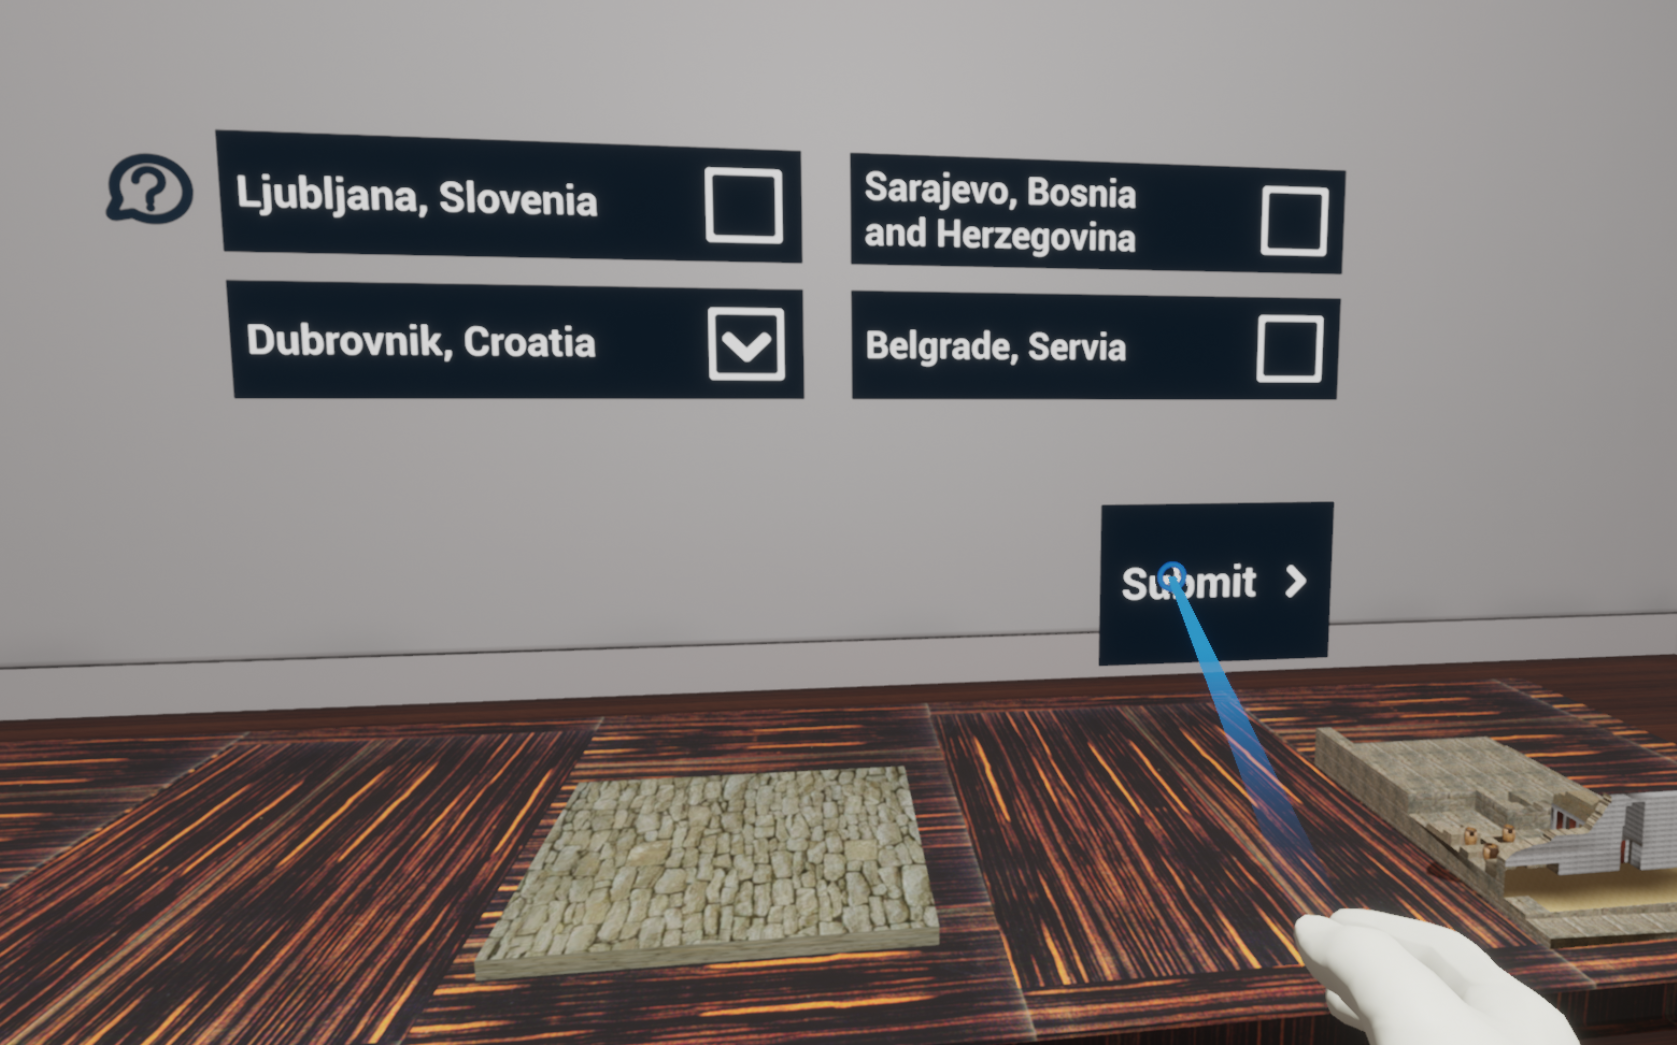
The first action of this simulation is a question action. Use the ray to point to an answer and the left mouse button to select it. Then point to the Submit button, using the ray and again use the left mouse button to select it and move to the next action.
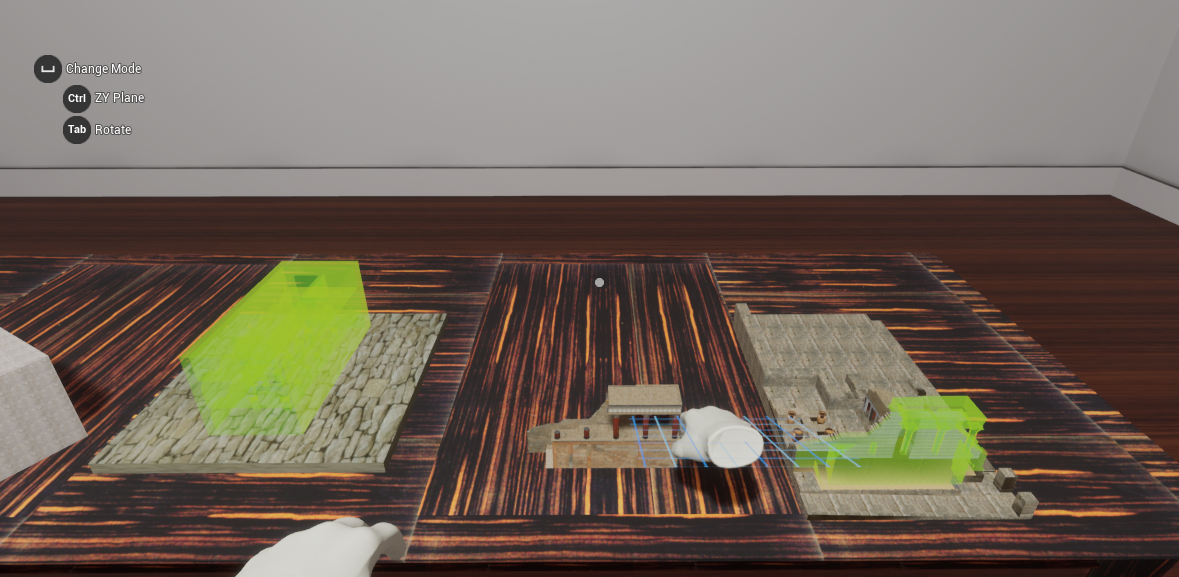
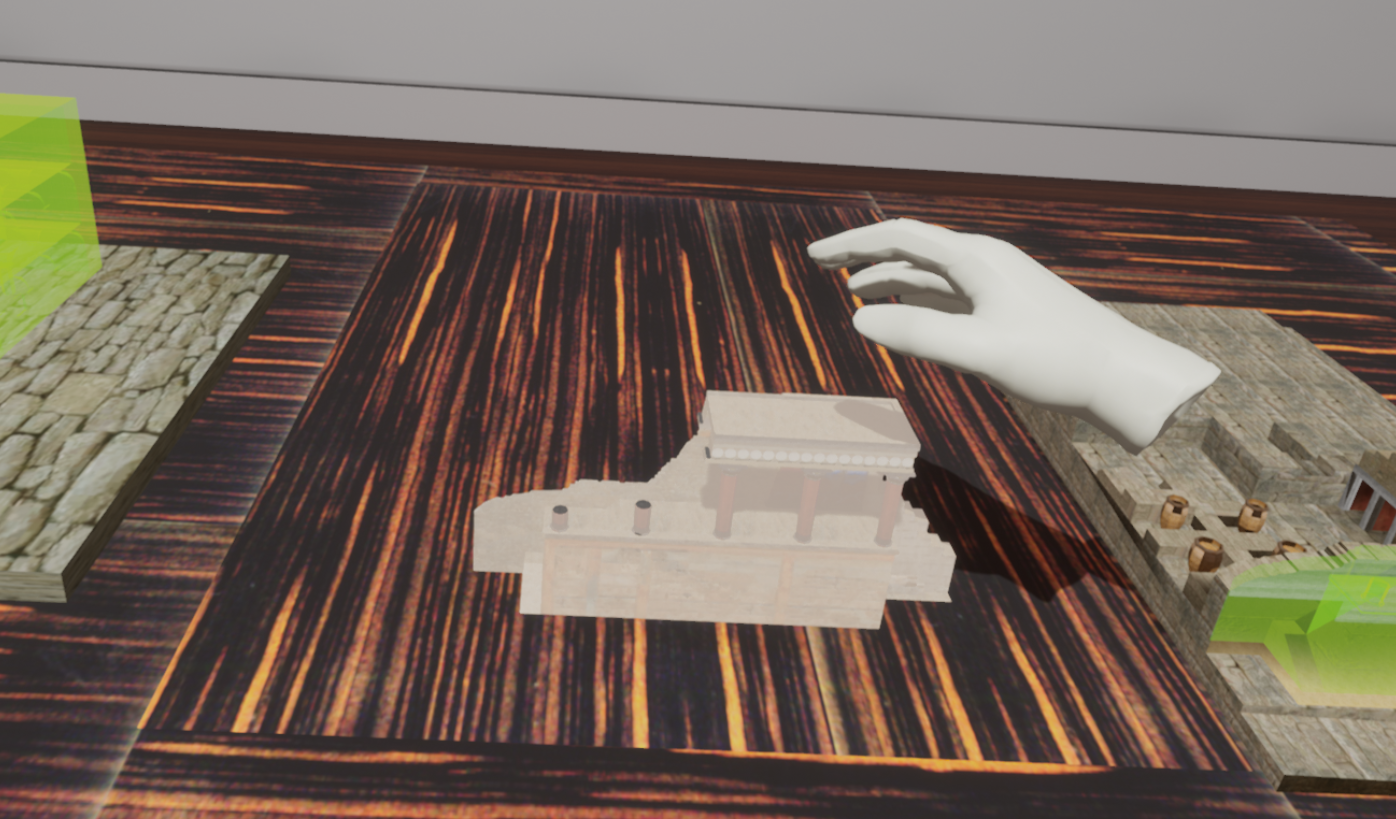
In the next action, you have to use one of the virtual hands to pick up the glowing knossos front part (by moving the hand close to the front part) and move it to the position that the green hologram represents to complete this insert action.
Once correctly inserted, the next action will start.
Note
Green holograms represent the position of the corresponding item or the way that this item should be used on a surface.
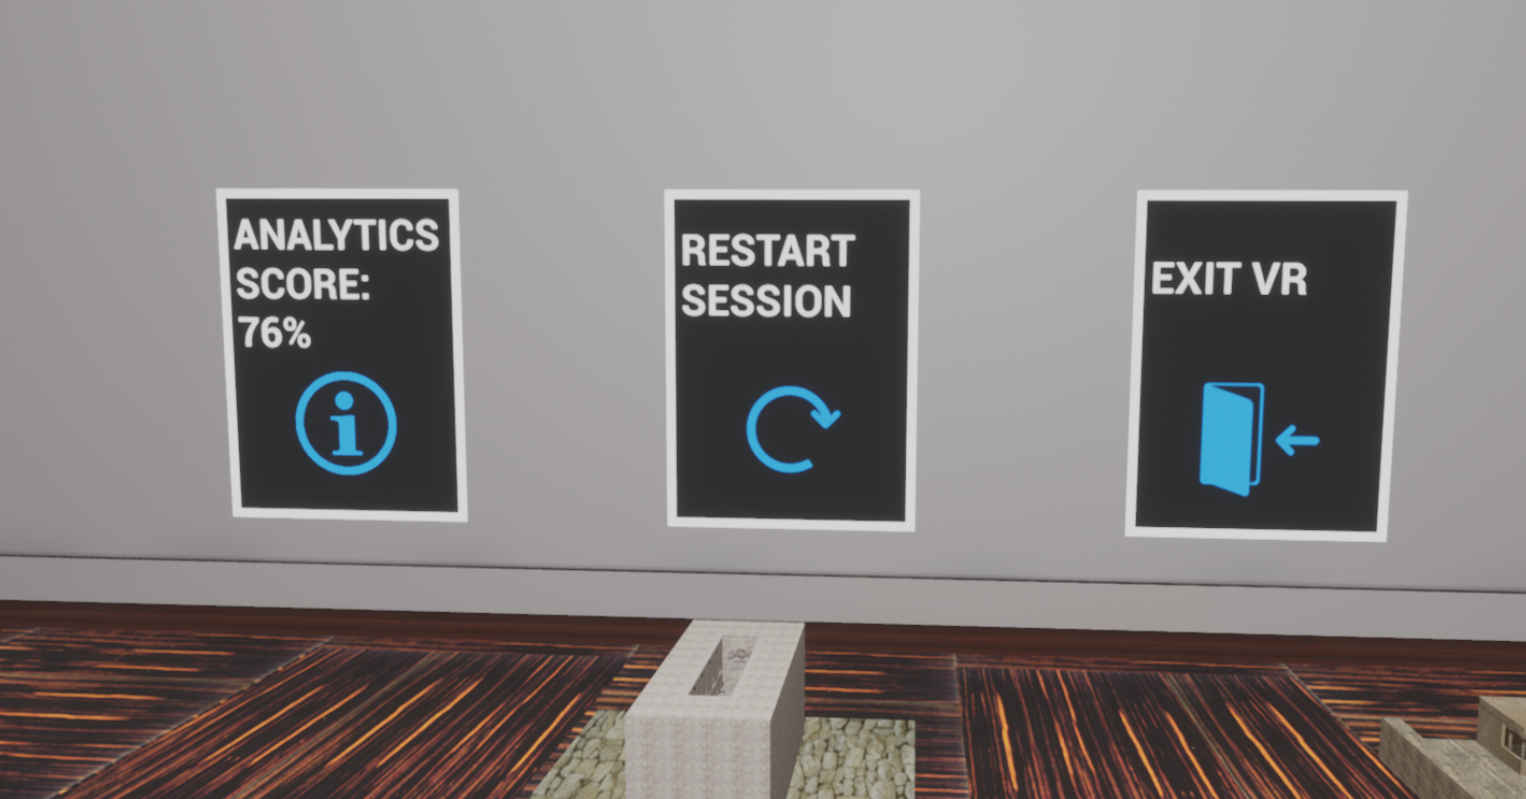
When the simulation is completed, the operation exit user interface will spawn. It will look like the one in the image below.
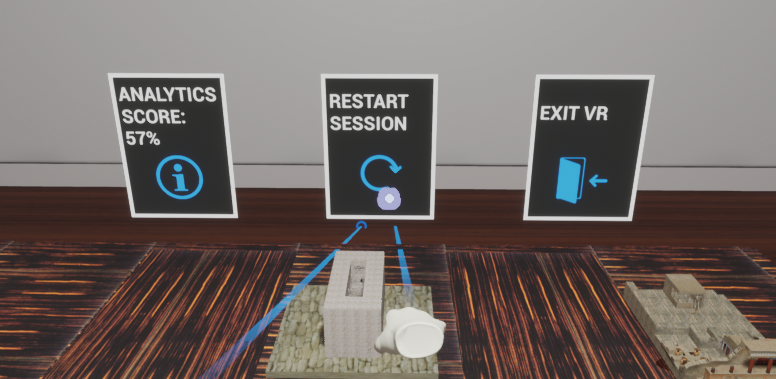
You can view your analytics by clicking the analytics button.
The restart button starts the simulation from the beginning.
You can exit the simulation by clicking the exit button.
How to Play in VR
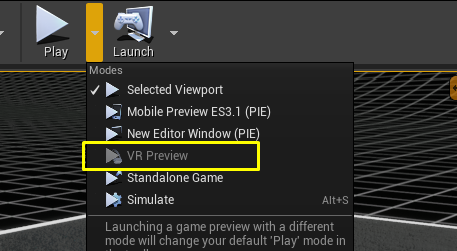
You are now ready to play the operation. If you followed the steps to play in VR click the arrow next to the play button and select Play in VR Preview
Once you start, a menu will appear, offering multiple buttons as options.
Each of the user’s virtual hands, has a ray which starts at the top of the hand. Point this ray to the Single Player button and click the trigger button on the pointing controller.
The first action of the SampleApp simulation is a question action. Use the ray to point to an answer and click the trigger button to select it. Then point to the Submit button, using the ray and again use the left mouse button to select it and move to the next action.
In the next action, you have to grab glowing knossos front part (by moving the hand close to the front part) and pressing the trigger button and place it to the position that the green hologram indicates to complete this insert action.
Once correctly inserted, the next action will start.
Note
Green holograms represent the position of the corresponding item or the way that this item should be used on a surface.
When the simulation is completed, the operation exit user interface will spawn. It will look like the one in the image below.
You can view your analytics by clicking the analytics button.
The restart button starts the simulation from the beginning.
You can exit the simulation by clicking the exit button.