Scenegraph Generation
In this tutorial we will generate a scenegraph blueprint from scratch. We strongly suggest that you take a glance at Unreal’s documentation on how to use the Blueprint Graph Editor
Creating a New Scenegraph
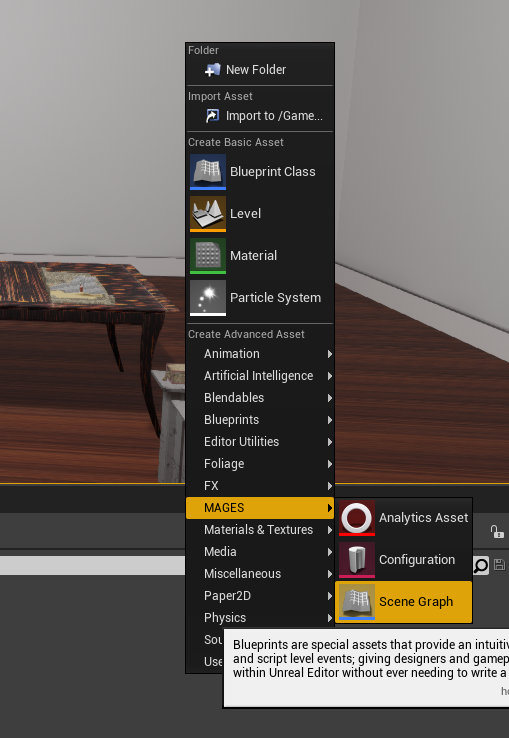
Right-click on an empty space in the Content Browser and choose MAGES > Scene Graph:
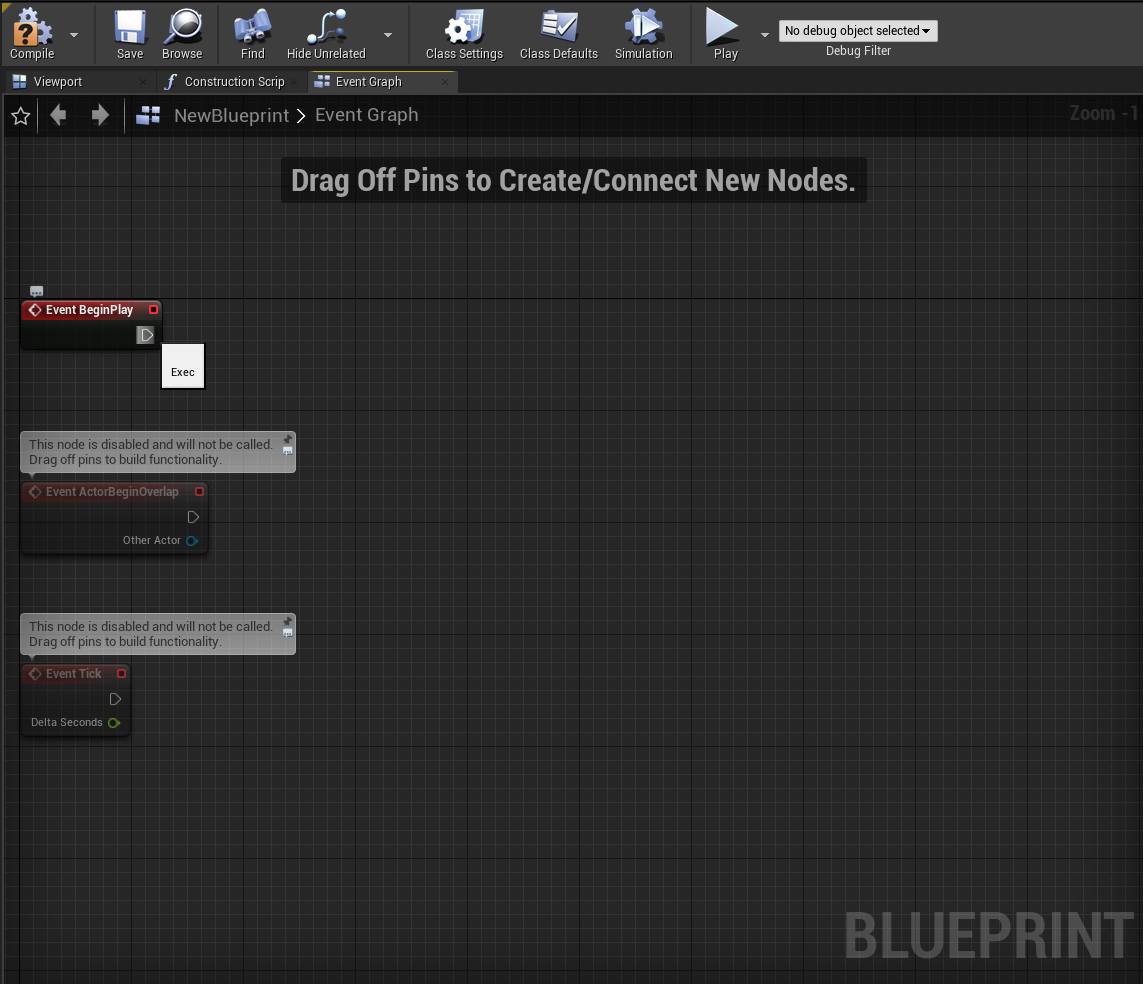
And open the Blueprint.
Creating a New Action
In the Event Graph tab, drag a connection link from the node “Event Begin Play”:
Once you let go of the left mouse button, a popu menu will appear listing all of the available nodes that you can use. Search for the node named “Action”:
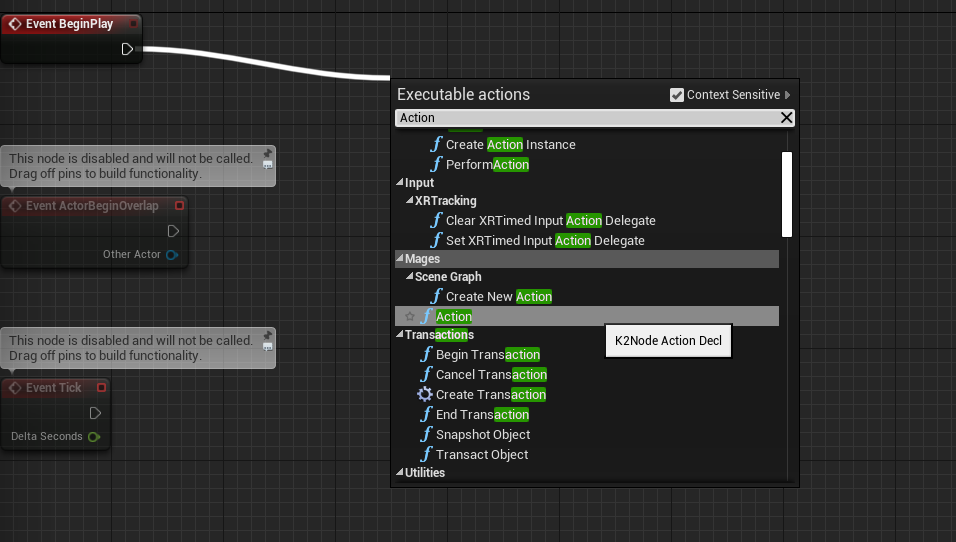
And press enter, or click on the search result. You should see a node like this:
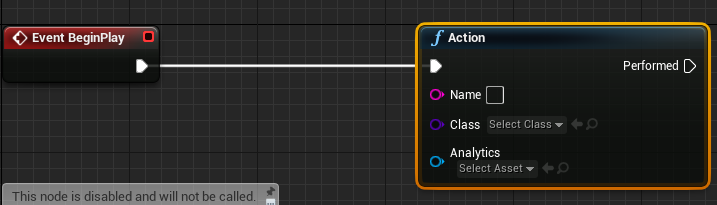
This node is the basis of any MAGES Scene Graph. It’s parameters are described in order:
Parameter |
Description |
|---|---|
Name |
The identifier of the action. Do not leave this empty! |
Class |
The class of the action blueprint to use for this action |
Analytics |
The analytics asset to use for this action |
Let’s set these values to something meaningful:
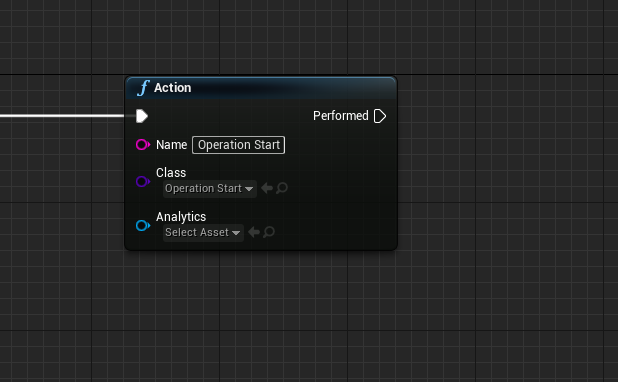
Usually, the first action of any Scene Graph is called: “Operation Start”. The Analytics parameter can be left empty.
Adding More Actions
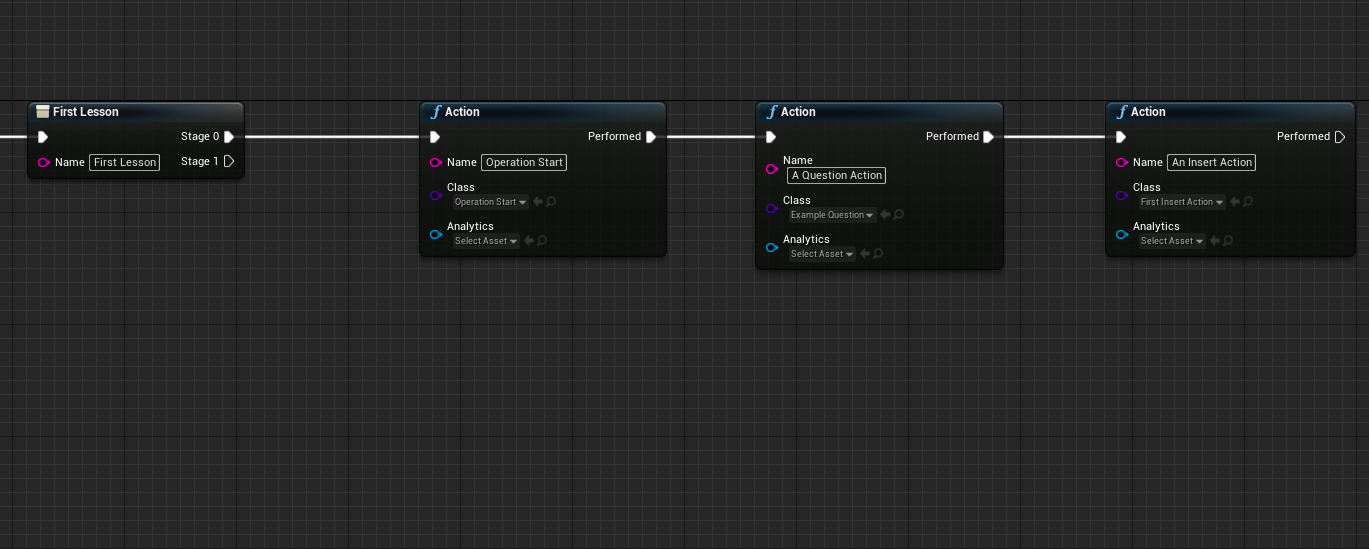
In the same manner you can create more actions to be executed after this one, by dragging connection links from the Performed pin of the last node:
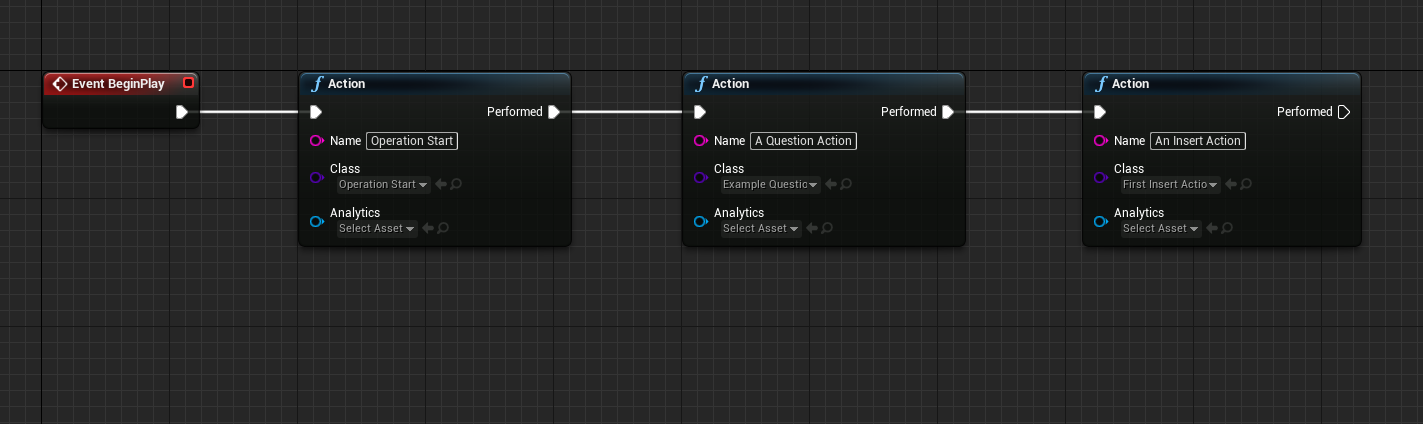
The order in which the action will be executed will be:
Operation Start
A Question Action
An Insert Action
But this is getting a bit unwieldy, imagine 10 or more actions linearly connected - with no structure; you can do it, but it would be very difficult to manage visually!
This is where the “Lesson” node comes in. From the node “Event Begin Play”, drag a new connection link, and search for “Lesson”:
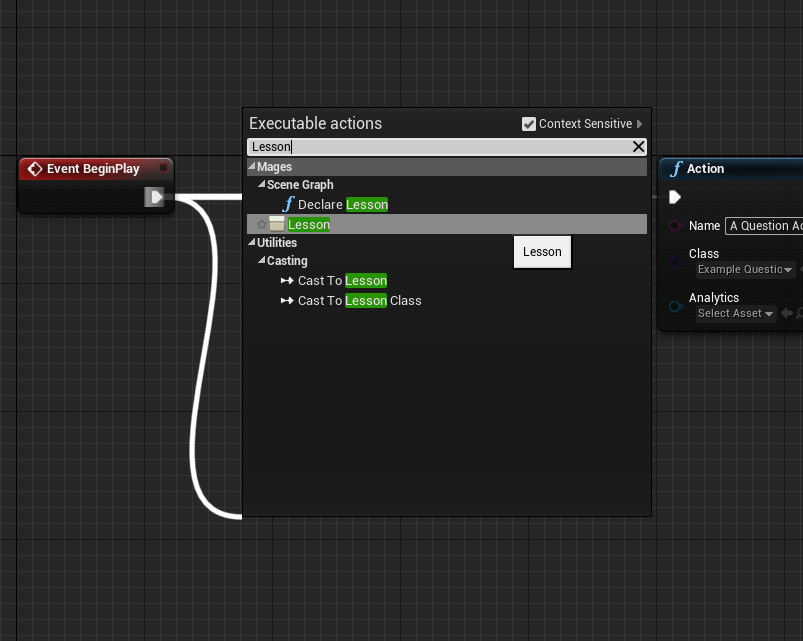
You should see something like the following:
Now click inside the text entry box of the lesson node, and name it something meaningful, like “First Lesson”:
You can now see that the node’s title has also changed to reflect the name you’ve entered. Let’s discuss about what the Lesson node does:
The Lesson Node
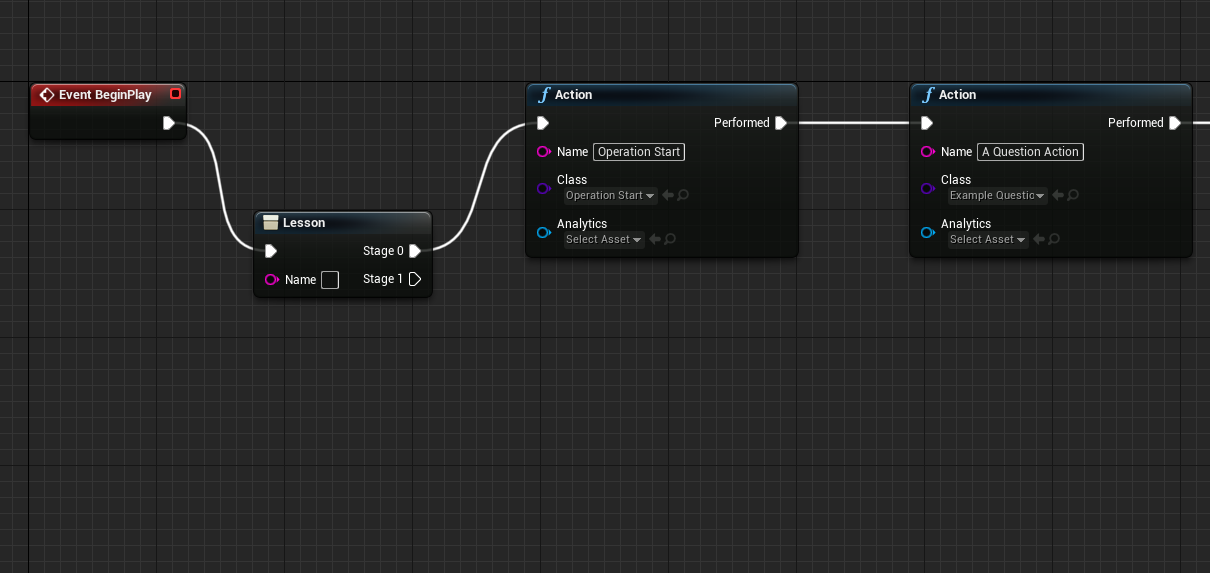
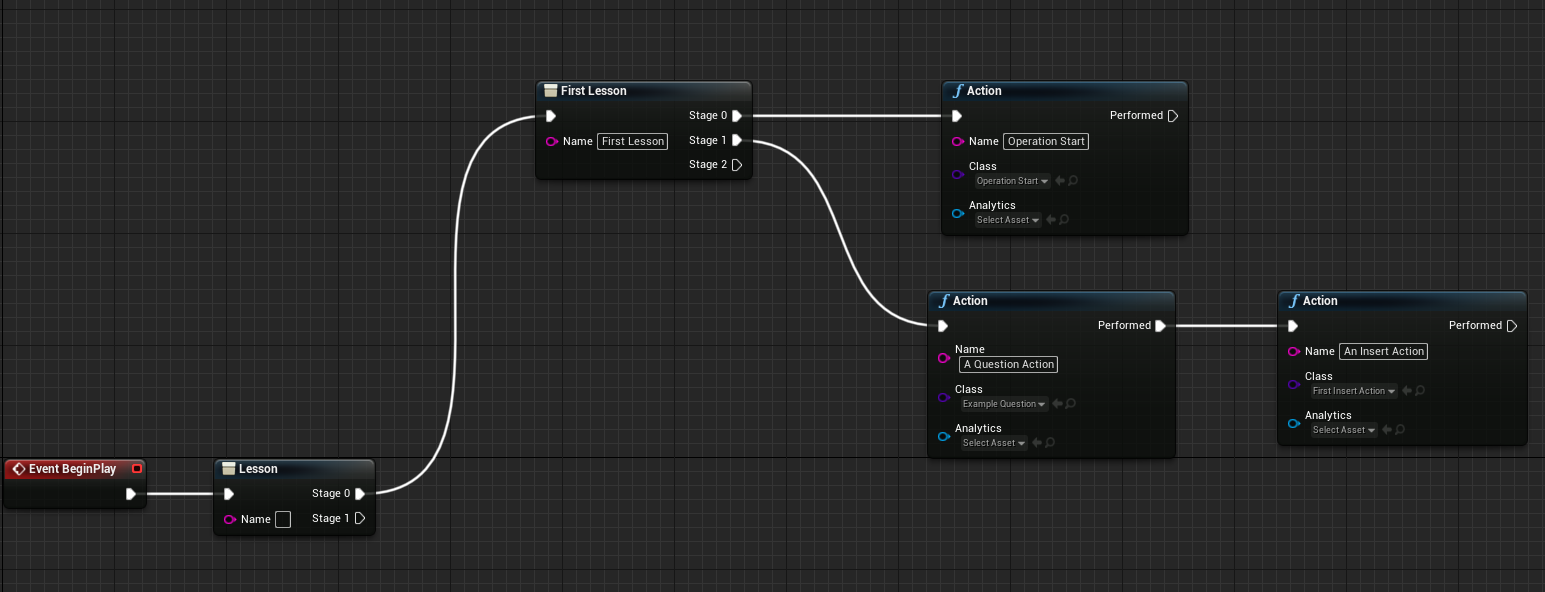
The Lesson node is a node that executes all of the actions conencted to it in order. For example, if we disconnect the Action named “A Question Action” (by grabbing the input pin with Left Ctrl held down), and reconnect it to the “Stage 1” link of the lesson node:

We can see that:
Stage 0 has only once action
Stage 1 has two actions; one connected to the next
The Lesson node has now created another Stage pin, named Stage 2
Now, this Blueprint is strating to look more like a tree, but really, nothing has changed; the actions will be executed in the same order as before:
Operation Start
A Question Action
An Insert Action
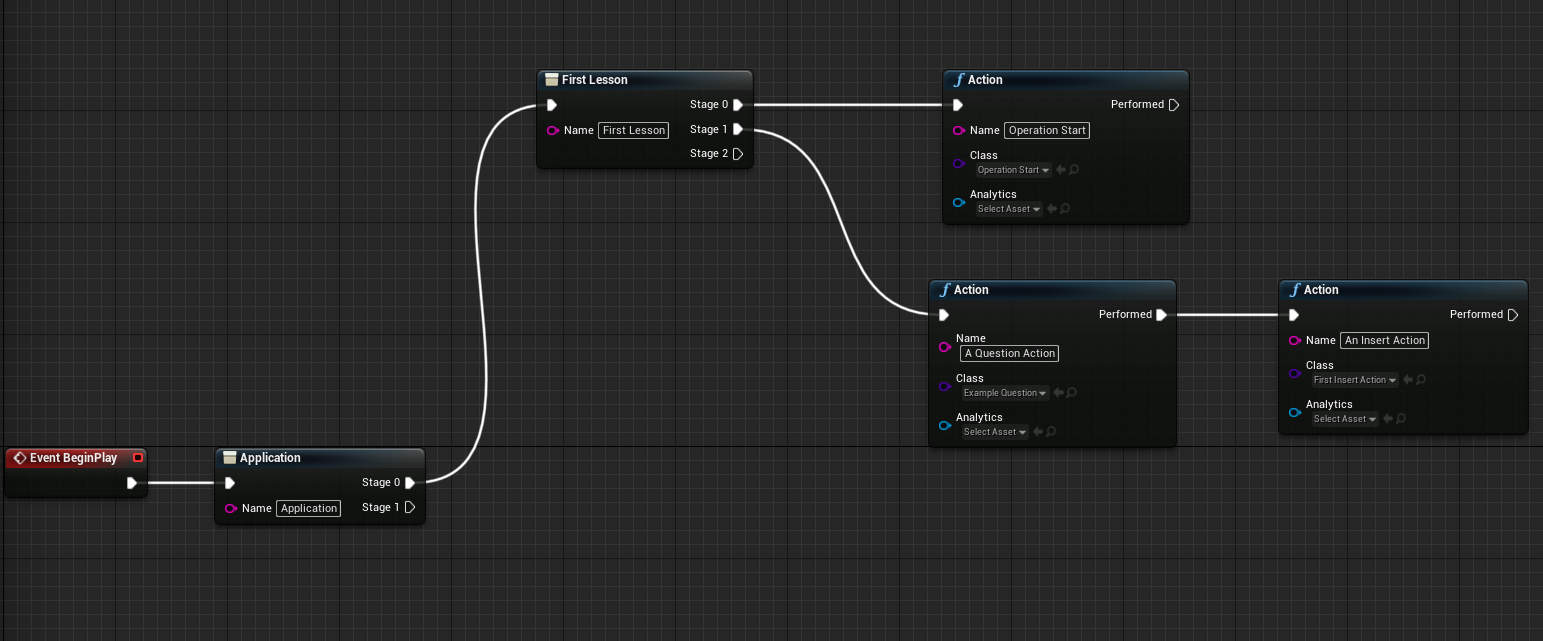
The Lesson node is only used for organizational purposes, so that we don’t end up with a huge linear graph of actions. In that vain, you can also add lesson nodes within other lesson nodes:
What’ve done now, is we created another lesson node, and relinked “First Lesson” to the first stage (“Stage 0”) of our new lesson node.
In all of our sample applications, you will see that the root lesson node (i.e. the node that is directly linked to the “Event Begin Play”) is called “Operation”, but this is really only our convention, so you can name it however you’d like, “Application”, for example:
The final step is to set this scene graph in the configuration asset:
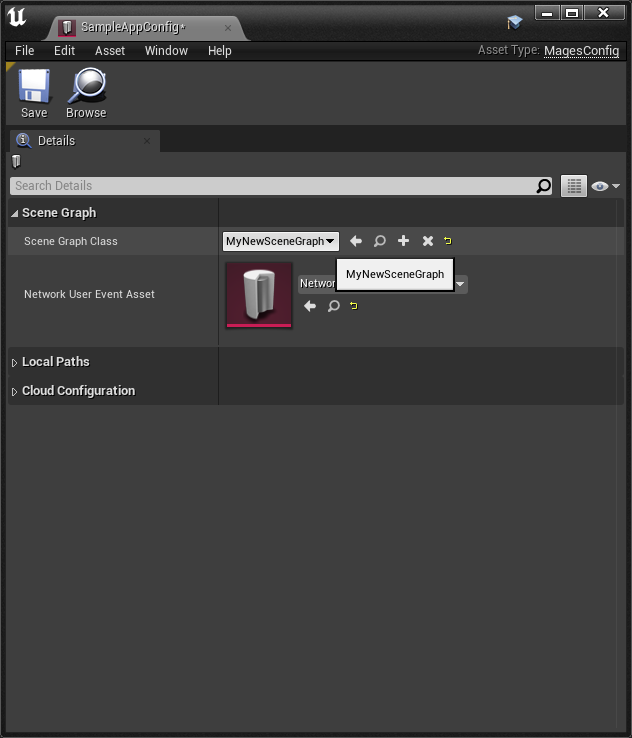
Setting the Scene Graph in the Configuration Asset
Navigate to the Config asset used in the “Scene Graph” actor and open the asset.
Set the Scene Graph Class property to the Scene Graph you created
That’s it! Press play inside the editor and the first action (as well as the your Scene Graph) will be visible inside the World Outliner:
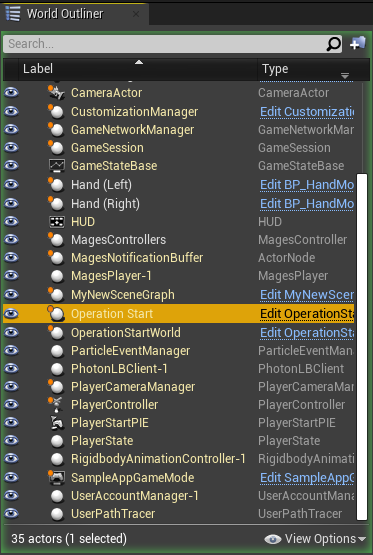
You can read more about the Scene Graph here. It covers the basics of the Scene Graph as well as more advanced topics like logic and alternative paths.