Action Analytics
In this tutorial we will demonstrate the different types of our analytics errors/warnings and how to properly configure them for your Actions.
In MAGES SDK we provide a number of standard scoring factors to enhance your Analytics.
Note
Scoring factors refer to specific actionable behaviours which are important to consider for each Action and they reflect the user scoring e.g. wrong collision, action time, max movement velocity etc.
How to add scoring factors to your Action
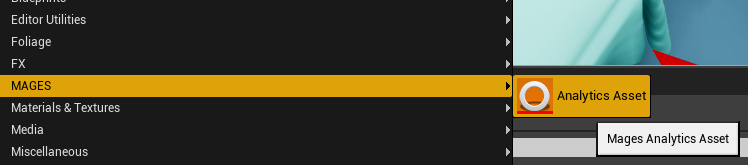
Right click on Unreal’s content browser, on the folder you want to save your analytics asset. From the MAGES submenu select Analytics Asset in order to create an analytics configuration.
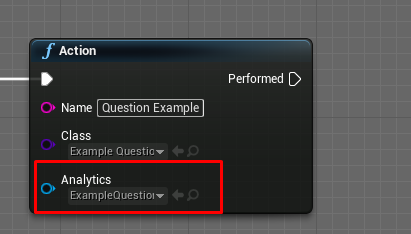
Each Action has each own Analytics configuration. In order to specify which action this asset is referring to, you need to reference it from respective action node in the Scenegraph Blueprint.
This window contains the scoring factors. To enable a new scoring factor click the corresponding checkbox. To save your changes click the Save button.
The Analytics Editor
This is an example of the analytics editor.

Note
The scoring system is calculated in 100. The maximum score of an Action is 100 and the minimum 0.
Multiplier: At the top of the window you can see a multiplier value. This can be used in case you want to multiply with a given number the score of the current Action, making it count as multiple actions.
Importance: This value identifies the weight of each scoring factor.
VeryLittle: 15%
Little: 30%
Neutral: 50%
Big: 80%
VeryBig: 100%
If our Action has only a Little scoring factor then its maximum score will be 30/100.
If we configure a Neutral and a VeryLittle scoring factor within the same Action, the maximum score of the Action will be 65/100.
Note
The score is capped at 100.
If our scoring factors overpass 100 e.g. three Neutral scoring factors it will be capped at 100, allowing the user to have 50 “bonus” points.
Error Type: We support three different types of errors with different popup UIs for each case:
Warning
Error
CriticalError
Error Message: In the error message input field you can type the message that will be shown to the user, in case the user performs this error.
Show UI: Boolean value to toggle the error message. In case of false, the error will be logged but not shown to the user.
Example of an error message:

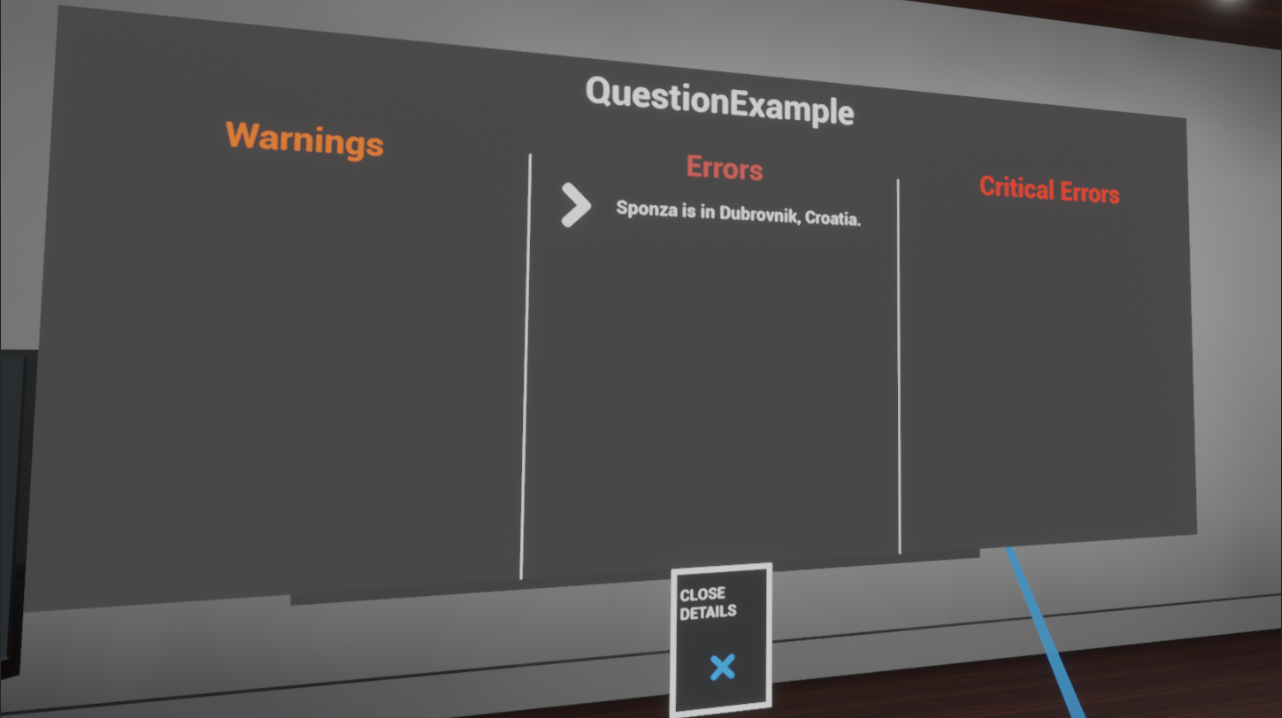
Be aware that errors, warnings and critical errors are also presented in the analytics overview at the end of the operation:
Below we present the standard scoring factors with examples on how to use them to rate your users.
Scoring factors:
Time
Usage: Give points according to the completion time. To achieve the highest score user needs to complete the Action in less seconds than the Completion Time. Passing this time-limit results in points loss (10 points per second).
Example: In this example we give user 25 seconds to complete the Action,
Here is the analytics editor for this Action:
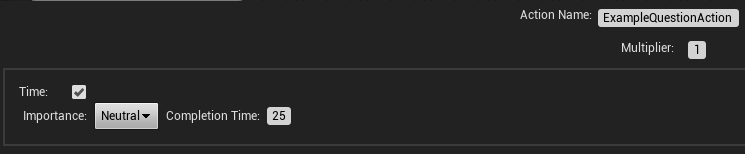
We set the Completion Time to 25 seconds.
We also set the Importance to Neutral meaning that this scoring factor will give 50/100 points to the user. If this is the only scoring factor the user can achieve a highest score of 50/100.
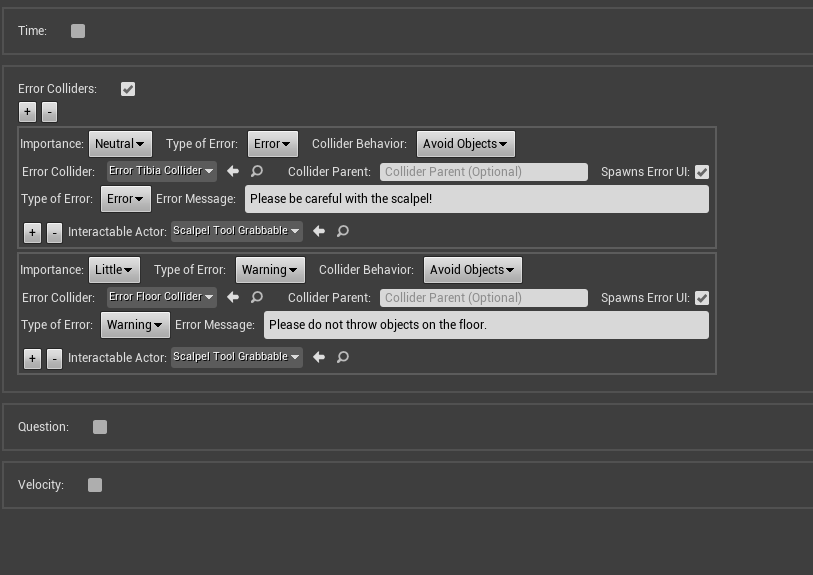
Error Colliders
This scoring factor refers to the usage of overlapping colliders in order to define invalid events the user can perform in the simulation. The collider behaviour field defines when an error should be triggered. The available options are: 1. Avoid Objects 2. Stay in Collider 3. Must hit objects
Avoid Objects
Behaviour Usage: Track if an object is in contact with a collider.
Example: In this example we set two error colliders to track if the user drops a tool on the floor, and the other one if the scalpel cuts the skin in wrong position.
Below you can see the analytics editor for this Action:
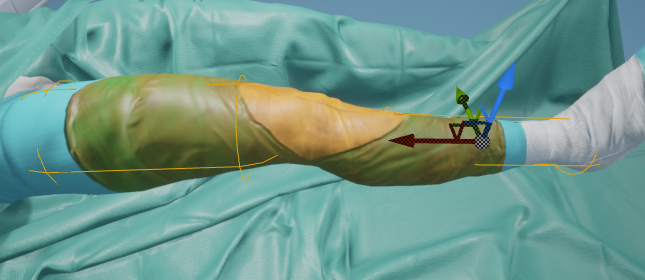
The first error collider actor contains two error trigger components: one for the femur and one for the tibia. You can see them below:
We select the actor containing the two error triggers in the ErrorColliderActor input field. This reference will spawn the actor
We select the ScalpelToolGrabbable from the corresponding Interactable Actors fields
We set the Error Type as an Error
We type the Error Message to our custom message
ShowUI is enabled in order to show the error UI to the user
2. The second error collider actor is an error trigger for the floor.
We select the actor containing the floor error trigger in the ErrorColliderActor input field. This reference will spawn the actor
We set the Error Type as a Warning
We type in the Error Message our custom message
ShowUI is enabled
We add all the available items from the corresponding Interactable Actors fields
Stay Error Colliders
Usage: Track if an object is not in contact with a collider.
Example: In this example we set an error collider to track if the user holds the sponza while cleaning it with the cloth. If the hand exits the trigger box, the user will lose points.
You can see the error box here on sponza:
In addition a non-visible static mesh actor is spawned as child of the user hands. This is actor is spawned through the action blueprint and is not automatically spawned from the analytics editor.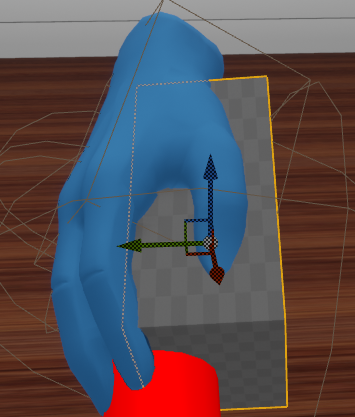
Here is the analytics editor for this action:
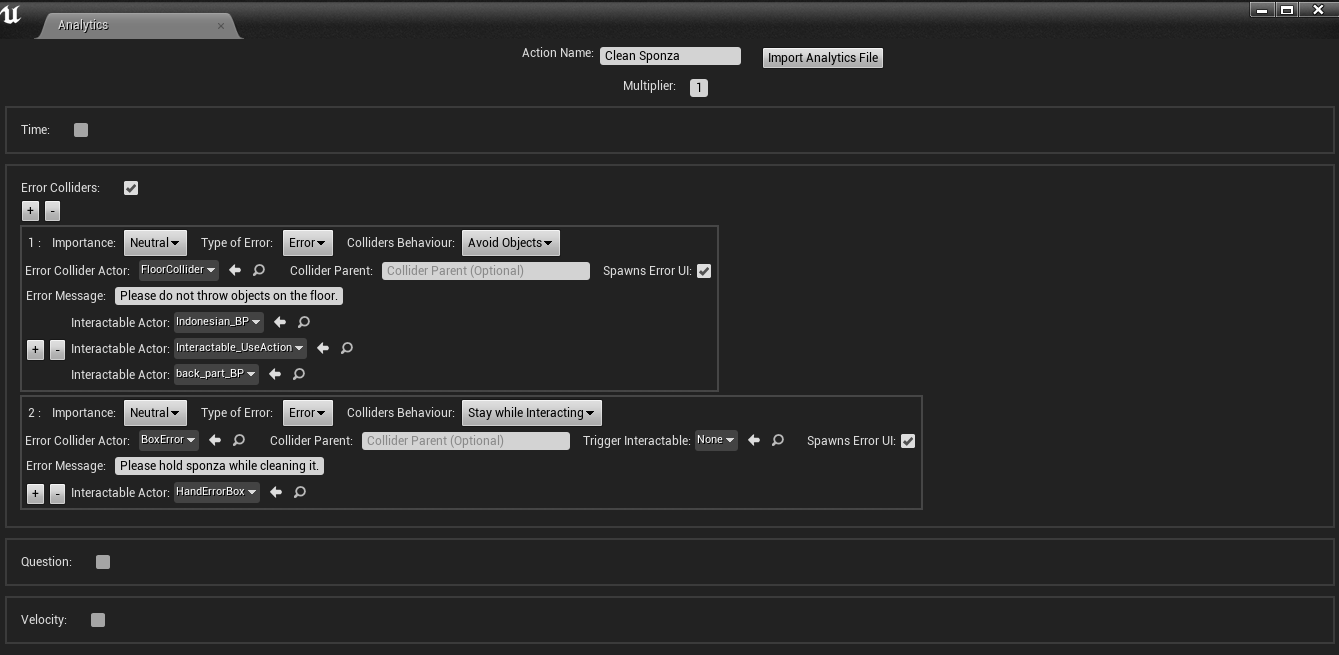
We select the colliders behaviour to Stay while Interacting
We select the collider representing the area that the user needs to place his hand on top of sponza into Error Collider Actor. This will spawn the safe area collider.
We select the Cloth (Interactable_UseAction) from the Trigger Interactable dropdown
We set the Error Type as an Error
We set the Importance to Neutral. This factor is valued 50/100.
We type in the Error Message our custom message
ShowUI is enabled
Hit Perform Colliders
Note
Currently under development.
Question
Usage: Lose points when answering a question incorrectly.
Example: In this example we will set the scoring factor to affect 100% of the score. Meaning that if the user answers wrong it will get zero points.
Below you can see the analytics editor for this Action:
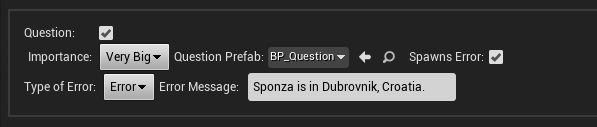
We set the Importance to VeryBig, in this way a correct answer will give 100 points and a wrong answer 0.
We select the question blueprint in the corresponding object field next to the Importance.
Since, Spawns Error is enabled we need to set the type of error and the message that will be shown to the user.
We type the Error Message.
We set the Type of Error to Error from the dropdown field.
Velocity
Usage: Track the velocity of an object. Lose points when the velocity overpasses the configured value.
Example: In this example we will set a velocity scoring factor on a fragile object since we don’t want the user to grab it and move it very fast.
Below you can see the analytics editor for this Action:

We set the Importance to Big, in this way the Action will get a perfect score of 80/100
We add the Velocity Interactable Actor that will be observed in the Velocity Actor field
We set the Velocity Threshold value to 60. If the velocity of the object overpasses 60 the user will lose 80 points.
A general guideline for velocity thresholds is:
30: The user must move his hand extremely slowly. 40: The user must move his hand slower than the average speed. 60: The user must not do rapid movements with his hand while holding this object.
Since, Spawns Error is enabled we need to set the type of error and the message that will be shown to the user.
We type the Error Message.
We set the Type of Error to Error from the dropdown field.
Custom Scoring Factor
Usage: Configure your own custom scoring factors if you need something special, not provided out-of-the-box.
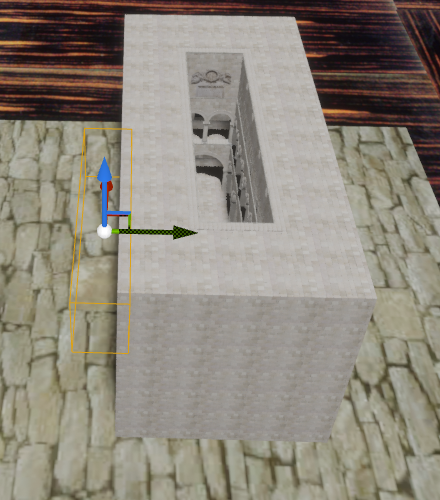
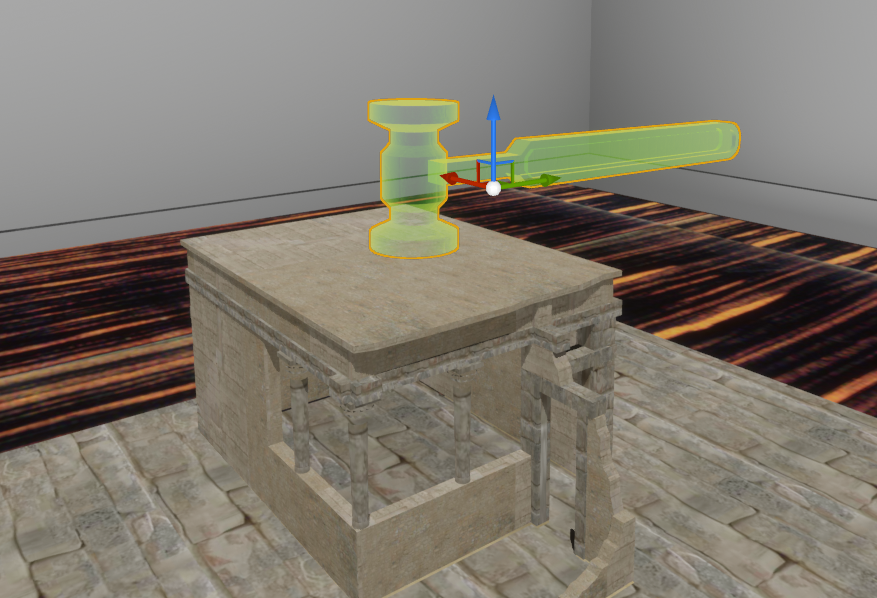
Example: In this example, we set a custom scoring factor to measure the velocity on impact when hammering the knossos building. User needs to take the mallet and hit the Knossos building three times. However, Knossos is fragile so we set a maximum velocity to track the hits.
Here is the knossos building with the mallet hologram:
Note
For custom scoring factors we don’t need the analytic editor. We will implement the behaviour using Blueprints
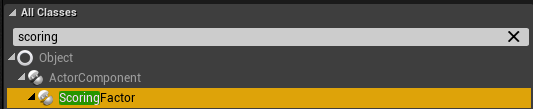
First we create a new blueprint class that inherits from ScoringFactor
The ForceScoringFactor blueprint implements our example custom scoring factor.
The ScoringFactor class contains virtual functions and events for you to override in your custom scoring factors.
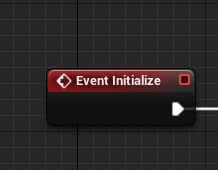
The Initialize event is called to setup your custom scoring factor. Everything you need to spawn or configure you should implement it in this function.
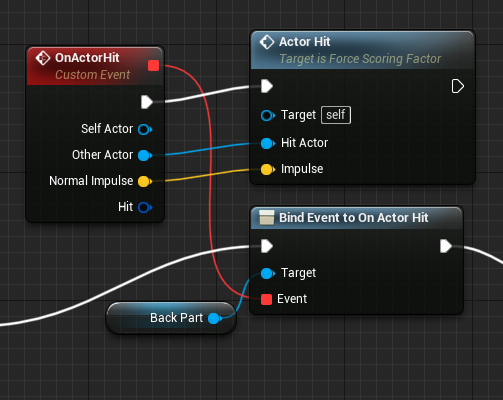
In this case we add an event on the Actor Hit listener of the back part actor. On each hit the Actor Hit function is called which determines if the applied force results in an error. In the same way you can implement your own logic to gather information about the user’s performance.
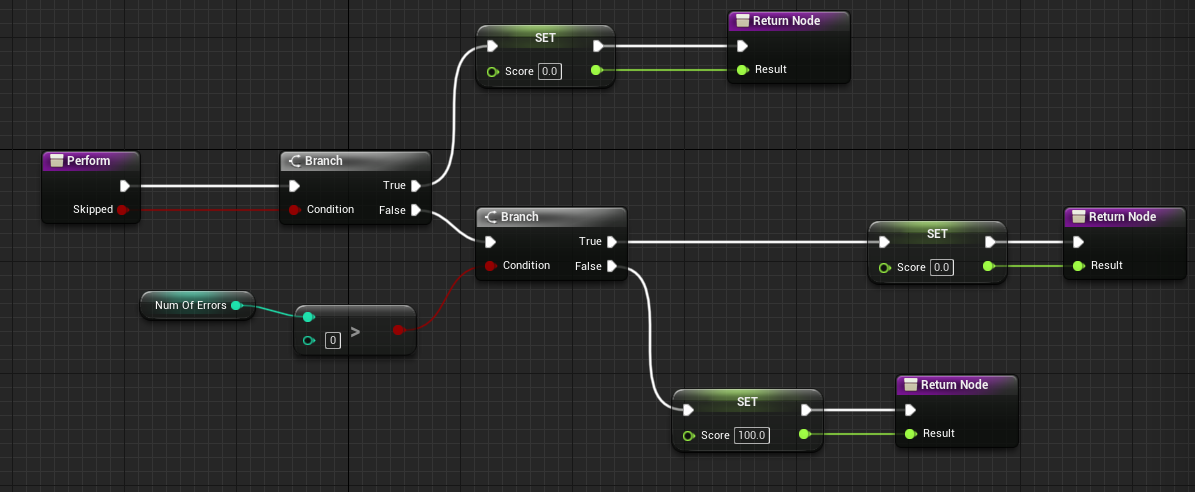
The Perform function of the custom scoring factor needs to be overridden. It is called along with the Action’s Perform(). The purpose of this method is to calculate and return the score of the user. In this example, it calculates the score with data retrieved from the Actor Hit Function.
Make sure the score in the range [0,100]
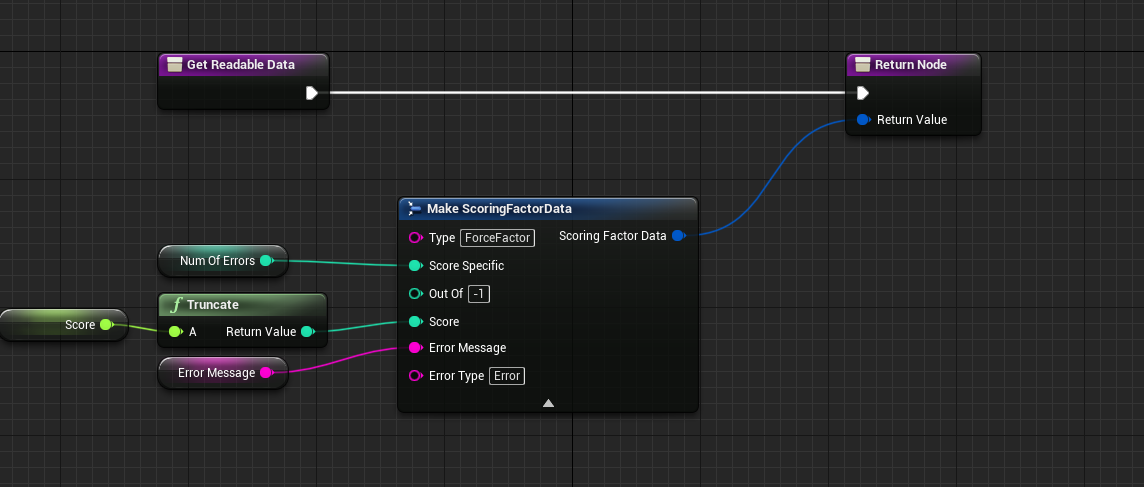
GetReadableData manages the data from the custom scoring factor that will be saved at the end of the Action in human-readable form.
A new ScoringFactorData struct needs to be created, which contains:
Score: The user’s score
Out Of: In case the scoring factor contains a number of possible values (e.g maximum velocity, maximum time etc) this variable reflects this amount
Type: The scoring factor’s description name
Score Specific: The specific metric of this scoring factor. E.g. In time it is the seconds the user needed to complete the action.
Error Message: The error message to spawn when triggering this error
Error Type: The type of error (warning, normal, critical error)
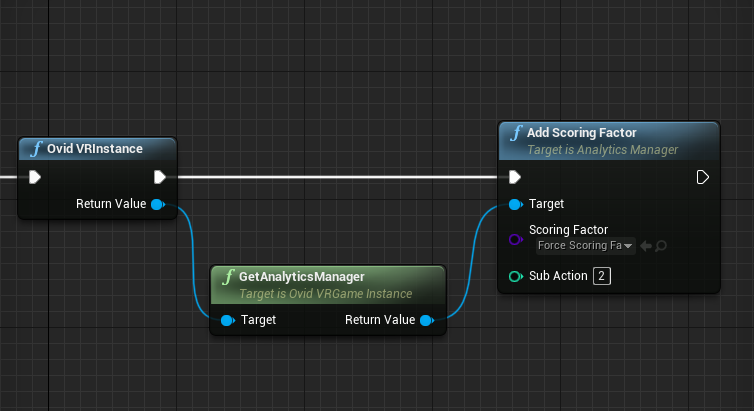
The final step is to link this scoring factor with our Actions script.
Below you can see the Blueprints that are responsible for adding a custom scoring factor in the current Action.
Warning
The Add Custom Scoring Factor Blueprint connects our custom scoring factor with this Action and the Analytics Manager.
It needs to be called in the Initialization State of the current Action.
The Sub Action argument is used in Combined Actions to specify the sub-action which will be added.
In all other type of actions this field should be 0.
This is the proper way to configure a custom scoring factor.