Import a MAGES™ SDK Sample
Importing a Sample
Samples are short, completed applications made with Unity and MAGES™ SDK. Their purpose is to demonstrate MAGES™ SDK capabilities, as well as provide the users with examples, so they can start their own projects easily.
Currently, MAGES™ SDK supports the following Samples:
Sample Name
Details
Medical Simulation (TKA)
A simulation demonstrating some parts of the Total Knee Arthroplasty.
Cultural Heritage Simulation
A cultural simulation showcasing examples of the Knossos monument construction and Sponza restoration.
MAGES Deformations Showcase
Examples of different deformations of deformable meshes using MAGES™ SDK.
Empty MAGES™ Project
An empty scene, in which MAGES™ SDK is preinstalled. It is the perfect example to start a new MAGES™ project.
Note
As mentioned above, the Empty MAGES™ Project is the ideal scene to start a new project.
To import a MAGES™ SDK sample, Medical Simulation (TKA) in our case, kindly follow the steps below.
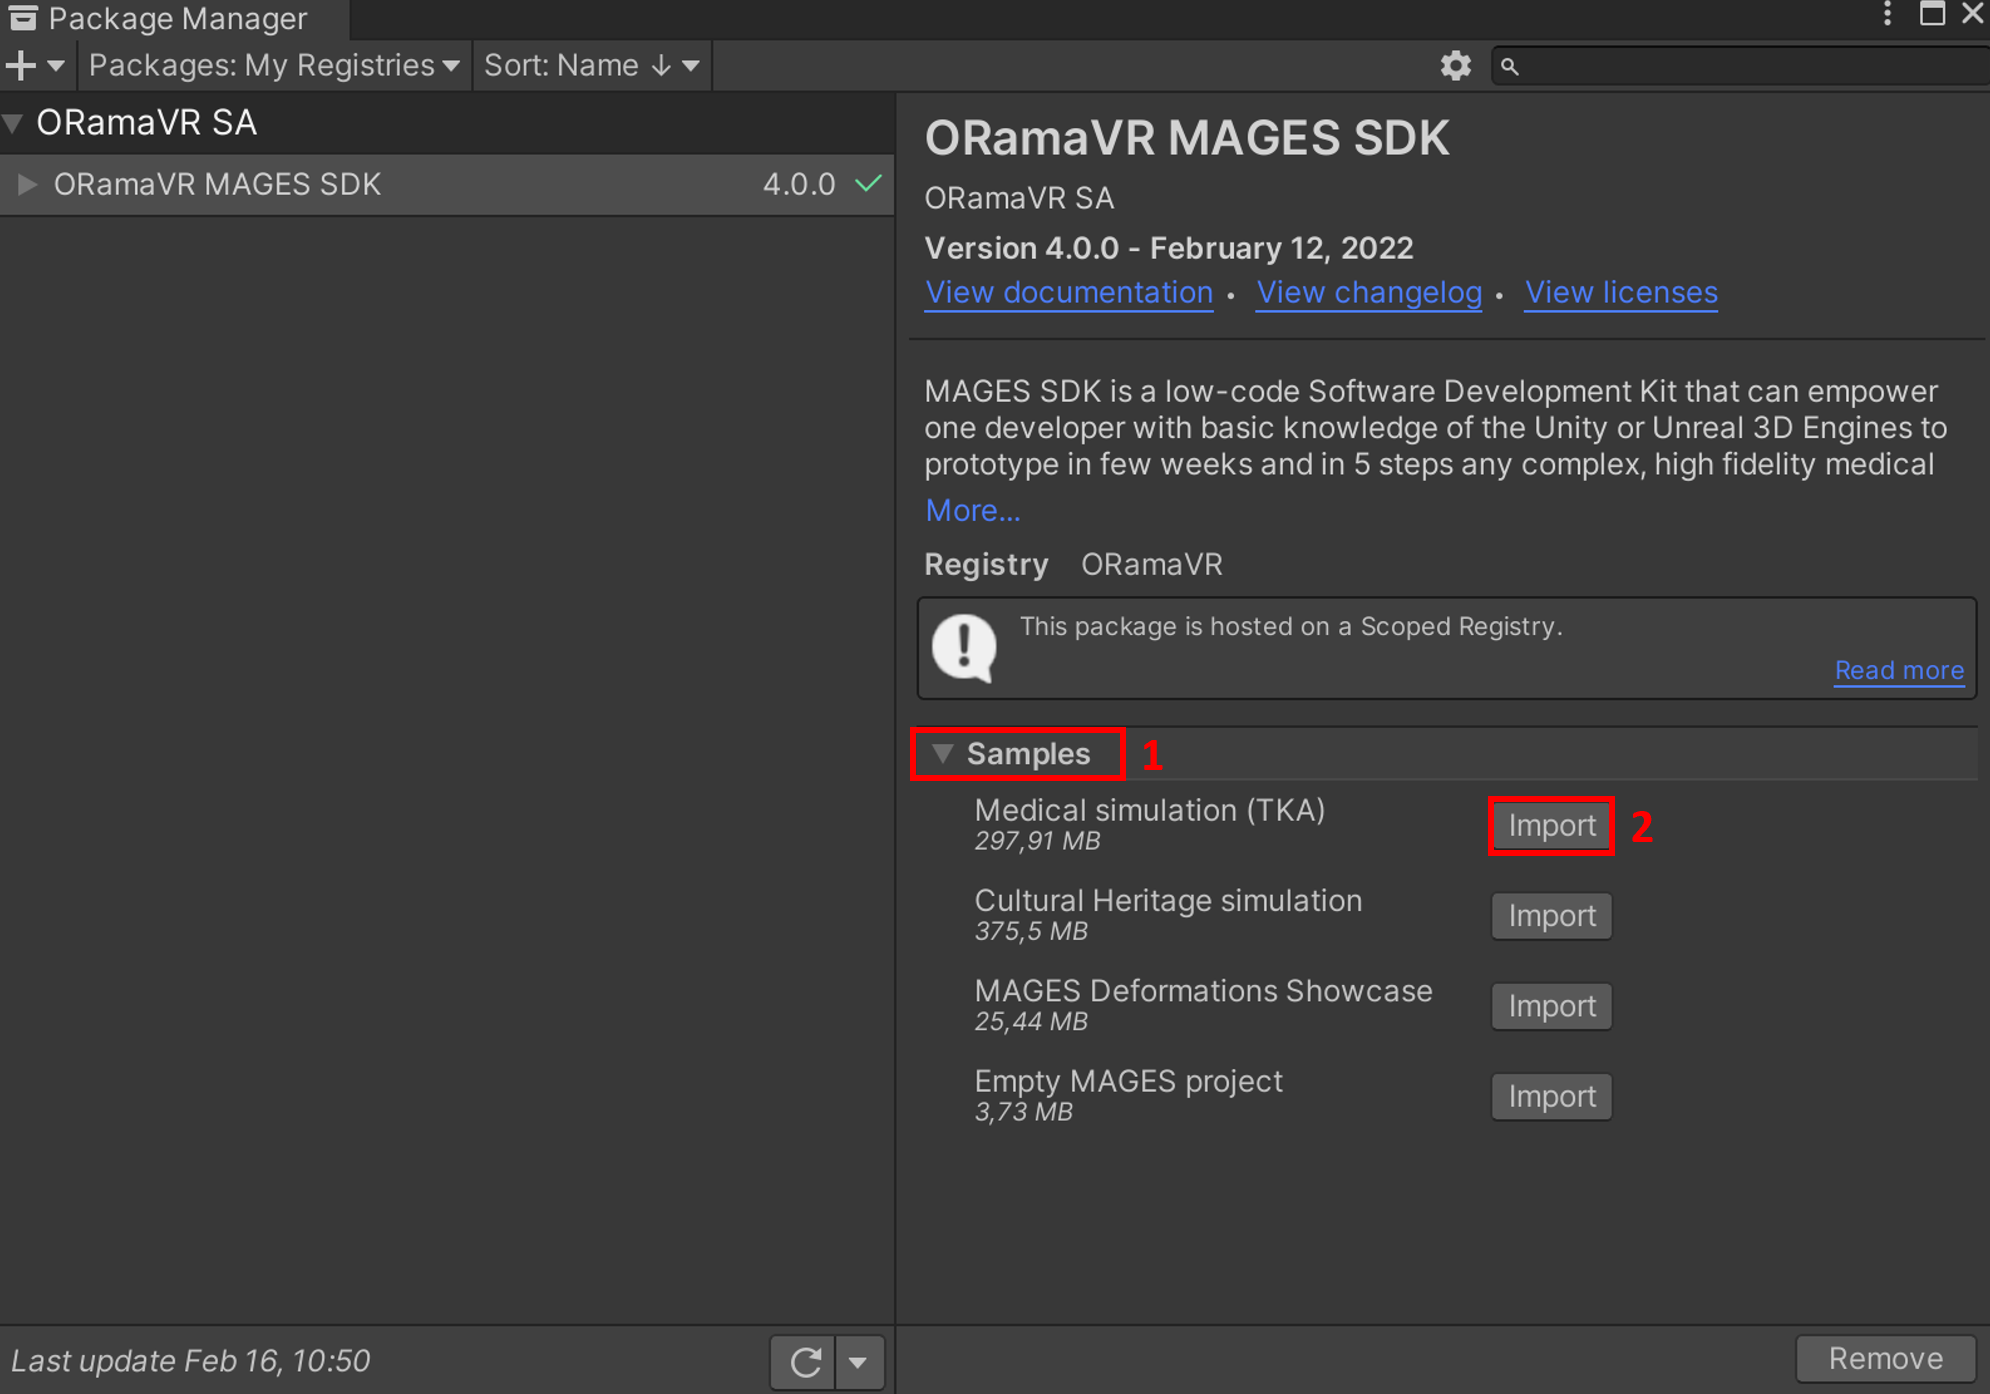
Open the Unity Package Manager and locate the MAGES™ SDK package.
Expand the Samples list and click the Import button next to Medical Simulation (TKA) as illustrated below.
Once the import procedure completes, you can open the scene located at
Assets/Samples/ORamaVR MAGES/4.0.0/Medical simulation (TKA)/Scenes/MedicalSampleApp.unity.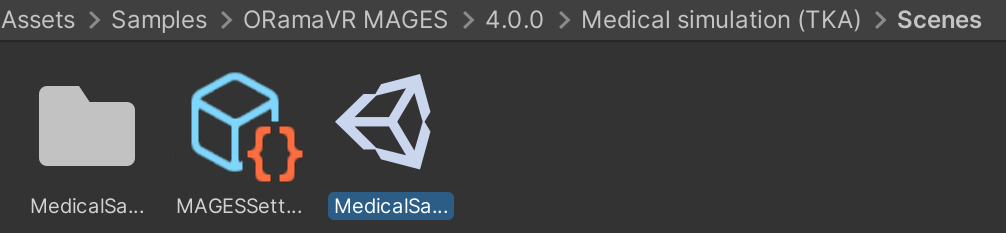
Note
The default camera is set to 2DoF mode to run the application using mouse and keyboard.
Adding Multiplayer Support
Applications built with MAGES™ SDK are multiplayer/network ready, meaning that with a few more actions needed by the developers, multiple users can cooperate and complete these simulations together online. To quickly setup your application to be multiplayer-ready please refer to Multiplayer guide.
Adding VR Support
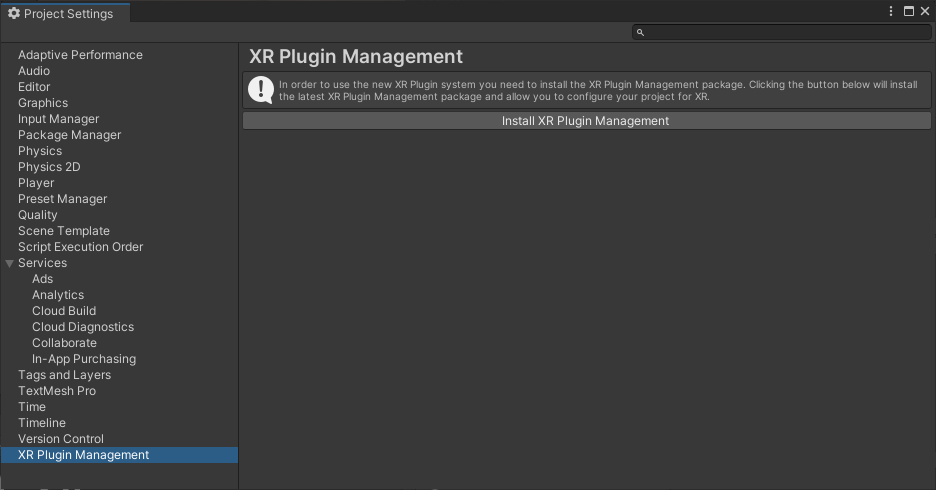
To configure the application for VR support you need to install the XR Plugin Manager. Navigate to the Project Settings and click Install XR Plugin Manager
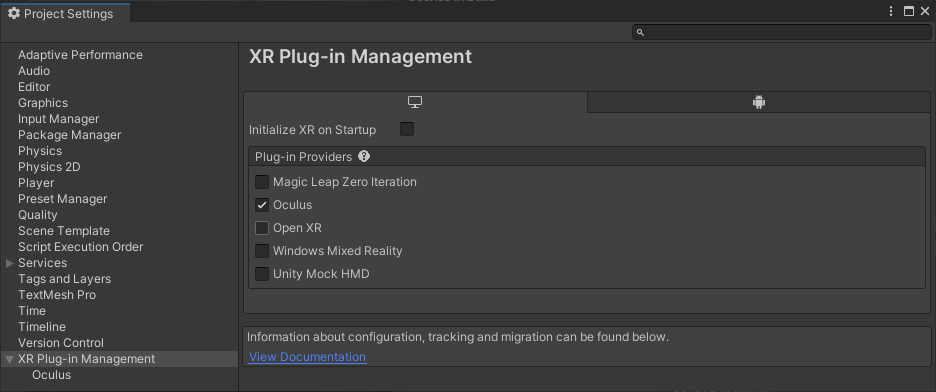
The next step is to configure your XR device. Select among the available plug-in providers. In this case, we selected Oculus.
The final step is to add the corresponding Universal XR camera to the scene.
First, delete any other MAGES camera from the scene (g.g the 2DoFCamera).
Then, from the MAGES menu navigate to Cameras/Universal XR. This will instantiate the Universal_XR_Rig camera that supports all the devices from the XR Plugin Manager.
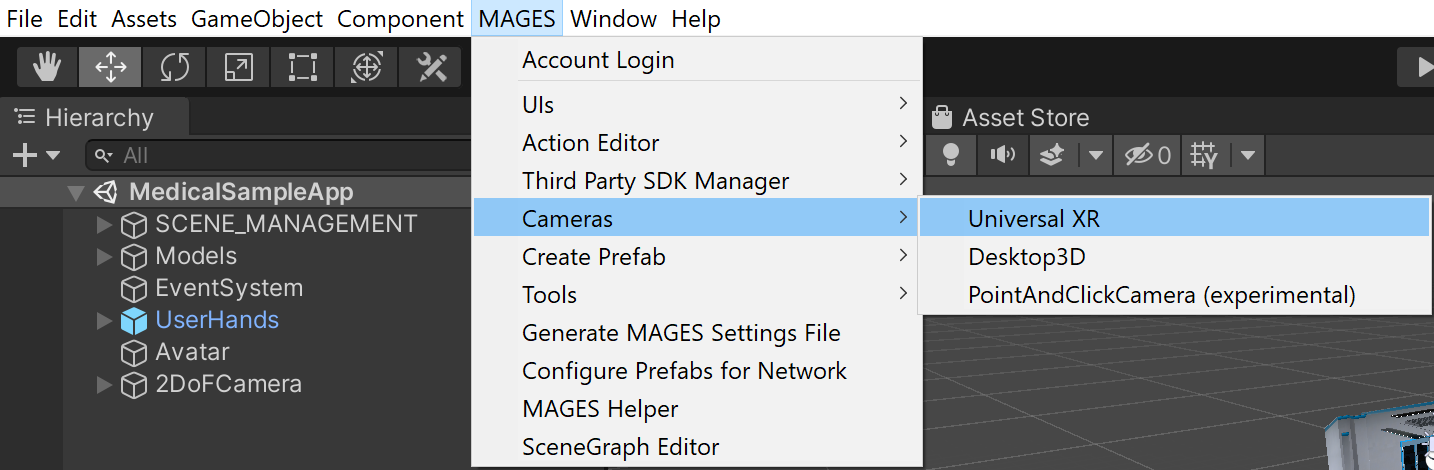
The supported cameras are the following:
Universal XR (for XR Plugin)
Desktop 3D (Non-VR camera imitating the VR controls with mouse and keyboard)
PointAndClickCamera (Non-VR camera for mouse only)
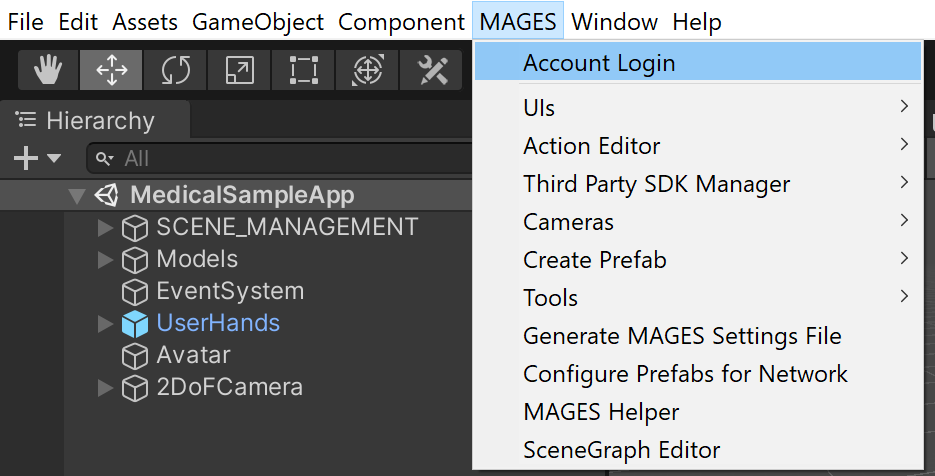
SDK License
Before you hit the Play button, make sure you have checked out a valid SDK license. To do so, open the MAGES tab on the top menu and click on the Account Login option.
Note
You can log in either with an ORamaVR account or by using your Google account.
Controls & Movement
In the table below you can find the controls for every supported platform and headset.
Oculus Touch |
VIVE |
Windows Mixed Reality |
Desktop3D |
|
|---|---|---|---|---|
Grabbing Objects |
Grip Button |
Grip Button |
Grip Button |
|
UI Selection & Usage of Tools |
Trigger Button |
Trigger Button |
Trigger Button |
|
Toggle Movement |
Press Left Touch Thumbstick |
Left Menu Button |
Right Menu Button |
|
Positional/Rotational Movement |
Left/Right Touch Thumbstick |
Left/Right Trackpad |
Left/Right Thumbstick |
Mouse and Keyboard (W,A,S,D) |
Toggle In-game Options |
Press Right Touch Thumbstick |
Right Menu Button |
Right Menu Button |
Alternatively, you can see here for a detailed tutorial on how to use the 3D Desktop camera if you don’t have a VR headset. There is also a video in the video tutorials section.
How to Play
Once logged in, ensure that the MedicalSampleApp.unity scene is open and click the Play button on the Unity Editor.
A menu will appear, offering multiple buttons as options.
Each of the user’s virtual hands, has a ray which starts at the top of the hand. Use this ray to point to the Single Player button and use the left mouse button to select it.

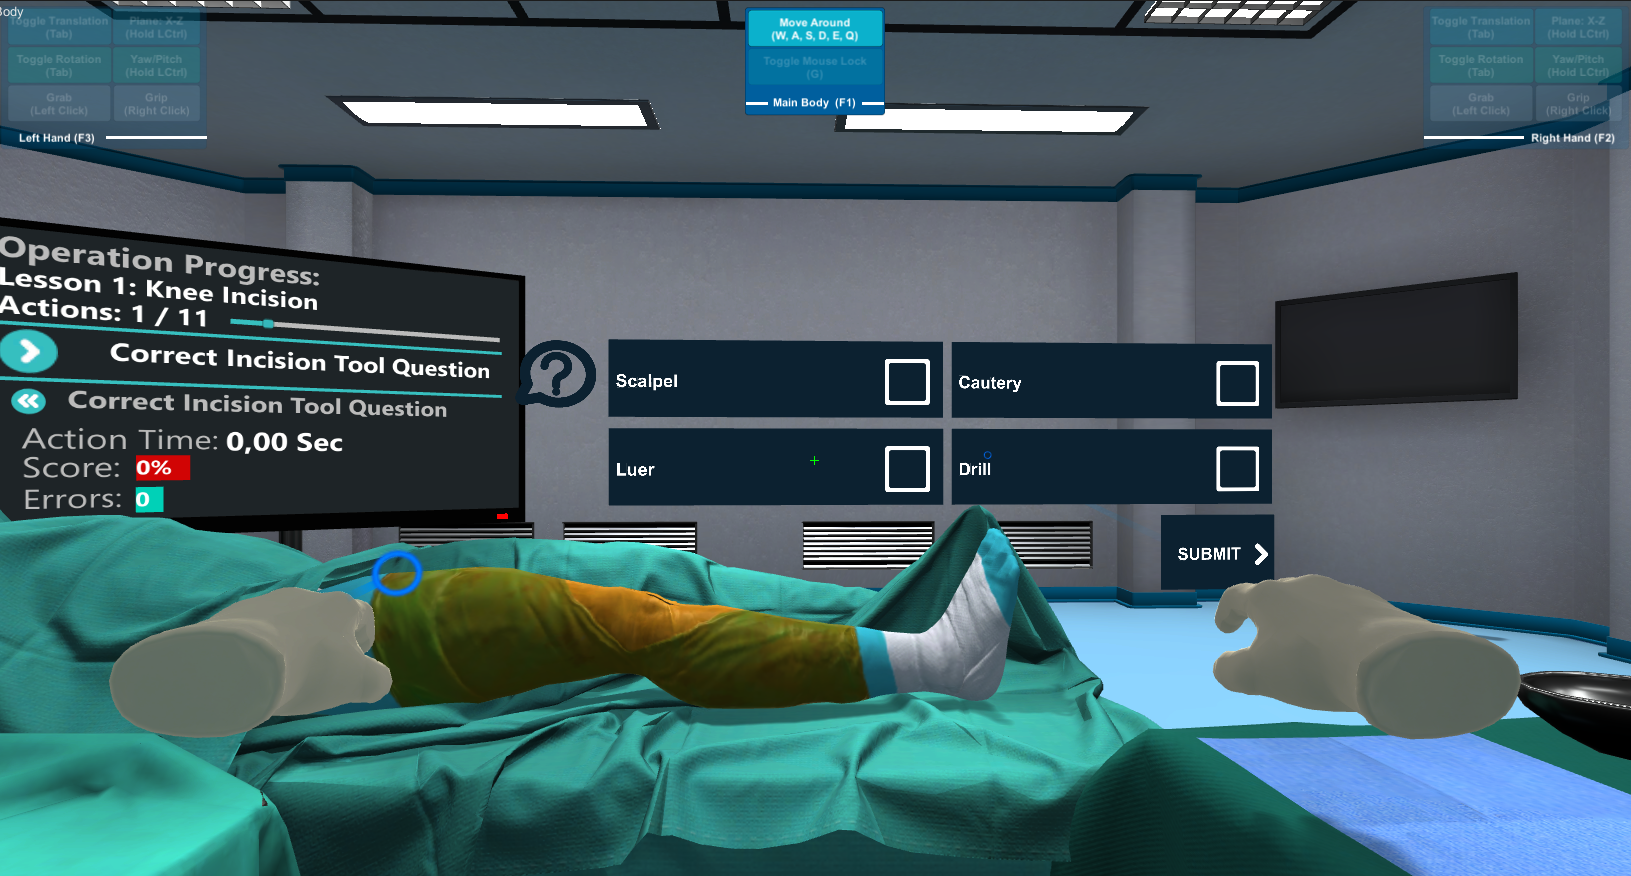
The first action of this simulation is a question action. Use the ray to point to an answer and the left mouse button to select it. Then point to the Submit button, using the ray and again use the left mouse button to select it and move to the next action.
In the next action, you have to use one of the virtual hands to pick up the glowing syringe (by moving the hand close to the syringe and holding the left mouse button) and move it to the position that the green hologram represents to complete this insert action.
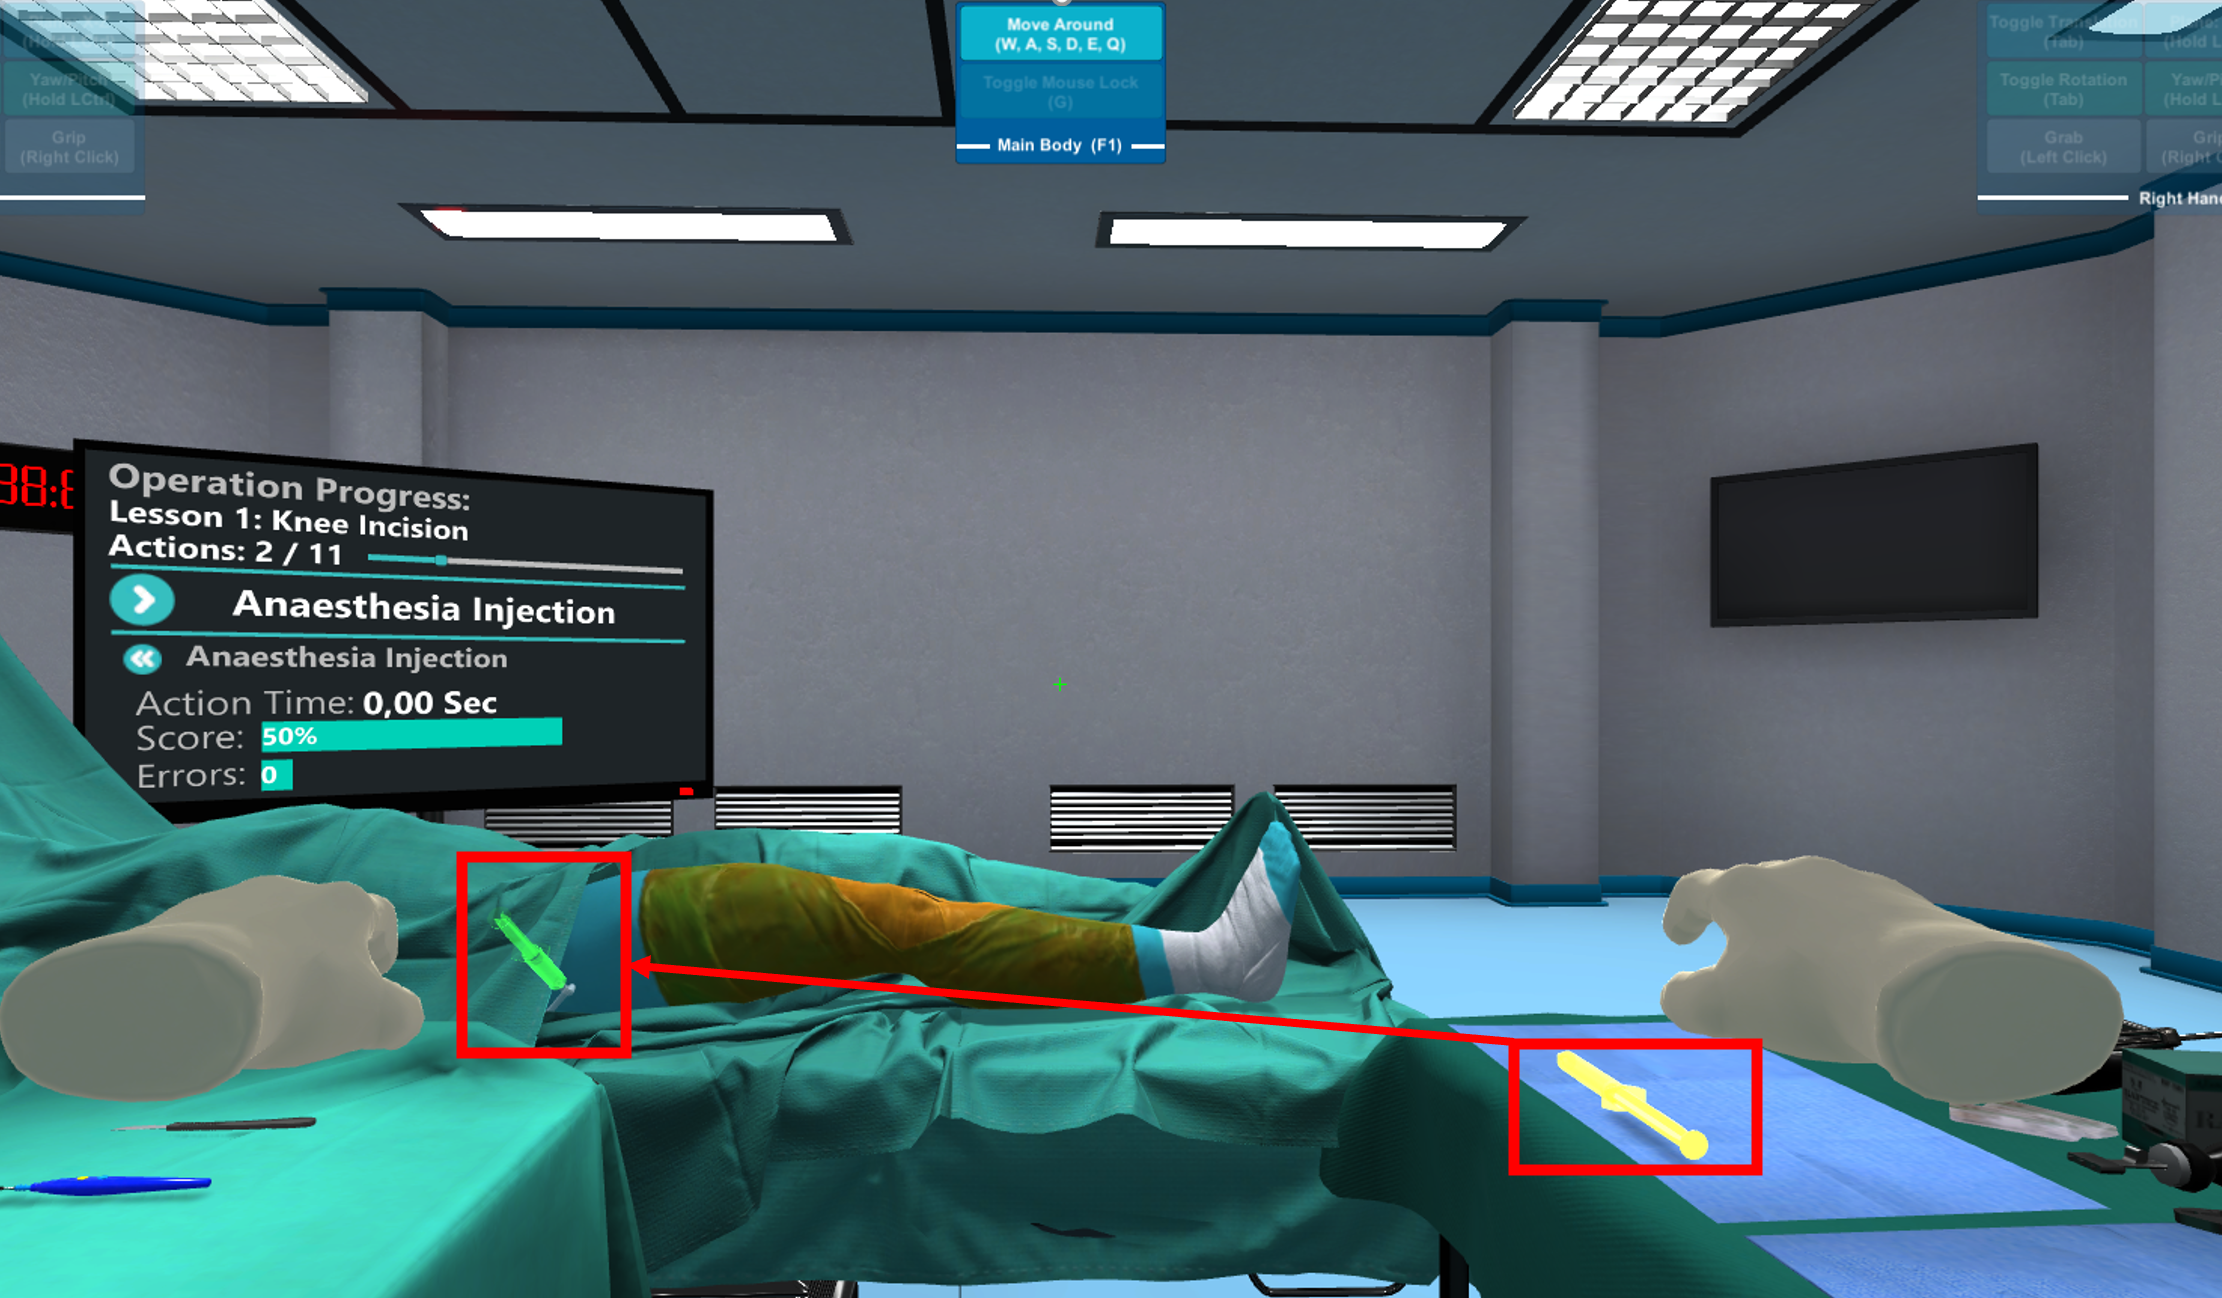
Once correctly inserted, click the left mouse button again to pump the syringe.
Note
Green holograms represent the position of the corresponding item or the way that this item should be used on a surface.
When the simulation is completed, the operation exit user interface will spawn. It will look like the one in the image below.

You can view your analytics by clicking the analytics button.
The restart button starts the simulation from the beginning.
You can exit the simulation by clicking the exit button.