Desktop 3D Controller
Intro
The Desktop 3D controller is used as the default pawn (camera) for all three different operations provided with MAGES Unreal. It is a useful development tool for accelerating iteration time when creating VR content; as immersive as VR can be, sometimes you need a quick way to check that some interaction works.
Additionally, the Desktop 3D controller allows you to test networking logic within a single instance of the editor.
Warning
To re-iterate: the Desktop 3D controller is not intended to be the pawn that you will ship the operation with, but only as a tool for development and testing purposes.
We’ll be going through an explanation of the main controls and concepts of the Desktop 3D controller by looking into the reasoning behind them.
Vision & Intention
It is impossible to represent all possible movements of a VR user’s head and hands using the mouse & keyboard, without resorting to an interface that makes you feel more like a pilot than anything else. Thus it was obvious from the start that the user will have to choose to control one aspect of a VR character at a time:
The whole body (Avatar), or
One of the hands
Note
You can use the number row on the keyboard to quickly change modes:
1 – Avatar Mode
2 – Left Hand
3 – Right Hand
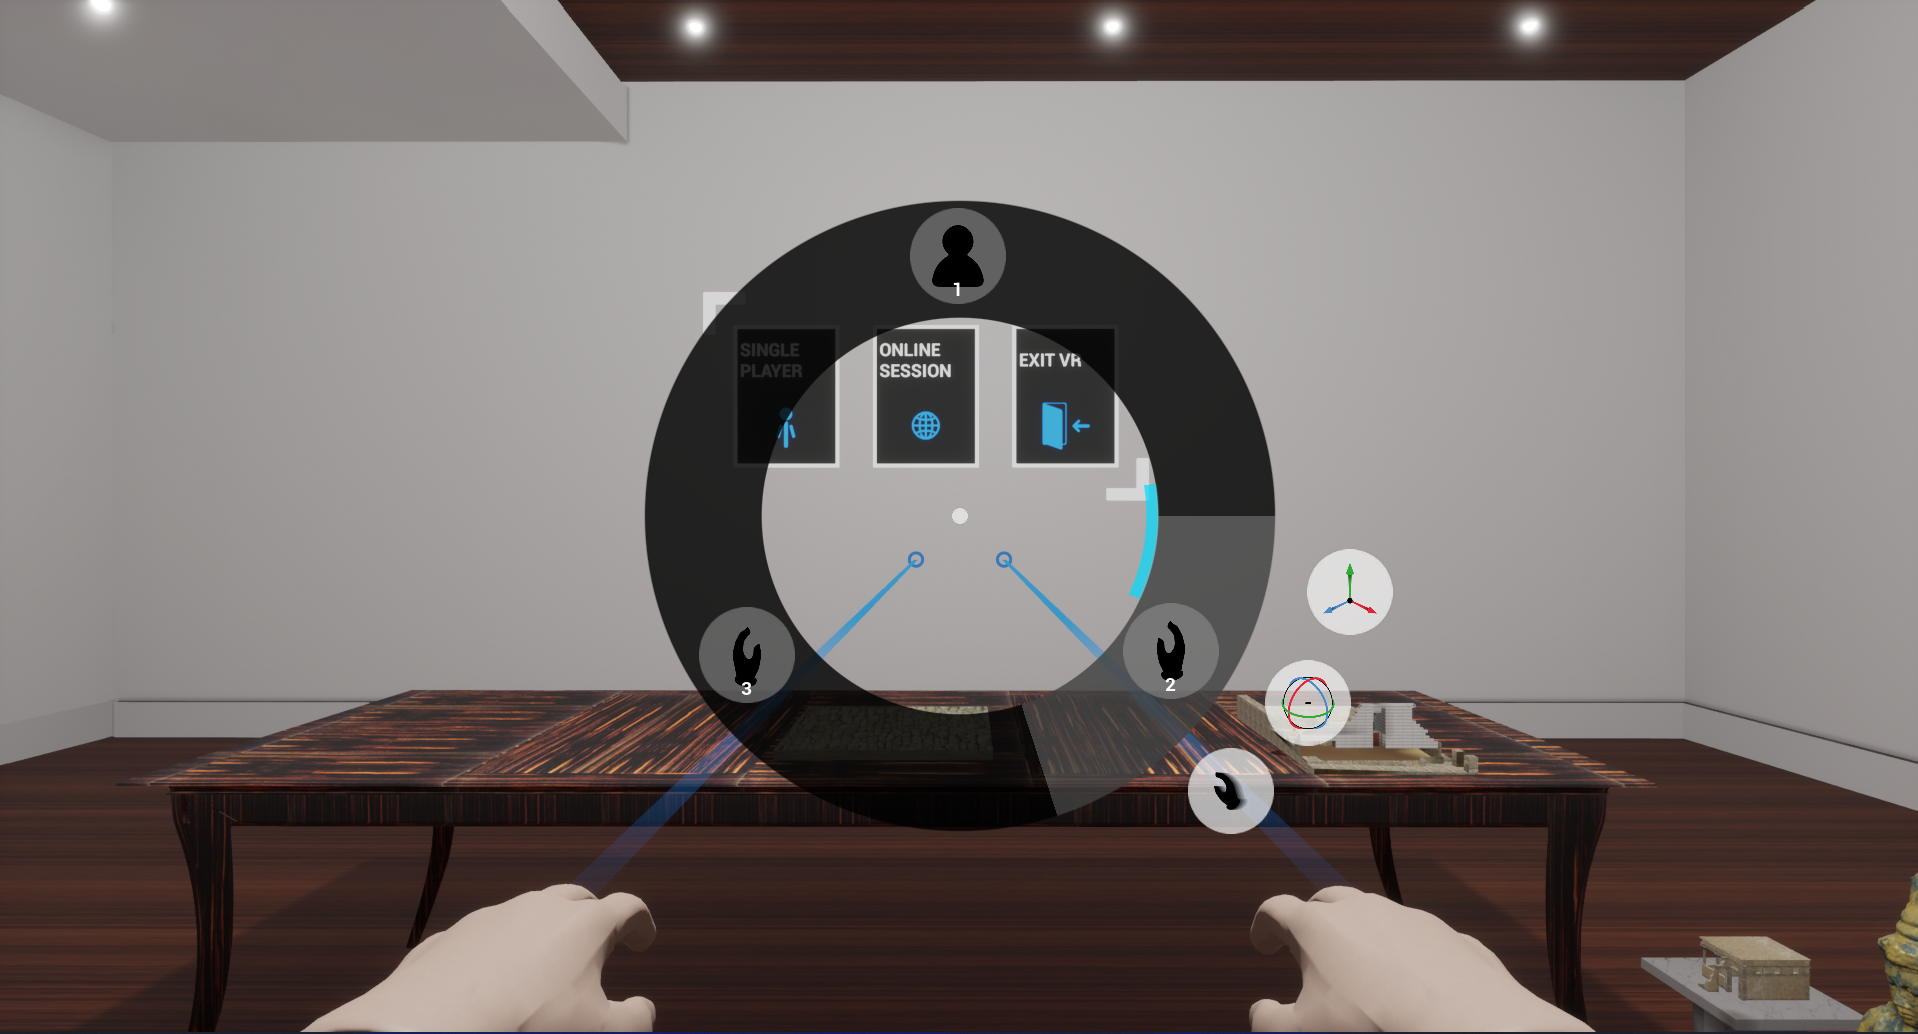
Additionally, for the hands, sub-modes needed to be implemented since our SDK allows for very fine-grained controller motion requirements, which cannot be emulated with keyboard keys. So, the translation and rotation of the hand needed to be mapped to the user’s mouse movement. In this manner: Through the radial menu (activated using the Spacebar), you can choose to switch to controlling one of the hands in one of two sub-modes:
Position (Translation)
Orientation (Rotation)
Note
The hotkey for switching between translation and rotation without going through the radial menu is the “Tab” key
Interaction
Interaction is easy to map: the left mouse button corresponds to the trigger button on a VR controller, and the right mouse button to the grip button, accordingly. Switching to a different mode while having grabbed an object will keep the hand in the same state, so you can hold multiple objects simultaneously.
Note
If you switch back to controlling one of the hands that has grabbed an object, you do not need to hold any of the mouse buttons; the item will stay grabbed. You can press the corresponding mouse button to let go of the item.
Swapping Axes
But there is still a problem here: The mouse can only input 2D coordinate movements: horizontal and vertical, which severely limits the user’s options in both cases:
By holding down “Left Ctrl”, you can temporarily change the axis of the translation or rotation
Throw Hand (or Quick Grab)
This takes care of a partial mapping of fine-grained movement to the keyboard & mouse. But what about mapping one of the most common aspects of any VR simulation? What about Grabbing?
The “Throw Hand” command does exactly this: It moves the left or right hand to the object at the user’s center of the screen, and tries to grab anything once it’s there.
Note
You can execute the “Throw Hand” command either through the radial menu, or by using Ctrl + Click:
Ctrl + Left Mouse Button Click — Throw right hand
Ctrl + Right Mouse Button Click — Throw left hand
Basic Controls
By default, the controller will start in the “Avatar” mode. This is the closest mode to any typical 3D application that uses a first-person perspective. You can:
Look around with the mouse
Move with the W,A,S and D keys
Interact with UIs using the left mouse button, or ‘F’
Open the radial menu with the Spacebar
Note
Movement with WASD is enabled on all different modes, so even when you’re controlling one of the hands you can still move the whole avatar around.
Outro
The Desktop 3D controller is self documenting and context sensitive, so it may feel difficult to control at first, but given time, you can learn the hotkeys through the radial menu and the context prompts at the top left of your screen, and become much faster with it.