Upgrade from MAGES v3.x to v4.x
In this tutorial we will upgrade an existing project made with MAGES v3.x to the latest version of MAGES v4.x (currently the v4.0.2).
Step 1: Folder structure
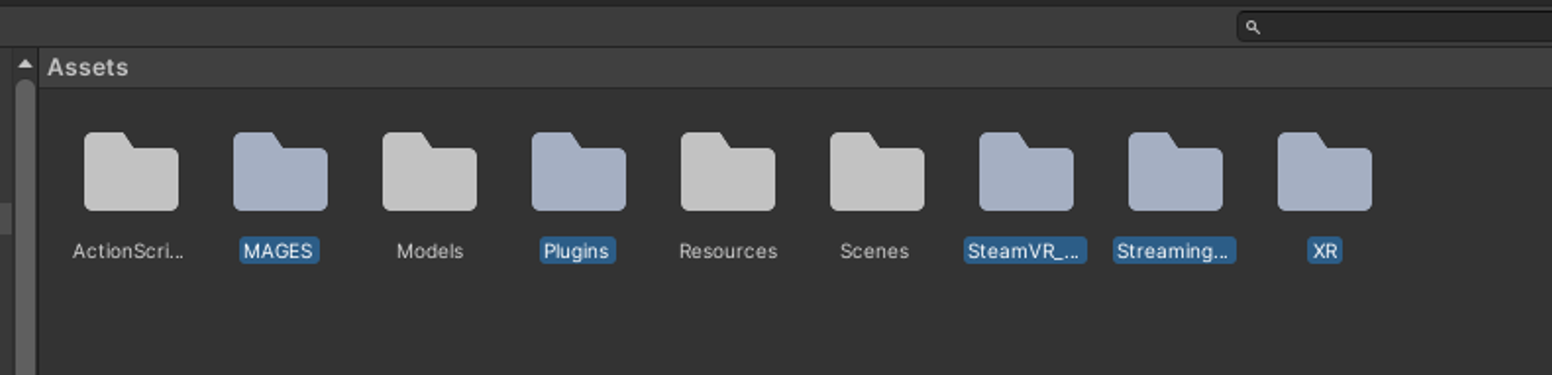
First, gather everything operation related into 4 folders. This is optional but it helps to separate the SDK from the operation. The 4 folders are: ActionScripts, Models, Resources, Scenes. Those folders will only contain assets and scripts from your operation, nothing related to the MAGES SDK.
In more detail:
ActionScripts: Contains the Actions for the operation.
Models: Contains the models, animations, textures and materials. Basically, every visual asset that is not required to be in the resources folder (spawning runtime).
Resources: All the prefabs and items that will spawn in this operation.
Scenes: Contains the scenes and the MAGESSettings.asset file.
Step 2: Delete old MAGES
Delete the rest. This includes anything MAGES related. From SDK Addons to plugins, in our case we will only keep the 4 folders we created in the previous step. Make sure you also delete the MAGESres folder in the resources.
It is very important to delete the Assets/Plugins folder.
Also before moving on you have to do the following. It is a bit weird but required. Remove the Asset/Resources folder from your project before importing the MAGES SDK. After importing the SDK please put it back in place where there was. This is required cause otherwise the SDK will not be imported as it should (the folder com.oramavr.mages@4.0.2RuntimeResources will not be visible from the Unity).
After this step. lots of errors will appear, don’t worry it is normal. We ll fix them in the following steps.
Step 3: Download and Import latest MAGES SDK
Now we have to download the newest version of MAGES SDK. In this example we will download and import to our project the MAGES 4.0.2 version.
Here you can find instructions on how to download and import the latest MAGES SDK.
Step 4: Fix compile errors (Third party assets)
After importing the MAGES SDK the majority of the errors will be fixed. However, some of them may remain. In this step we need to fix those errors before moving on. In our case we had some errors from cause the photon and Dissonance package was required for this project and we deleted it along with the rest of MAGES folders in step 2. We will download and reimport the photon PUN asset in our case.
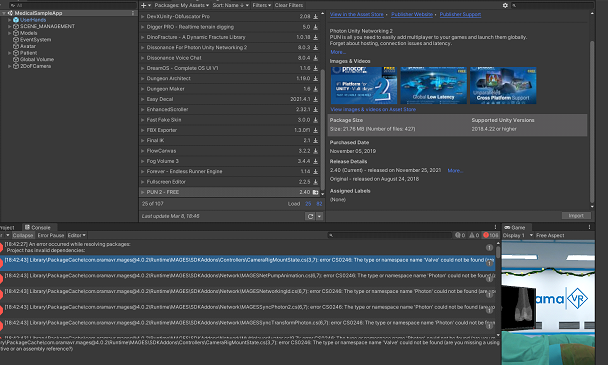
Also if you have any conflicts like this, make sure you resolve them and keep the ones from the MAGES package folders, not the ones in your Asset folder.

In your case, fix any error to move to the next step.
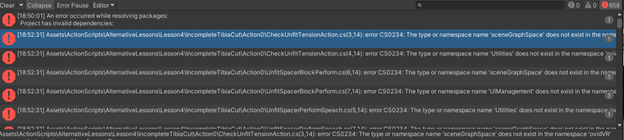
Step 5: Fix compile errors (Renaming)
More errors will pop. In this case it will be due to the renaming of our libraries. Double click an error from the Unity console to open the visual studio.
On visual studio, press CTRL + SHIFT + H to open the Find and Replace window and replace the following words across the project (press the replace all option):
“ovidVR” -> “MAGES”
“MAGES.toolManager” -> “MAGES.ToolManager”
“toolGameobject” -> “ToolGameobject”
“).isActive” -> “).IsActive”
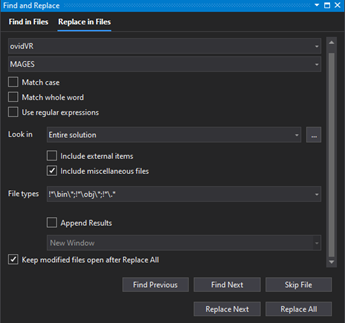
Press CTRL + SHIFT + S in visual studio to save all the changes.
Step 6: Fix compile errors (Final fixes)
Now that we have finished renaming we need to fix some more errors. You may not have some of them but in any case here they are
1. If you have any Action that inherits the IAction Interface you will see an error that says your class is not implementing the IAction interface. Hover on the IAction, press “Show potential fixes” and click the “Implement Interface” option. This was occurred since we added the DestroyAction() method in the interface.
SetPhysicalColliderPrefab is no longer user. Use the Spawn() method instead but remember to delete the spawned prefab on Perform() and Undo() if needed.

Also anything related to the AlternativePaths and Parallel Actions is deprecated and removed. Consider using OptionalActions.
Here is a tutorial on how to use Optional Actions:

After fixing all the errors the Unity project will reload itself.
Step 7: Fix missing references
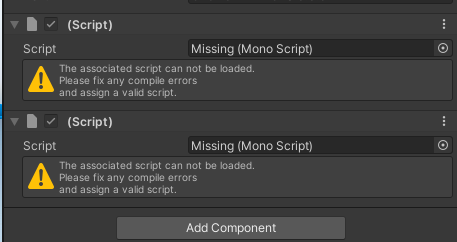
At this point we don’t have any compile errors. However, you will see that almost all of the prefabs have missing references. This is caused since we renamed many functions and namespaces in MAGES dlls.
To fix this issue we build an external tool that will do all the work for you.
Script: https://www.dropbox.com/s/kbvc2r1kk44lxg8/MAGESUpgradeFix.cs?dl=0
Add this script to your asset folder. Open it and change the values of the variables projectPath and prefabsPath. The variable projectPath contains the path to your project (the folder that contains the Asset folder). The prefabsPath variable contains the path to your prefabs you want to fix the references.

Let the Unity compile it and then go to the MAGES top bar menu and click the “Fix missing references” button. This will fix all the missing references for you.
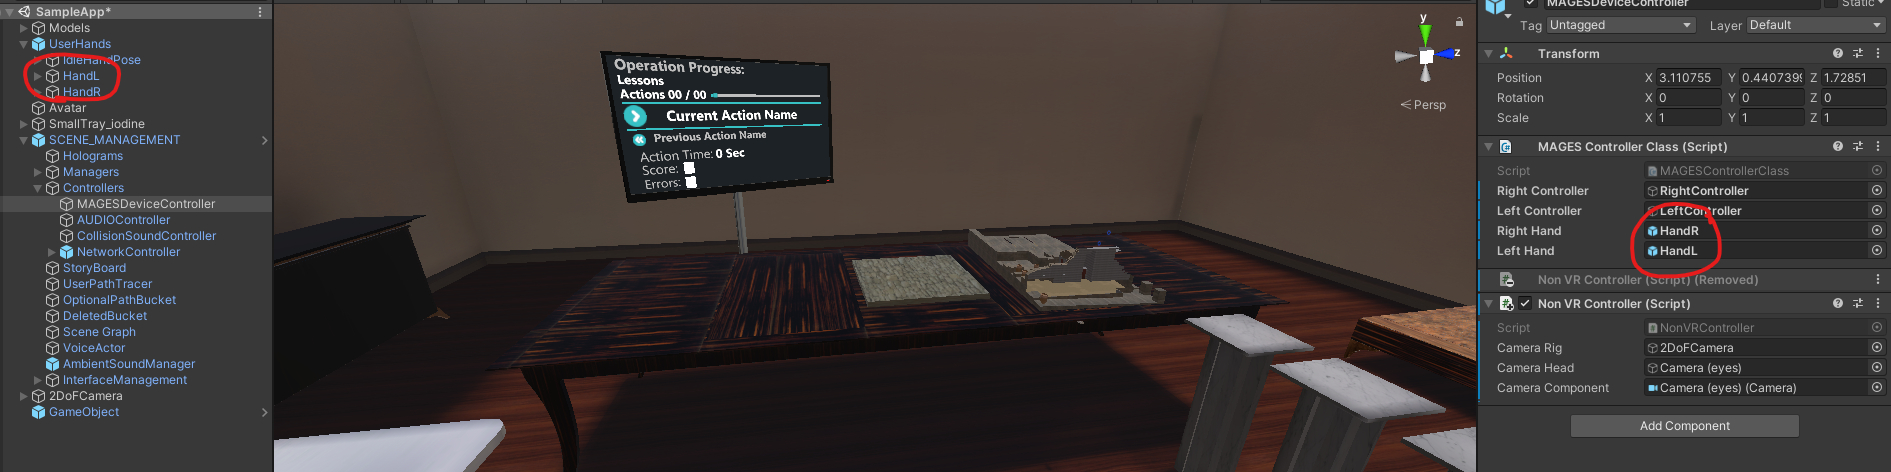
However, since the “SCENE_MANAGEMENT” Gameobject in the scene is not linked with a prefab will still have missing references. To fix it we propose to take it from one of our sample applications. To import a sample application navigate to the package manager. More info here.
After adding the new SCENE_MANAGEMENT object you need to delete your cameras and create them again from the MAGES top bar menu since the references on the SCENE_MANAGEMENT will be flushed.
Make sure that the MAGESControllerClass component on the MAGESDeviceController is properly set. Otherwise add the missing hand references.
Step 8: Generate Asset file
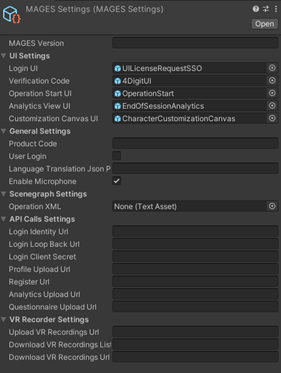
The next step is to generate the MAGES Settings asset file. From MAGES 4.x we use this asset file to store all the essential links and some prefabs. Navigate to the MAGES top bar menu and click “Generate MAGES Settings File”, then select the location to save your file. This will generate an .asset file.

At the beginning it will be like this:
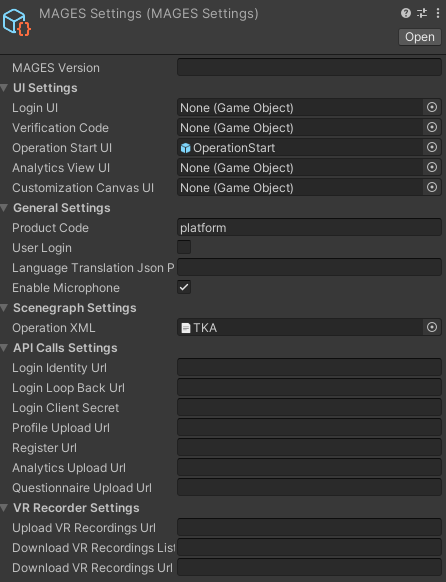
It is important to drag and drop your XML file in the “Operation XML” field. You can also add the product code. In our case it will be “platform”. In this case the XML should be saved in the following path: AssetsResourcesStoryboard**platform**. It is also important to drag and drop your prefabs at the beginning of the asset. If you have a different Operation Start UI or a customization Canvas UI for example drag and drop your own into those fields. The final result will be similar to this one.
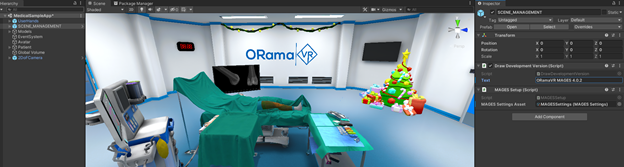
Then click the “SCENE_MANAGEMENT” Gameobject in your scene and at the inspector you will see a MAGES Setup scrip. Drag and drop the MAGESSettings.asset we created to this field.
Step 9: Login
Before log in you need to delete the previous account folder. It is located in the Assets/Resources/Storyboard/Account folder. Delete the Account folder.
Then from the MAGES top bar menu click the MAGES Helper and then login from this window by inserting your credentials.
Step 10: Upgrade the XML
The final step is to update the XML format as from MAGES 4.x we updated the formatting of the xml. First open the scenegraph editor from the MAGES top bar menu and load your old xml. All you have to do now is to click File > Save and it will be saved with the new format.
From the MAGES top bar menu click the MAGES Helper button and click to any remaining jobs to properly configure your project.
You are ready to go!