Multiplayer in MAGES™ SDK
Applications built with MAGES™ SDK are multiplayer/network ready, meaning that with a few more actions needed by the developers, multiple users can cooperate and complete these simulations together online [M1].
In this section we will go through the details that developers need to check to ensure that their application is multiplayer/network ready, as well as a tutorial on how a user can create and/or join multiplayer sessions within a MAGES™ application.
Networking Developer Guidelines
MAGES™ SDK supports Photon networking as the default networking API. For cooperation/multiplayer mode you need to setup Photon (playing in the same room with other players).
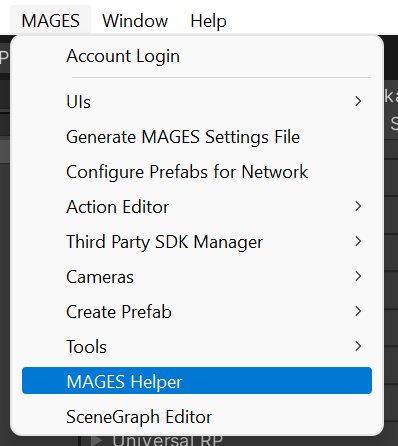
First you need to install the Photon PUN2 asset (it is free). Navigate to the MAGES menu and click the “MAGES Helper”
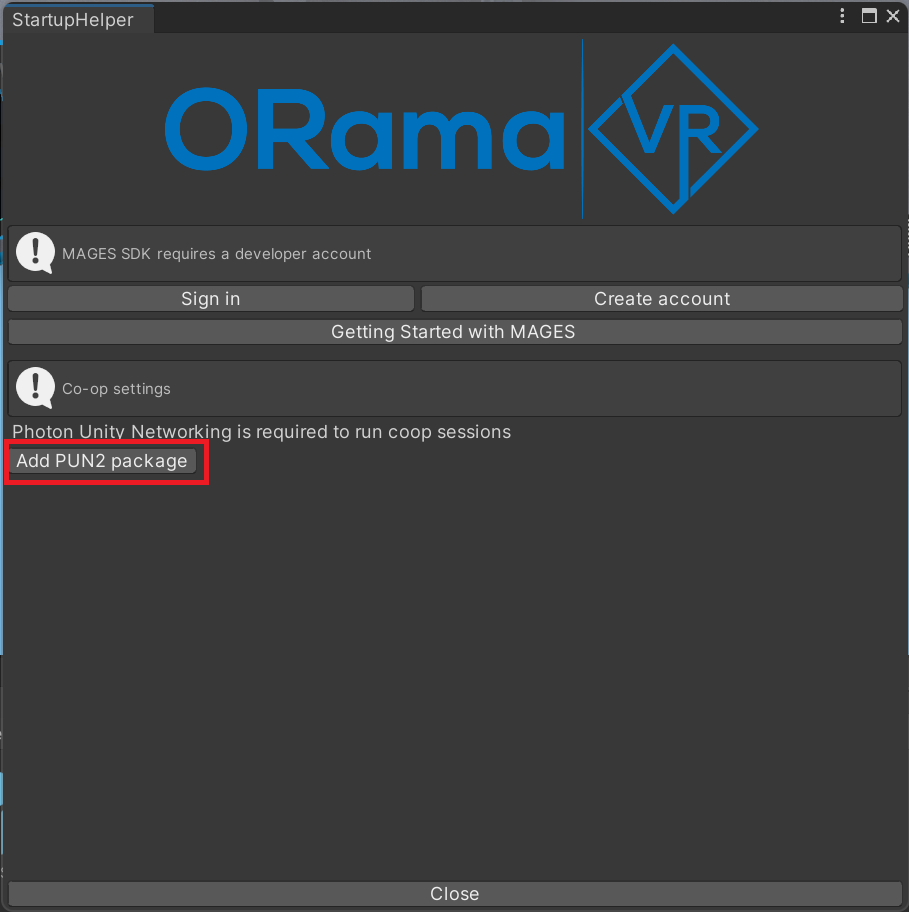
The Helper window will pop and you will see that you need to install the PUN2 package. Click the “Add PUN2 package”.
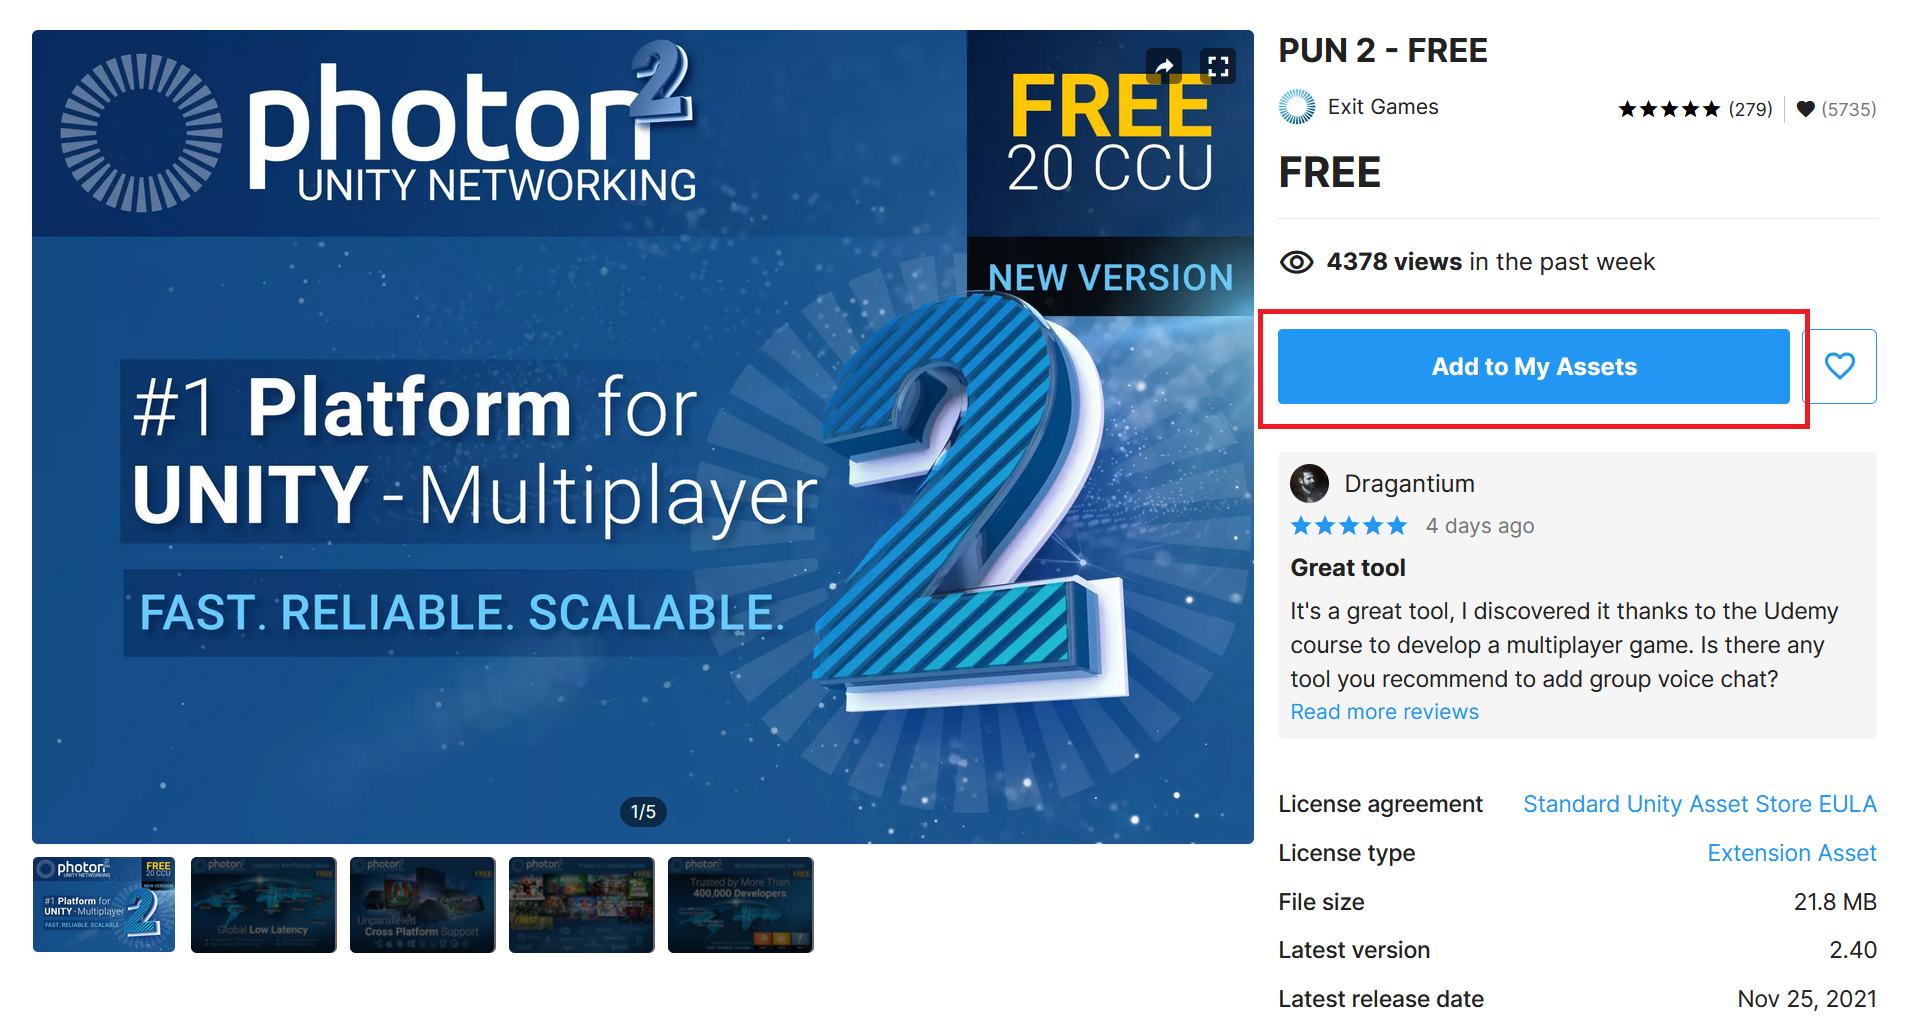
This will navigate you to the asset store. From there you can add the package to your assets.
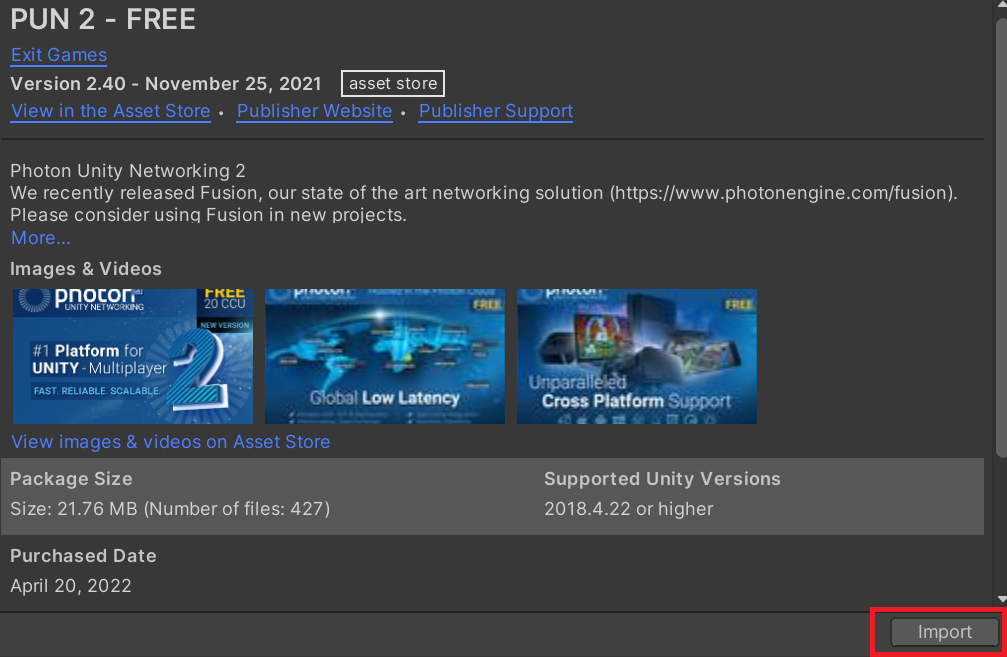
And import the package to your project.
After installing the package, you need to create an account at Photon.
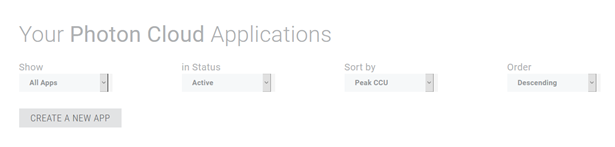
After successful registration, go to the Photon Dashboard and click the CREATE A NEW APP button.
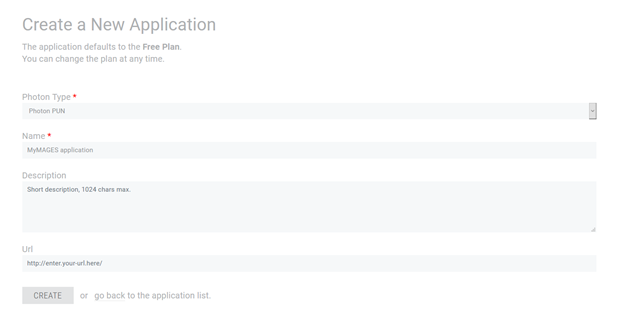
Select Photon PUN from the Photon type dropdown, give a name to your application and click the CREATE button.
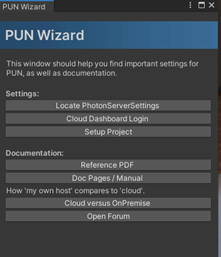
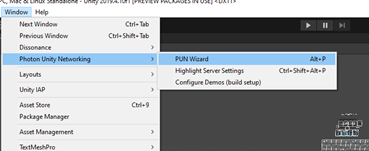
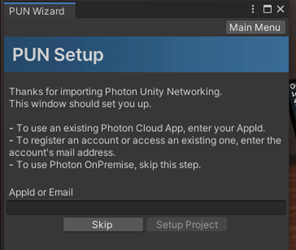
Navigate back to the main dashboard page and you will see your new PUN application. You need to copy the App ID. Open the Unity project and from the top bar go to Windows/Photon Unity Networking/PUN Wizard.
Note
Click the code next to the App ID to reveal the full key.

Click Setup Project, paste your App ID at the Appid or Email field and click Setup Project.
Host Online Session
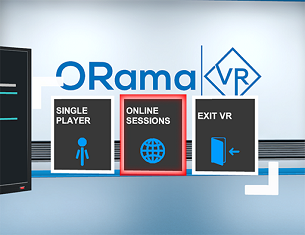
Once you start the simulation, you will be greeted with two options. Starting the simulation in Single Player, or go to Online Sessions.

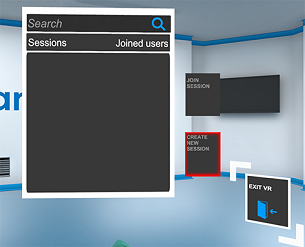
Select the Online Sessions. There you will be able to create a new session and wait for other to join, or join an existing session that is demonstrated on the Sessions board.
To Create a session, select the Create New Session, as illustrated.
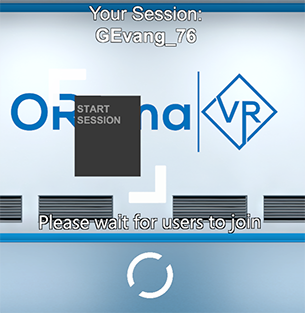
Wait for others to join. If at least one more user has joined, you will be able to start your online session.
If you want to go back, select Exit VR to quit.
Note: If you are using older versions of our simulation, please refer to this video for instructions.
Join Online Session
Once you start the simulation, you will be greeted with two options. Starting the simulation in Single Player, or go to Online Sessions.
Select the Online Sessions. There you will be able to create a new session and wait for others to join, or join an existing session that is demonstrated on the Sessions board.
Select an available session from the Sessions board, and select Join Session. Each available session will demonstrate all connected users.
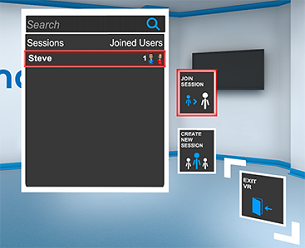
If you want to go back, select Exit VR to quit.
Note: If you are using older versions of our simulation, please refer to this video for instructions.
References
- M1
Kamarianakis, M., Lydatakis, N., & Papagiannakis, G. (2021, September). Never ‘Drop the Ball’ in the Operating Room: An Efficient Hand-Based VR HMD Controller Interpolation Algorithm, for Collaborative, Networked Virtual Environments. In Computer Graphics International Conference (pp. 694-704). Springer, Cham.