Unity Integration with the Cloud
In this tutorial we will demonstrate the complete pipeline on integrating Unity with the web services provided in MAGES 3.2.
We will start of by creating a product for the Sample App through the Web Portal, and then create a user and assign him a valid product license.
After the online walkthrough is completed, we will proceed to integrate the Login service with the Sample App Unity side. Additionally, we will provide a configuration for uploading the user analytics to the AnalyticsAPI.
The end goal of this tutorial is to make you product-ready, meaning that you are able to build your VR Module and authenticate/check out any user licenses you want. Further, you will be able to upload user analytics to the AnalyticsAPI and display them in the Web Portal.
Tutorial Overview:
Prerequisites
You have configured all three web services whether for local Development or in a Production setting as described in the Web Services Manual section and the separate service sections per se:
For the Login Service: Getting Ready for Development & Getting Ready for Production
For the AnalyticsAPI: Getting Ready for Development & Getting Ready for Production
For the Portal: Getting Ready for Development & Getting Ready for Production
All three web services are up and running whether locally or in the Azure Cloud
You have an active user with Admin role permissions
(Optional) Azure Storage Account and Azure Blob storage must be in place for uploading user Analytics
Note
For brevity, we assume in this tutorial that you have set up and running a Development –localhost environment of the Web Services.
In any case, it is easy to translate the following steps to the equivalent Production configuration.
Product & User Creation
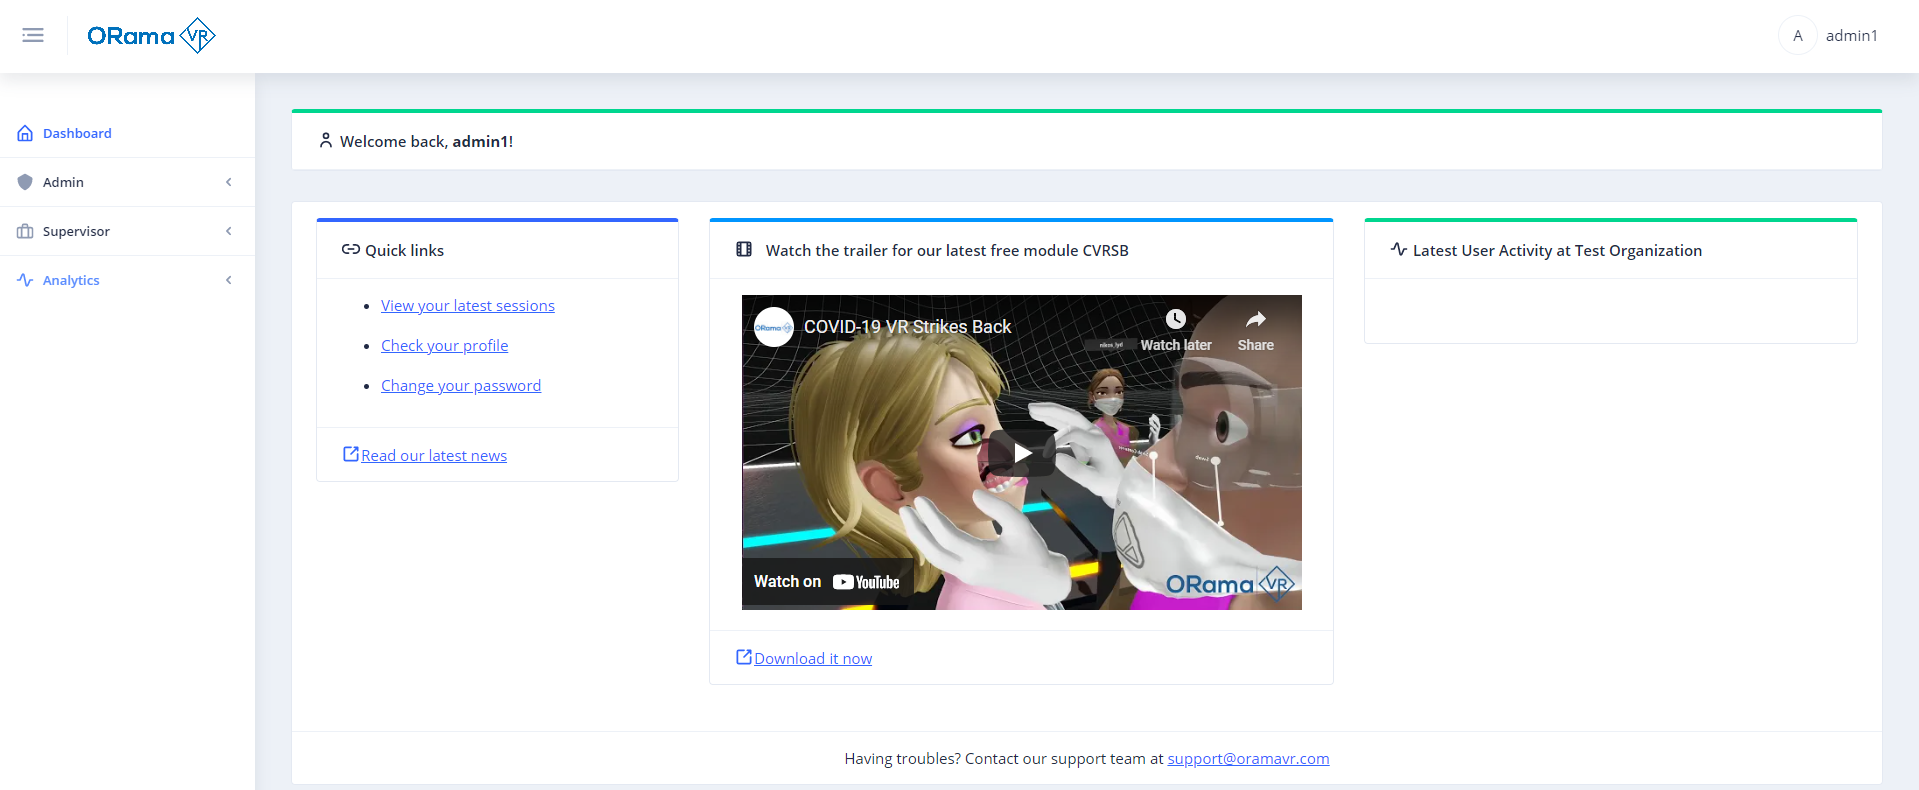
The first step is to login to the portal with an Admin user account.
Point your browser to localhost:4200 and you will be redirect to the Login Service https://localhost:44355 for authentication.
Upon successful login, you will be redirected to the Portal Dashboard as below:
Add New Product
Proceed to expand the Admin menu item from the main sidebar, and further the child Products menu item as depicted in the figure:
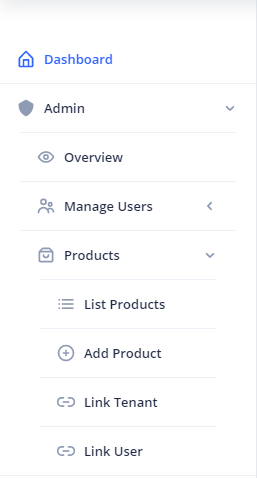
From the Products menu, you can either click on the List Products menu item, or on the Add Product menu item.
List Products Option
If you clicked on the List Products you will see an overview of all your Products as the one below:

Click on the Plus Icon button on the right and a new table row will appear with an inline form. There, go on to create a product with the following configuration:
{
    "ProductName": "Test2021",
    "ProductFormalName": "This is the formal name of the product",
    "DefaultLicense": "None",
    "Playable": "True"
}
Click on the Check Icon on the right and a successful notification will appear on the top right of the page!
Note
Notice that the ID field is grayed out, this will be populated by the Login Service.
Add Product Option
If you clicked on the Add Product menu item, you will end up in the following page:
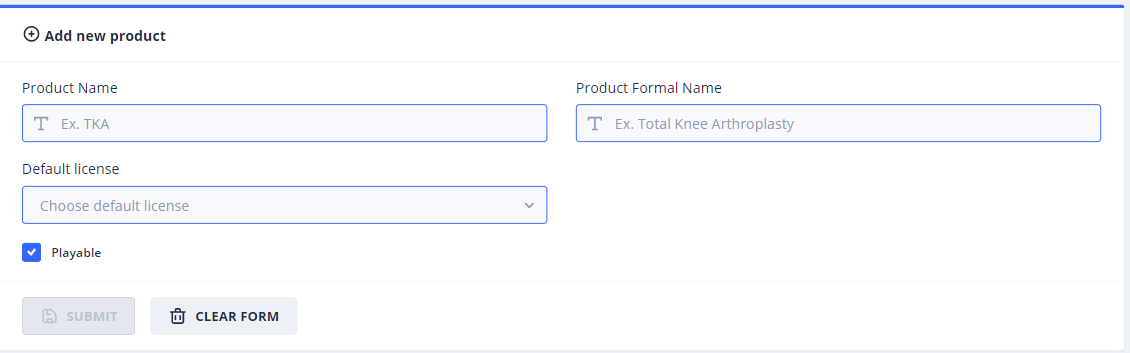
Here is a dedicated form that has also predefined options for the DefaultLicense and the Playable fields, instead of writing these info by hand.
Fill it in with the values in the JSON snippet above and click the Submit button to create the product.
User Creation
After the Product is created, navigate to the Manage Users expandable item and click on the Create User menu item.
The following stepper form will load:
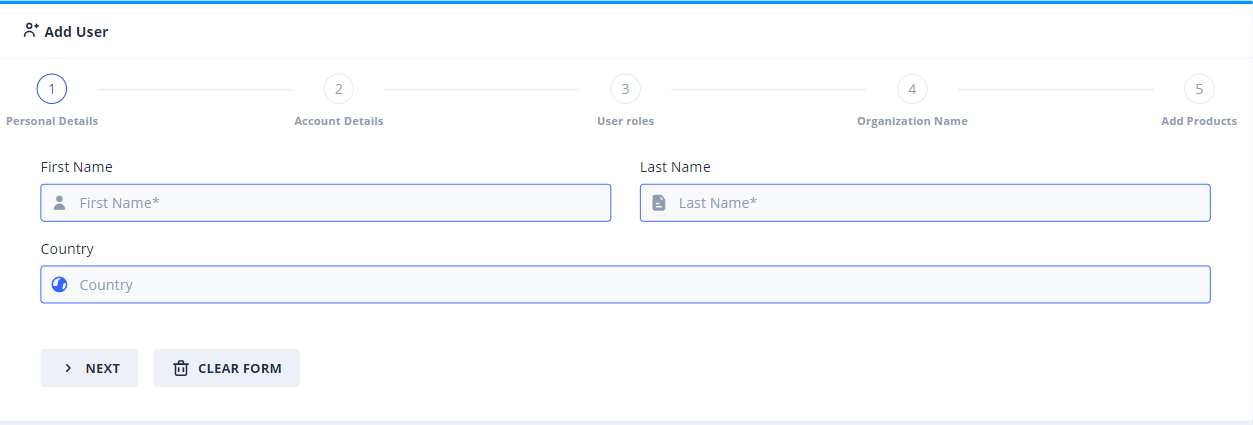
With this form you can create a user and optionally assign him product licenses.
Step 1.
Proceed to fill in the Personal Details of the dummy user as you see fit.
Step 2.
In the Account Details step, create a username and a password for your user.
Warning
When creating a user manually through the Portal, an email confirmation link will not be sent to the user’s email address!
The email address is considered Confirmed for the Login Service.
By default, we assume admins are able to correctly register their users. This also helps testing user creation, because you do not have to enter a valid email address.
Step 3.
If the password meets the Validator, you can proceed to select the User Roles. If you user is a typical VR-only application user, select the User role only.
Otherwise, you can proceed to add more roles – but recall, roles are inclusive! (e.g. An admin has all three roles assigned, etc.)
Step 4.
Select the Organization this user belongs to. For simplicity, select your own organization name or the Default one if applicable.
Step 5.
In the final step, we assign the user a license of the product we created earlier.
Make sure you input a date in the future and the DefaultLicense of the user is set to Unlimited as below:
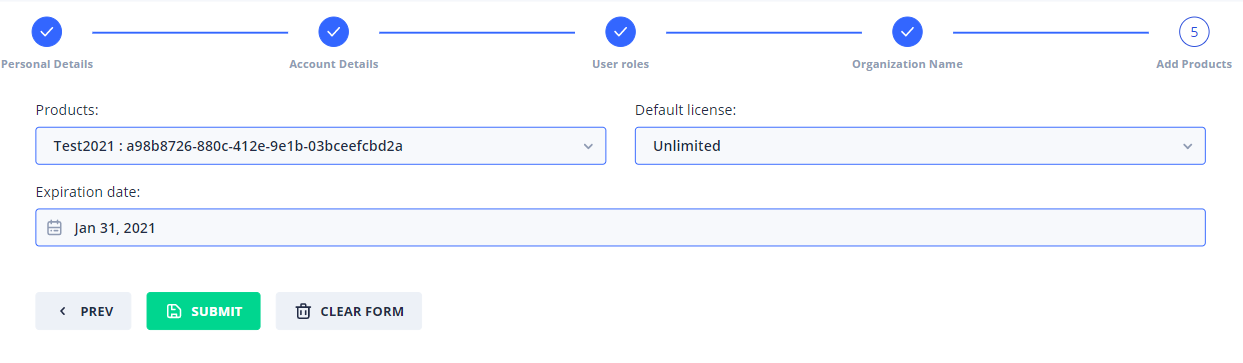
Note
Unlimited means that the user can access the VR application frivolously, until the expiration day.
Go ahead and click the Submit button in the Step 5. to create the user. If everything went smoothly, you should see a green Notification bar at the top right corner.
Your user is now created with a product license attached! Congrats!
MAGES™ SDK Sample App
After the product and the user is set, let’s move on to the SDK Sample App for the integration part with the Login service.
Open your MAGES SDK project in Unity and select the Sample App scene from ovidVRcomp/Operation/Scenes/.
Enable User Login Window
First, we need to make sure the checkbox Enable User Login Window For Build is checked in the Unity Editor.
To do so, expand the Scene Manager component and click on the Scene Graph component.
On the Inspector you can see if the Enable User Login Window For Build checkbox is ticked, as in the figures below:
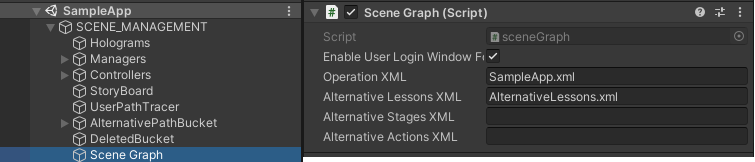
This variable is set in the scenegraph.cs script and will make sure that when you build your VR application,
the Login window prefab will spawn automatically, asking for user authentication before the user can access your application!
Login Flow UI
By default, the prefab of the Login window is set to UILicenseRequestSSO.prefab under Resources/ovidVRres/Operation/Prefabs/UI 2.0/.
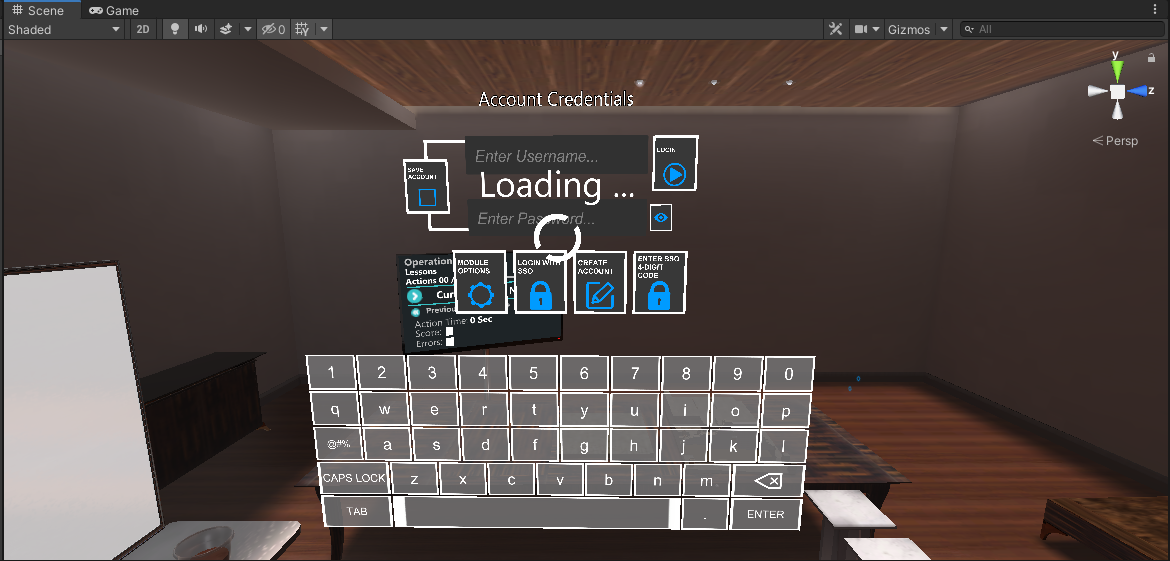
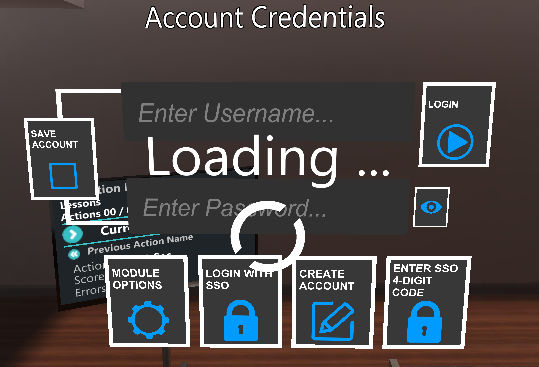
Notice that the UI prefab offers 3 available options for user sign in & authentication.
Authenticate by typing Username & Password and pressing the Login button on the right.
Authenticate by clicking on the Login with SSO button. This will open and point the user’s browser at your Login service, where the user can sign in either with username/password credentials or by clicking on a SingleSignOn button (e.g. Google). Then, the user will be presented with a 4-digit code that has to fill in at the next screen in the picture below.
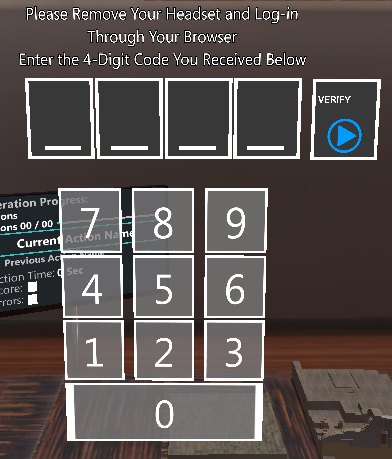
If already at the 4-digit code on the browser, the user can click on the Enter SSO 4-DIGIT Code button on the bottom right to directly enter the 4-digit code.
Client Configurations
Now we need to set the Client configurations to connect Unity with the Login service.
There are two distinct parts that need to be defined, each for a separate purpose:
User Authentication with Username & Password (w/o SingleSignOn)
User Authentication via browser with SSO capabilities
To properly work with the provided UI Login prefab, you need to configure both settings.
However, if you only wish to authenticate users with either of the two methods, you can simply edit the prefab and remove one of the options.
User Authentication with Username & Password
For the first part, you need to open the LicenseRequest.cs script that is under the ovidVRcomp/SDKAddons/ovidVRScripts/License/ directory.
Navigate to the Login function at line 162, it should be identical to the one below:
1 2 3 4 5 6 7 8 9 10 11 12 13 14 15 16 17 18 19 20 21 22 23 24 25 26 27 28 29 30 31 32 33 34 35 36 37 38 39 40 41 42 43 | public void Login()
{
if ((!string.IsNullOrEmpty(userField.text) && !string.IsNullOrEmpty(passwordField.text)))
{
loginButton.ButtonActivation(false);
StartCoroutine(FadeMusic(false));
StartCoroutine(DelayLogin());
}
#if UNITY_STANDALONE_WIN
KeyboardController.SetKeyboardState(true);
#endif
user = userField.text;
pass = passwordField.text;
#if !UNITY_EDITOR
// Login Flow and Checkout User License
ClientConfiguration client = new ClientConfiguration()
{
ClientId = "",
ClientSecret = "",
};
var identityUrl = "";
AuthenticationHandler.Instance.LoginUserWithoutSSO(client, identityUrl, user, pass, "SampleApp", result =>
{
if (result == LoginStatus.Success)
{
Debug.Log("User authenticated");
hasLic = true;
cameraRig.enabled = true;
Destroy(this.gameObject);
}
else
{
Debug.Log("Error authentication");
Debug.Log(result);
Init(true);
}
});
#endif
InterfaceManagement.Get.applicationLanguage = selectedLang;
}
|
The Login function performs the Sign In directly from the UI prefab, with the use of Username & Password.
To do so, it utilizes the Resource Owner Password and Client Credentials (ROPC) grant type as described in the official IdentityServer4 documentation.
Note
ROPC is considered a valid client only for trusted and native (legacy) applications.
You should use it only for your Unity projects, and not for web-based applications, as we do on the Portal.
You need to populate the configuration between lines 19 and 25.
To get you started, we have already defined a similar Client to the Login service inside the Config.cs file at the root directory.
For brevity, we will use the same configuration with ClientId: UnityModuleWithoutSSO.
Danger
Make sure to alter the ClientSecret value to a secure and private one, never use the defaults provided in a Production setting!
We proceed to replace lines 19-25 with the following:
// Login Flow and Checkout User License
ClientConfiguration client = new ClientConfiguration()
{
    ClientId = "UnityModuleWithoutSSO",
    ClientSecret = "unity.module.without.sso.2020",
};
var identityUrl = "https://localhost:44355/";
AuthenticationHandler.Instance.LoginUserWithoutSSO(client, identityUrl, user, pass, "Test2021", result =>
{
    if (result == LoginStatus.Success)
    {
        Debug.Log("User authenticated");
        hasLic = true;
        cameraRig.enabled = true;
        Destroy(this.gameObject);
    }
    else
    {
        Debug.Log("Error authentication");
        Debug.Log(result);
        Init(true);
    }
});
Notice also, the parameter Test2021 we passed in function LoginUserWithoutSSO matches the ProductName of the one we created through the Portal.
Essentially, this function will authenticate the user with given credentials from the prefab’s text boxes (i.e., username and password) and checkout a user license for the product Test2021. Additionally, the underlying service will attempt to retrieve the User Data from the Login Service, that you can further utilize to upload analytics or populate your COOP, etc.
If any of the above steps fails, you will be prompted with an error message, and the Login screen will remain in place.
If the operation was successful, the Login screen will self-destroy and the user shall be able to continue with your module.
User Authentication via Browser (SSO support)
Let’s proceed to configure our settings for the second enriched Login flow that provides us with SSO capabilities.
In the same code file LicenseRequest.cs, navigate to the LoginSSO function, it should be identical to the one below:
public void LoginSSO()
{
    // Login Flow and Checkout User License
    ClientConfiguration client = new ClientConfiguration()
    {
        ClientId = "",
        ClientSecret = "",
        AllowedScopes = ""
    };
    var identityUrl = "";
    var loopbackUrl = "";
    AuthenticationHandler.Instance.LoginUserBrowser(client, identityUrl, loopbackUrl, result =>
    {
    });
    Spawn4DigitUI();
}
When a user clicks on the Login with SSO button, this function will spawn up a browser and point to your Login service for authentication.
The delegate is empty due to the fact that it will only spawn a browser page, and does not need to handle anything on return.
Sequentially, the 4DigitUI will be spawned, waiting for the user to enter his 4-Digit code.
To get you started, we have already defined a similar Client to the Login service inside the Config.cs file at the root directory.
For brevity, we will use the same configuration with ClientId: UnityModule.
Proceed to replace the snippet above with the following:
Danger
Make sure to alter the ClientSecret value to a secure and private one, never use the defaults provided in a Production setting!
public void LoginSSO()
{
    // Login Flow and Checkout User License
    ClientConfiguration client = new ClientConfiguration()
    {
        ClientId = "UnityModule",
        ClientSecret = "unity.module.2020",
        AllowedScopes = "openid profile offline_access IdentityServerApi"
    };
    var identityUrl = "https://localhost:44355/";
    var loopbackUrl = "https://localhost:44355/unity";
    AuthenticationHandler.Instance.LoginUserBrowser(client, identityUrl, loopbackUrl, result =>
    {
    });
    Spawn4DigitUI();
}
When a user logs in through the browser, he will be redirected to the unity endpoint defined in the Login service, which will serve him with the 4-Digit code, as in the example below:
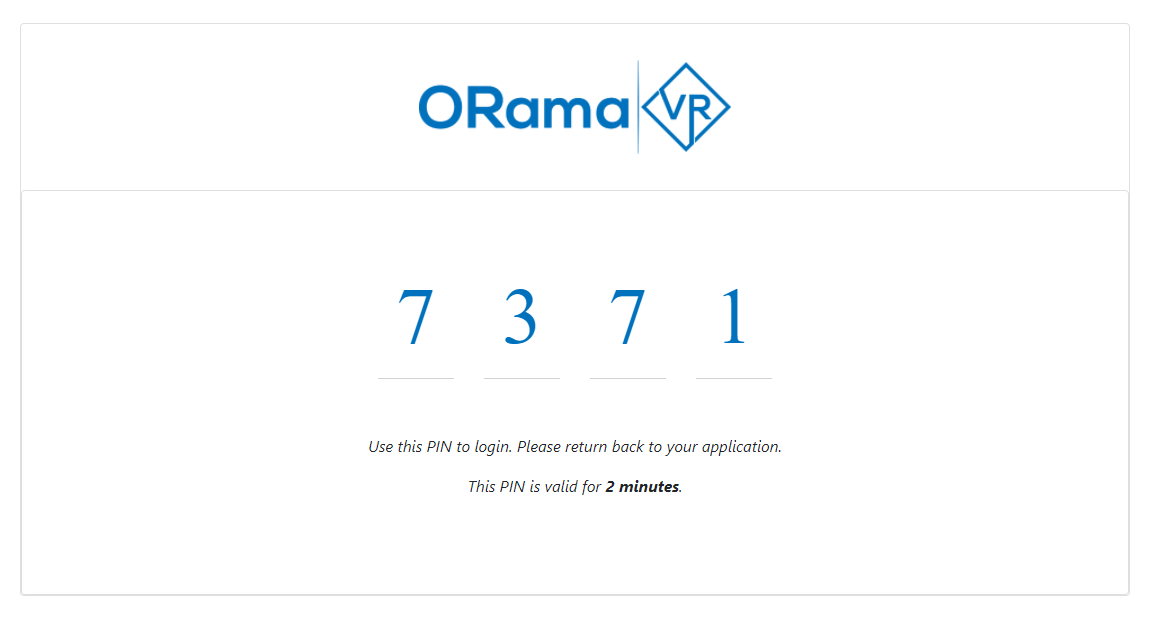
Then, the user heads back to Unity and enter the code.
Note
Each code expires after 3 minutes even though it states 2. This is to handle sloths.
Notice also, that no license checkout happens at this place. The checkout will happen when the user enters the 4-digit code at Unity and clicks on the Verify button.
Final step - 4Digit Code
To complete the flow, we also need to provide configurations for the 4DigitUI.prefab.
Proceed to open the VRNumpadController.cs file under the ovidVRcomp/SDKAddons/VRKeyboard/Scripts/ directory.
Navigate to CheckCode function and it should be identical to the one below:
public void CheckCode()
{
    string code = GameObject.Find("Digit1/Placeholder").GetComponent<Text>().text + GameObject.Find("Digit2/Placeholder").GetComponent<Text>().text + GameObject.Find("Digit3/Placeholder").GetComponent<Text>().text + GameObject.Find("Digit4/Placeholder").GetComponent<Text>().text;

    ClientConfiguration client = new ClientConfiguration()
    {
        ClientId = "",
        ClientSecret = "",
        AllowedScopes = ""
    };
    var identityUrl = "";
    AuthenticationHandler.Instance.CheckoutUser(client, identityUrl, code, "SDK", result =>
    {
        if (result == LoginStatus.Success)
        {
            Debug.Log("User authenticated");
            LicenseRequest.hasLic = true;
            GameObject.Find("UILicenseRequestSSO(Clone)").GetComponent<LicenseRequest>().cameraRig.enabled = true;
            Destroy(GameObject.Find("UILicenseRequestSSO(Clone)"));
            Destroy(GameObject.Find("4DigitUI(Clone)"));
        }
        else
        {
            Debug.Log("Error authentication");
            Debug.Log(result);
            _header.GetComponent<Text>().text = "The 4-Digit Code was incorrect.";
        }
    });
}
To make sure that our application is authenticated and no one else can start posting up 4-digit codes, we use an additional Client for this request.
As before, to get you started, we have already defined a similar Client to the Login service inside the Config.cs file at the root directory.
For brevity, we will use the same configuration with ClientId: UnityInternal.
Proceed to update the following fields like below:
public void CheckCode()
{
    ClientConfiguration client = new ClientConfiguration()
    {
        ClientId = "UnityInternal",
        ClientSecret = "unity.internal.2020",
        AllowedScopes = "IdentityServerApi"
    };
    var identityUrl = "https://localhost:44355/;
    AuthenticationHandler.Instance.CheckoutUser(client, identityUrl, code, "Test2021", result =>
    {
        // redundant
    });
}
And we are done!
But before you go, notice also here that we have to provide the ProductName we are checking out against, as in the Username/Password flow.
Further, the UnityInternal client authenticates/protects an API resource with Client credentials only (i.e., ClientID, ClientSecret), make sure
to check it out on the official IdentityServer4 documentation.
Now you can proceed to build a version of the SampleApp (whether Windows standalone or Android), and you can checkout your users product licenses ;).
Otherwise, keep reading for more.
User Account Manager
By default, and for convenience, we populate the UserAccountManager class with the authenticated user information.
This includes username, the JWT token, and other optional values such as first and last name.
Therefore, you don’t need to acquire any user information throughout the whole application experience. Everything is there for you to utilize as you see fit.
Uploading User Analytics
Last but not least, to upload user analytics we have to configure Scenegraph.cs script to populate your Upload with the info from UserAccountManager described above.
Proceed to open Scenegraph.cs and navigate to line 174.
It should be identical to the one here:
// Configuration properties that regard post Scenegraph initilization such as Analytics, Users go here.
//Configuration.User = new ApplicationUser
//{
//    id = "app-user",
//    firstName = "User",
//    lastName = "User",
//    country = "Devland",
//    userName = "proplayer"
//};
//Configuration.UserPassword = ("default");

// For uploading analytics specify your endpoint and add any extra form fields or headers required from your service.
Configuration.OnlineURL = "";
//Configuration.OnlineURL = "";
Configuration.FormFields = new List<AnalyticsExporter.FormField>
{
    new AnalyticsExporter.FormField { key = "Username", value = UserAccountManager.Get.GetUsername() },
    new AnalyticsExporter.FormField { key = "Operation", value = "SDK" },
};
Configuration.HeaderKeys = new List<AnalyticsExporter.HeaderKey>
{
    new AnalyticsExporter.HeaderKey { key = "Authorization", value = "Bearer " }
};
Configuration.ConfigurePostInitialization(); // Important
Since we will be using the UserAccountManager to upload user analytics, you can proceed to remove the commented lines that create an ApplicationUser:
Ideally, the end result should look like this:
// For uploading analytics specify your endpoint and add any extra form fields or headers required from your service.
Configuration.OnlineURL = "http://localhost:5002/Upload";
Configuration.FormFields = new List<AnalyticsExporter.FormField>
{
    new AnalyticsExporter.FormField { key = "Username", value = UserAccountManager.Get.GetUsername() },
    new AnalyticsExporter.FormField { key = "Operation", value = "Test2021" },
};
Configuration.HeaderKeys = new List<AnalyticsExporter.HeaderKey>
{
    new AnalyticsExporter.HeaderKey { key = "Authorization", value = "Bearer " + UserAccountManager.Get.GetUserToken() }
};
Configuration.ConfigurePostInitialization(); // Important
All we did is specify the API endpoint, set the Operation name, in this case the Product we created earlier, and finally, use the authenticated user JWT to authenticate against the Login service.
Recall that AnalyticsAPI is connected with Login to work properly. Therefore, tokens are delegated to the Login service for authorization.
This is particularly useful for making authorized requests on behalf of the user.
Note
In a full playthrough with an authenticated user, if Analytics are uploaded correctly, you should be able to see them via the Web Portal.
This is everything required to integrate Unity with the Web Services seamlessly.
Next step is to actually build your application and test it!
Happy coding!