Tool Action
The Tool Action is used when we need to use a tool to complete a specific task. Examples of tool Actions may be a skin incision with the scalpel, or the cauterization of fat using the cautery.
It is important to mention here that the Tool Action has a lot of similarities with the Use Action. Both Actions need a collider and a specific object to complete a task. However, the only difference is that Tool Actions needs a tool whereas the Use Action is implemented with just a prefab.
Note
Tools are unique entities in MAGES SDK. They are spawned at the beginning of each scenario and in many cases support additional functions like turning on/off.
In this tutorial we will implement the drilling of the femoral canal.
To generate a Tool Action you need:
A tool
A tool collider
A hologram (optional)
The tool
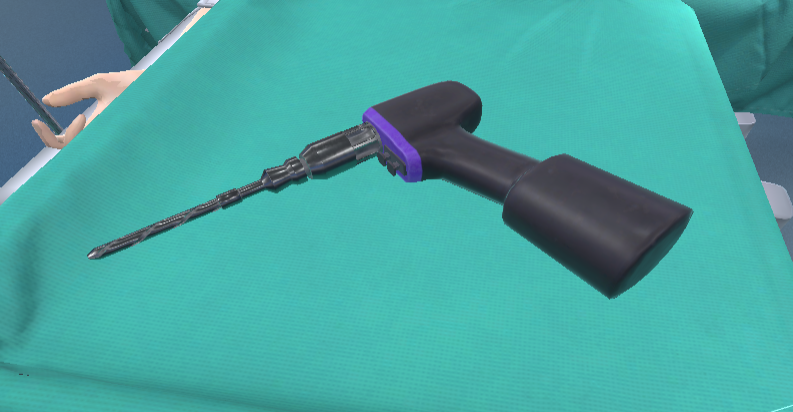
We will use the drill as our tool.
Tools difeer from other prefabs in the MAGES SDK since they have a refence saved in the ToolsEnumDLL.dll. This dll file is used to store the tools as data types to use them later in Action scripts.
In our case the Drill tool is already provided by the MAGES SDK as a part of the standard tool assets.
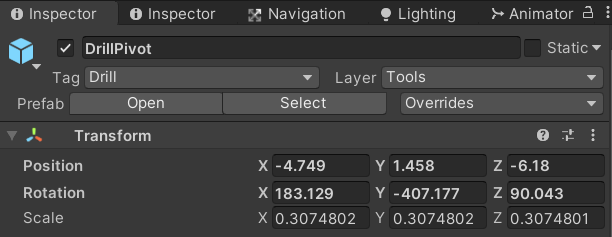
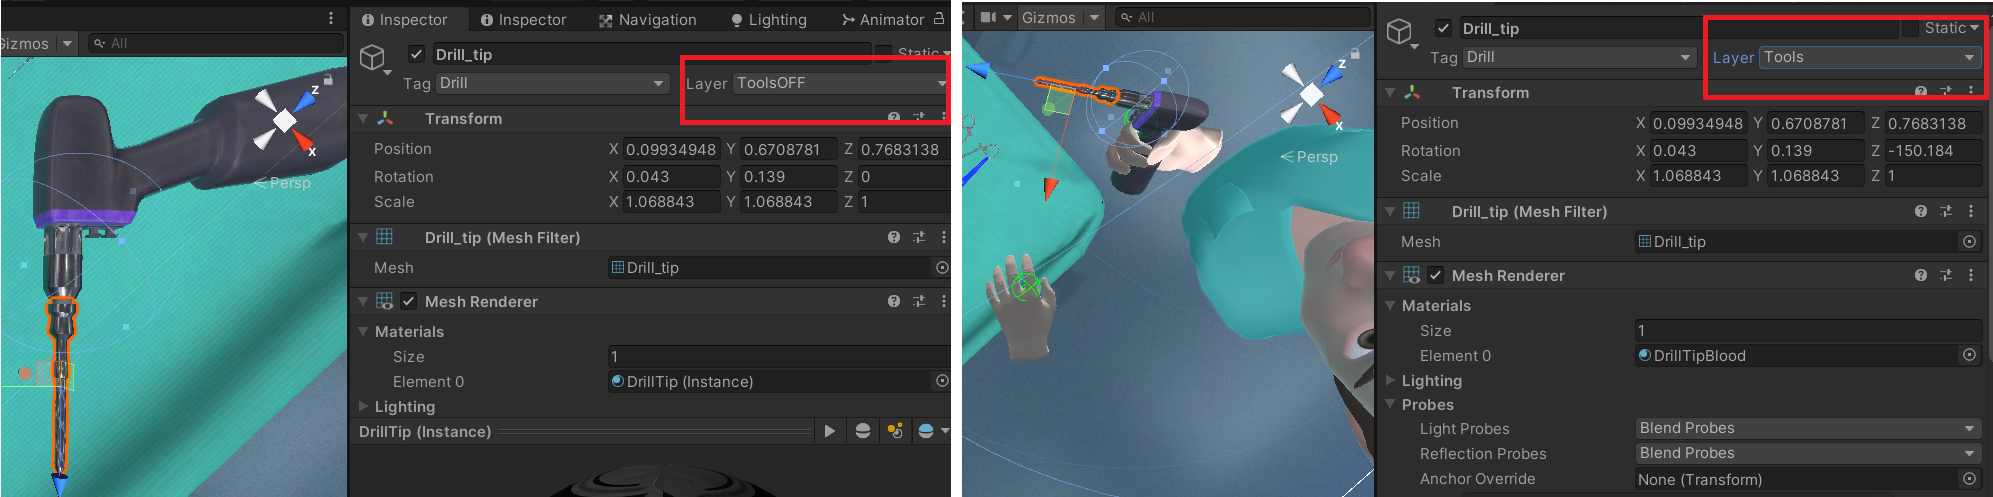
You can see in the inspector, the tool has its own tag (Drill) and Layer (Tools).
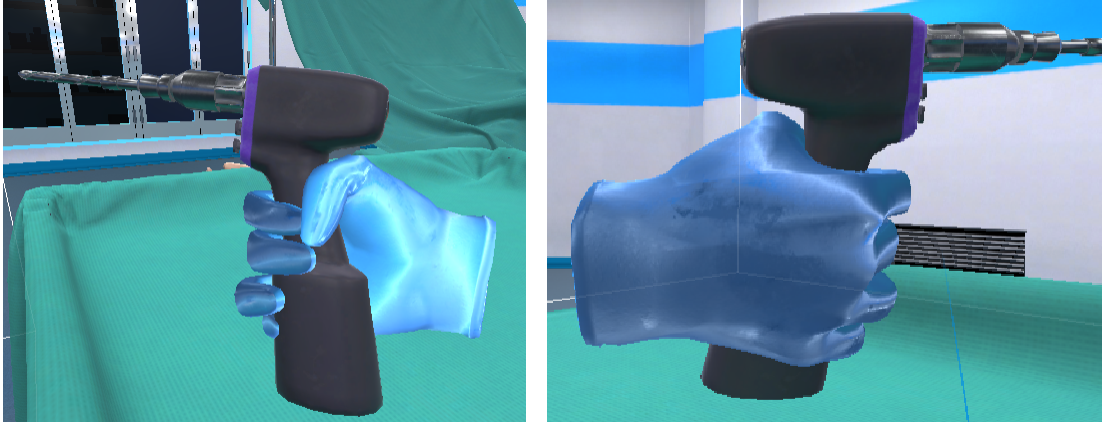
For all the tools it is recommended to add the HandPoser component with the proper grab postures to improve the interaction with the tool.
You can read here a detailed tutorial on how to properly setup hand postures.
Drill gesture hands
The drill is not a static tool. To operate it you have to press the dill button. In MAGES SDK we have implemented this behavior in the GestureHands base class.
Developers can inherit from this script, to generate their own tool behaviors. For example if you need the cautery to emit smoke particles when turned on, you should implement a CautreyGestureHands script and inherit from the GestureHands.
Then you can code the tool’s behavior.
In our scenario we need the drill tip to rotate when operating and change the rotating tip material to a bloody texture when inside the femoral canal.
The first step is to write the DrillGestureHands script and attach it to our drill tip gameObject as showed below.
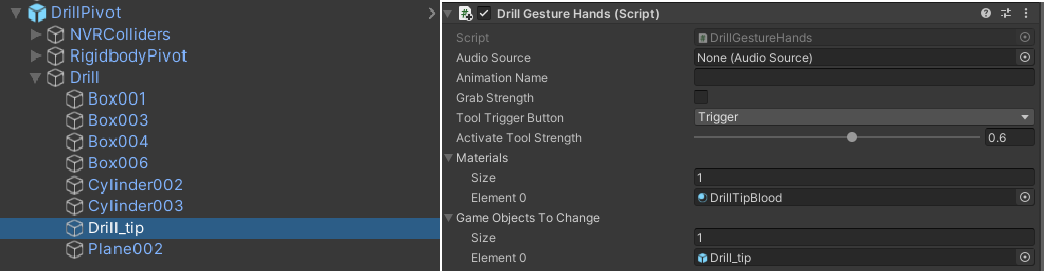
Below you can see a snippet from the DrillGestureHands script.
public class DrillGestureHands : GestureHands {

    public Material[] materials;
    public GameObject[] gameObjectsToChange;

    private MAGESInteractableItem toolInteractable;

    public void SetRotatingParts(params GameObject[] GO)
    {
       rotatedParts.AddRange(GO);
    }

    public override void EndToolGesture()
    {
        GetComponent<Renderer>().material = materials[0];

        base.EndToolGesture();
    }

    private void Start()
    {
        fullRotation = true;
        SetRotatingParts(gameObject);

        toolInteractable = tool.toolGameobject.GetComponent<MAGESInteractableItem>();
    }

    public void ChangeToolMaterial(int _materialNumber)
    {
        // If tool is not grabbed and called to change to bloody material - ignore
        if (!toolInteractable.IsAttached && _materialNumber == 1)
            return;

        if (gameObjectsToChange.Length != 0 || materials.Length != 0)
        {
            foreach (GameObject gO in gameObjectsToChange)
                gO.GetComponent<Renderer>().material = materials[_materialNumber];
        }

    }
}
You can override the virtual functions from the GestureHands to implement a custom tool behavior.
In our case we added the ChangeToolMaterial and the SetRotatingParts methods. The first one will change the texture of the tip with the assigned bloody material while the second one will rotate the drill tip upon operating the tool by pressing the trigger button.
Save your tool into a prefab.
As mentioned before all the tools are spawned from the beginning of the operation. This is mainly because we need the tools to be present constantly to the virtual environment.
The best way to spawn the tools is at the beginning of our scenario, in the Perform() method of the OperationStart Action.
Below there is a method which is called at the Perform() function in OperationStart.
private void SpawnNetworkPrefabs()
{
PrefabImporter.SpawnActionPrefab("Medical/Lesson0/Stage0/Action1/PliersPivot");
PrefabImporter.SpawnActionPrefab("Medical/Lesson0/Stage0/Action1/ScalpelPivot");
PrefabImporter.SpawnActionPrefab("Medical/Lesson0/Stage0/Action1/CauterizerPivot");
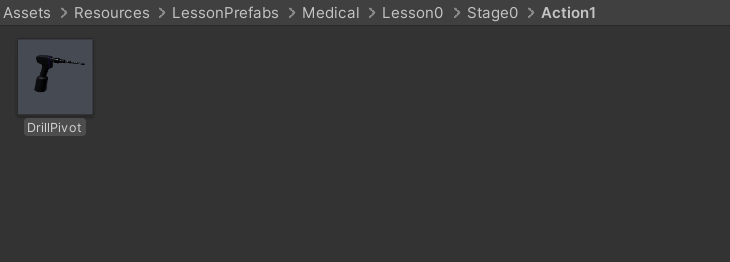
PrefabImporter.SpawnActionPrefab("Medical/Lesson0/Stage0/Action1/DrillPivot");
}
As you can see all the tools are spawned in this way.
Warning
Pay attention to the tool’s layers when operating the drill. The Drill_tip gameObject is initially registered with the layer toolsOFF. This layer will not trigger the tool collider. Once turning on the drill, the tip changes layer to Tools to trigger the tool collider.
The tool collider
To generate the tool collider navigate to MAGES/Create Prefab/Tool Collider and the tool collider prefab template will appear.
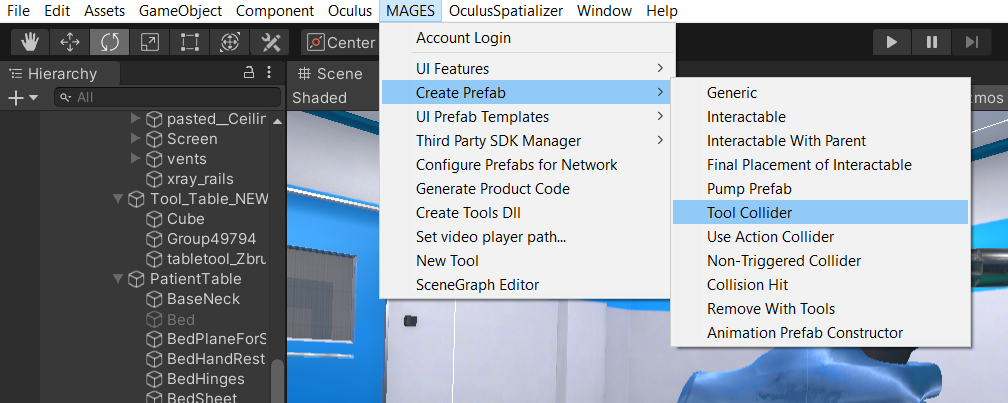
You will see a New_Tool_Collider_Prefab object in the scene. This is the template for our tool collider.
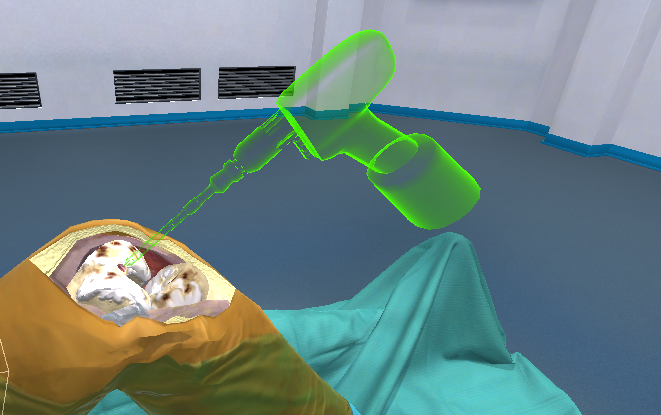
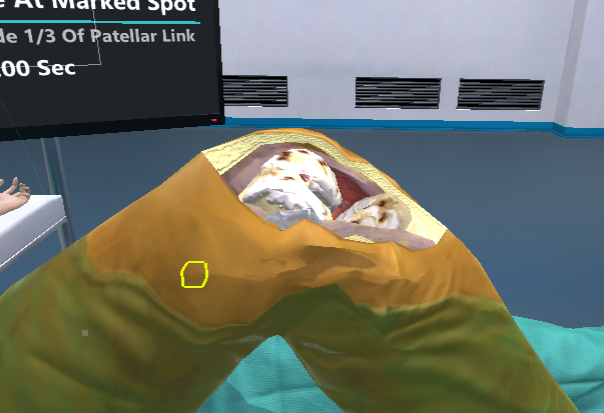
In this scenario we need use the drill to open the intramedullary canal on the patient’s femur. To implement this behaviour, we need to place the tool collider at the bottom of the femoral canal to trigger the collider only when the drill is in the proper depth.
It is important to make some configuration to the ToolColliderPrefabCosnstructor script which is attached to the tool collider object.
Make sure you select the proper tool that triggers the tool collider, in our case the drill. The TimeToUse variable sets the time we need to stay in contact with the collider to Perform the Action.
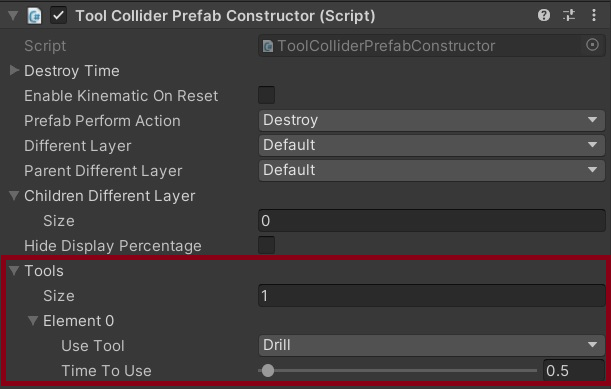
The drill needs to stay in contact with the tool collider for 0.5 second to perform.
Note
Of course we need physical colliders to form the femoral canal in order for the drill navigate properly to the canal

The image above shows the steps of this Tool Action. We take the drill (the tip is still clean) and drill the femoral canal. When we are a drill’s tip length inside the canal we trigger the tool collider and the Action is performed. Additionally, when touching the interior of the femoral canal, the drill tip changes material into a bloody one.
Action Script
The script below initializes the interactable prefab and spawns the hologram as well.
using MAGES.ActionPrototypes;

public class DrillKneeAction : ToolAction
{
    public override void Initialize()
    {
        SetToolActionPrefab("Medical/Lesson1/Stage0/Action0/DrillCollider", MAGES.ToolManager.tool.ToolsEnum.Drill);

        SetHoloObject("Medical/Lesson1/Stage0/Action0/Hologram/DrillHolo");

        base.Initialize();
    }
}
The SetToolActionPrefab method takes two arguments.
The drill collider
A ToolsEnum enumerator with the assigned tool to trigger our collider
This is why we need the tools defined in the ToolsEnumDLL, in order to use them as data types in Action scripts.
Finally, we add an animated drill hologram showing the proper movement.