Download and Import MAGES SDK
Before you start
Latest stable release of MAGES SDK runs on Unity 2019.4.10f1 LTS. Login using your developer account credentials.
Warning
Make sure you install this specific version otherwise you may encounter incompatibilities between internal and 3 rd party packages.
Import MAGES SDK
Before you import MAGES SDK you have to create a new empty Unity project.
As of version 3.2.1, MAGES SDK utilizes the Unity Universal Render Pipeline..
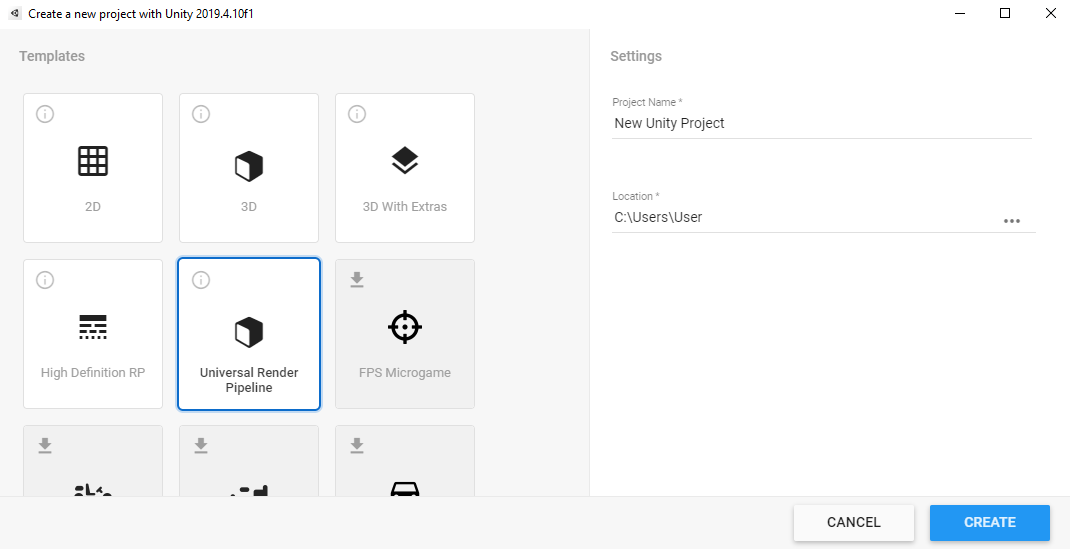
It is highly recommended to start an empty Unity project by selecting the Universal Render Pipeline preset, as shown in the image below:
Warning
Importing the package on an existing project will overwrite your project settings and might induce runtime errors.
Package Import
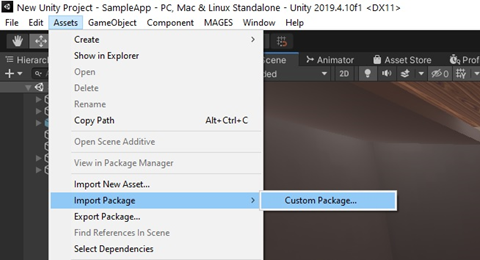
From Unity Editor navigate to Assets on the top menu, select Import Package/Custom Package and open the MAGES3.1 package as shown in the figure below.
Two pop-up windows will appear on screen. One regarding project settings and one for files included in the MAGES package. Make sure you import both!
Note
The process to import the project on MacOS is the same.
Import Existing MAGES Project to Different Platform
A MAGES SDK project can easily be transferred between MacOS and Windows platforms.
To transfer such a project from MacOS to Windows, for instance, kindly follow the steps below:
Save and close your Unity project on your MacOS machine.
Locate the project folder, and compress it for easier transfer.
Note
In order to compress a folder on MacOS, right click on the folder and then select “Compress {Folder Name}”.
Transfer the compressed folder to your target Windows machine.
Decompress the folder.
Open Unity Hub, and click ADD, located on the top right corner of the Unity Hub window.
Navigate to the decompressed project folder and select it.
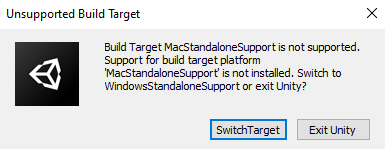
Note
A window will appear, notifying that the Mac OS X target platform is not supported. Simply click Switch Target.
Once the importing is finished, Unity will open the project and you can continue your work.
Note
Your SDK license login account will be retained between the platforms (in case you did not logout before the project transfer). Since Windows platform supports VR, you can add VR support to your project while on Windows.