SampleApp
Loading the Scene
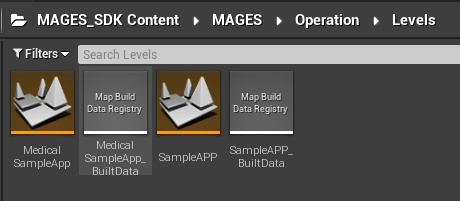
After you have successfully installed the plugin, from the Content Browser navigate to MAGES_SDK Content > MAGES > Operation > Levels and open the SampleApp level.
SteamVR Setup
MAGES_SDK uses SteamVR for input, and automatically configures the most essential input bindings upon plugin startup; but you will need to apply those input bindings to the SteamVR plugin:
In the Project Settings window, navigate to the SteamVR plugin settings (under Plugins). You should see four buttons:
Regenerate Action Manifest
Regenerate Controller Bindings
Reload Action Manifest
Launch SteamVR Bindings Dashboard
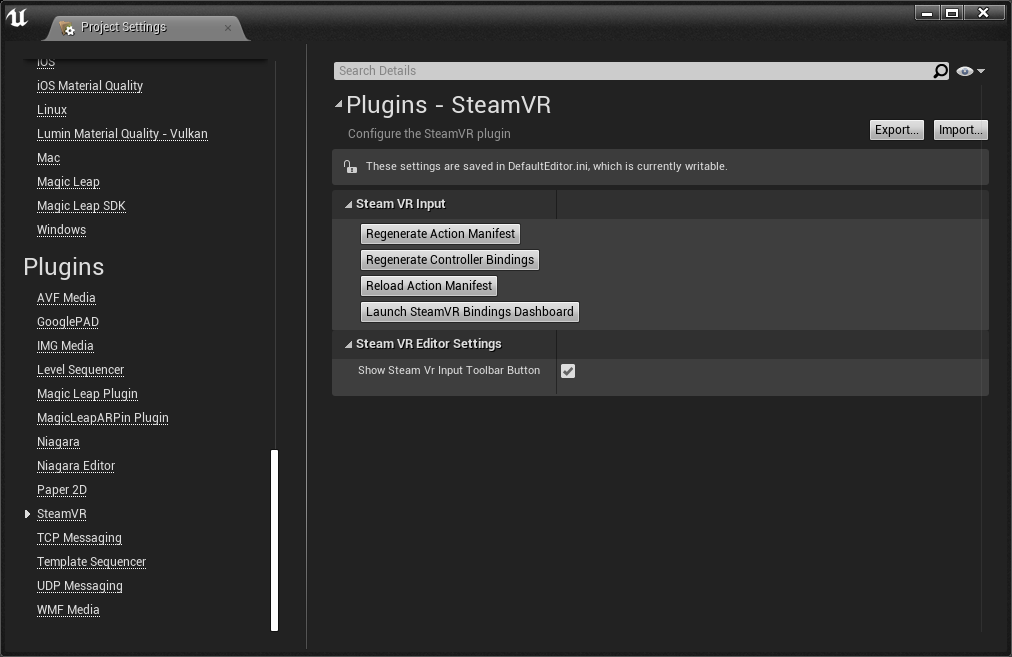
Press the first three buttons to apply the input settings.
Note
In the future, you will only need to do this when the project’s input bindings have been changed.
Collision Settings
MAGES_SDK uses two custom collision presets and one custom trace channel for UI interaction. In the “Project Settings” window, navigate to the “Collision” section.
In the “Trace Channels” section, create a new Trace Channel named “MagesUIInteraction”, with the default response method set to “Ignore”
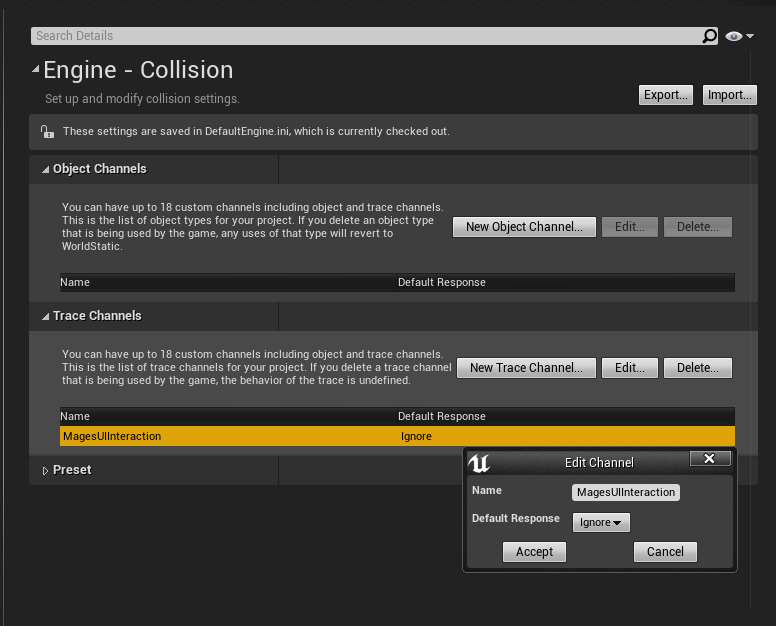
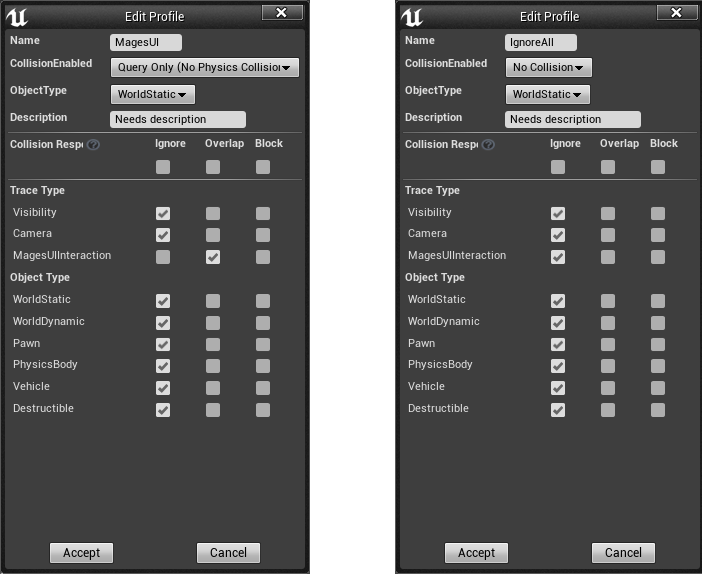
Expand the “Preset” section, and create two new presets, “MagesUI” and “IgnoreAll”. The configuration for both is shown below:
Default Project Settings
From the MAGES Menu, click on “Apply Default Settings”. This will configure the project with some good default settings regarding rendering and performance. You will have to restart the editor in order for these changes to be applied.
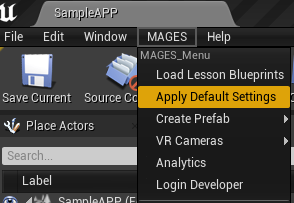
After the editor has been restarted, in the same manner, click on “Load Lesson Blueprints”; this will ensure that the required shaders have been compiled, in order to have a smoother experience while playing inside the editor.

SDK License
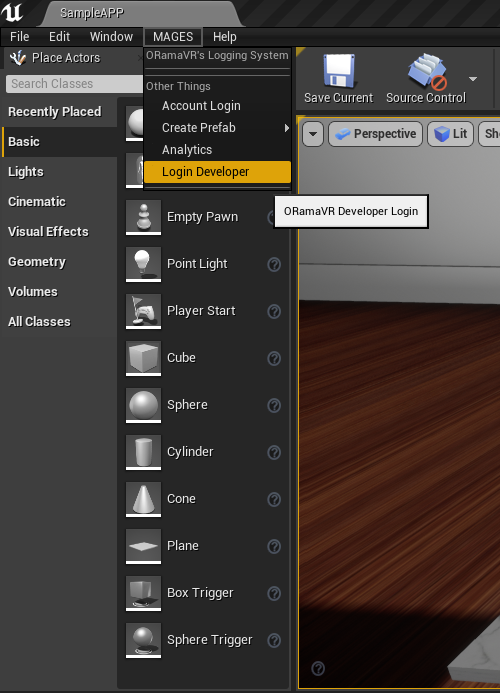
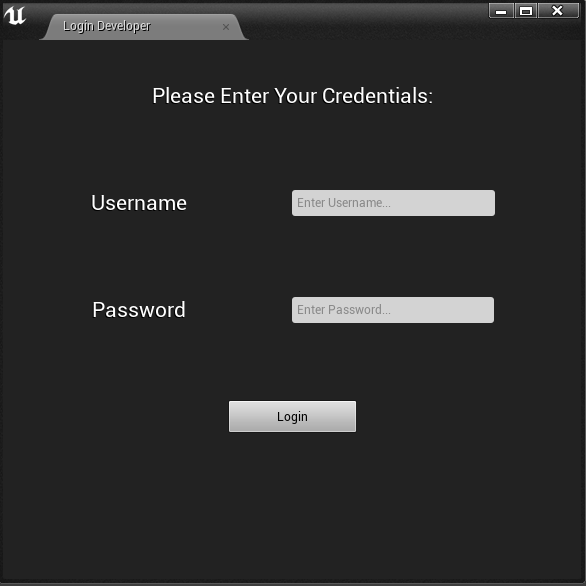
Before you hit the Play button, make sure you have checked out a valid SDK license. To do so, open the MAGES tab on the top menu and click on the Login Developer option.
Controls & Movement
In the table below you can find the controls for every supported platform and headset.
Oculus Touch |
VIVE |
Windows Mixed Reality |
|
|---|---|---|---|
Grabbing Objects |
Grip Button |
Grip Button |
Grip Button |
UI Selection & Usage of Tools |
Trigger Button |
Trigger Button |
Trigger Button |
Toggle Movement |
Press Left Touch Thumbstick |
Press Left Touch Thumbstick |
Press Left Touch Thumbstick |
Positional/Rotational Movement |
Left/Right Touch Thumbstick |
Left/Right Trackpad |
Left/Right Thumbstick |
Toggle In-game Options |
Press Right Touch Thumbstick |
Press Right Touch Thumbstick |
Press Right Touch Thumbstick |
Next/Previous Step |
X,Z Keyboard Button |
X,Z Keyboard Button |
X,Z Keyboard Button |
Multiplayer setup with Photon
MAGES SDK supports Photon networking as the default networking API. For cooperation/multiplayer mode you need to setup Photon (playing in the same room with other players).
First, you need to create an account at Photon.
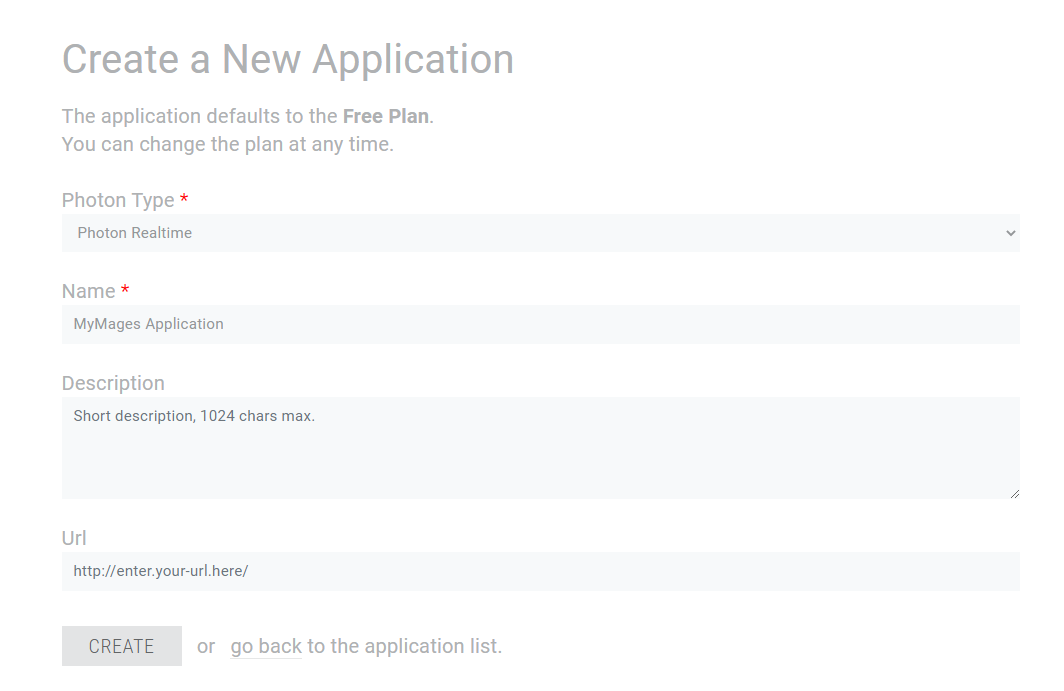
After successful registration, go to the Photon Dashboard and click the CREATE A NEW APP button.
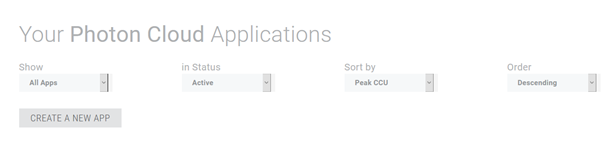
Select Photon Realtime from the Photon type dropdown, give a name to your application and click the CREATE button.
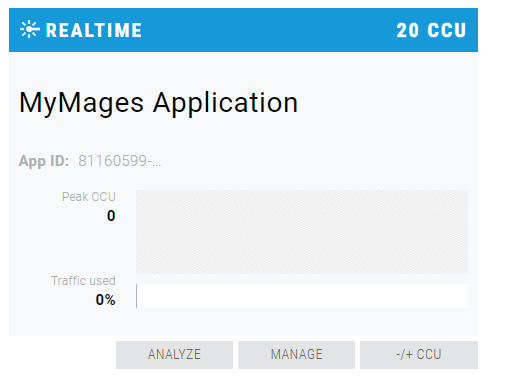
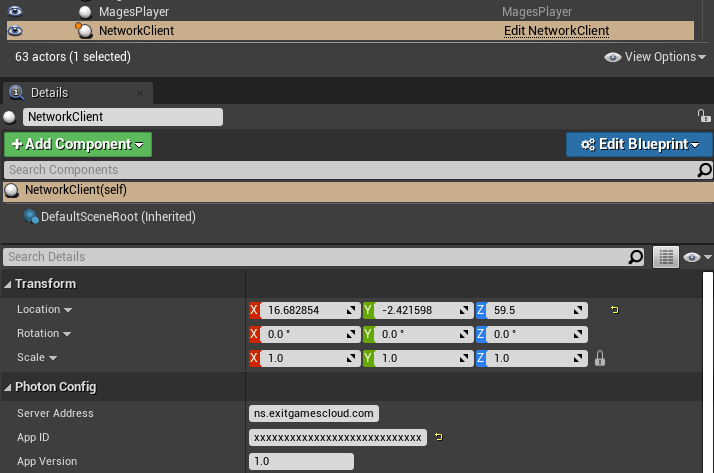
Navigate back to the main dashboard page and you will see your new PUN application. You need to copy the App ID. Open the Unreal project and in the world outliner find the NetworkClient actor. In the Photon Config section paste the Photon App ID.
Note
Click the code next to the App ID to reveal the full key.