MAGES Setup Script
In this section we will cover how you can configure –via code– certain settings of your application (mostly runtime).
Let’s start with some code.
1 2 3 4 5 6 7 8 9 10 11 12 13 14 15 16 17 18 | void Start()
{
// Note: The order is important.
// Here you can specify certain configuration properties that concern the following: Paths, ApplicationSettings.
MAGESSetup.Get.ProductCode = MAGESSetup.Get.productCode; // This should only change on build! On Unity.Editor it must remain as it is
MAGESSetup.Quality = QualityConfig.High;
MAGESSetup.Region = Region.Auto;
MAGESSetup.Difficulty = UserAccountManager.Difficulty.Easy;
OperationXML = MAGESSetup.Get.OperationXML == null ? null : MAGESSetup.Get.OperationXML.name + ".xml";
MAGESSetup.SetXmlName(OperationXML);
MAGESSetup.Get.ConfigurePreInitialization(); // Important
initializeSceneGraph();
}
|
The above snippet is the Start() MonoBehavior function override of sceneGraph.cs, a script that can be found inside the SampleScene under the SCENE_MANAGEMENT gameObject.
Warning
Without sceneGraph your application won’t load!
As you can observe from the snippet above, MAGESSetup is another script that is responsible for setting certain properties for your application.
In general, MAGESSetup offers two crucial methods:
MAGESSetup.ConfigurePreInitialization();
MAGESSetup.ConfigurePostInitialization();
From this we can deduce three main points:
Everything related to application settings, paths and storyboard is set prior to
MAGESSetup.ConfigurePreInitialization();
initializeSceneGraph()is invoked straight after to load the corresponding StoryboardEverything related to users and analytics (e.g., your own user management) is set after sceneGraph has initialized via
MAGESSetup.ConfigurePostInitialization();
Warning
Do not change the sequence/structure, or you will almost certainly experience unexpected behaviors!
By default MAGESSetup.cs has certain values set which you can inspect by opening the script.
Pre-Initiliazation
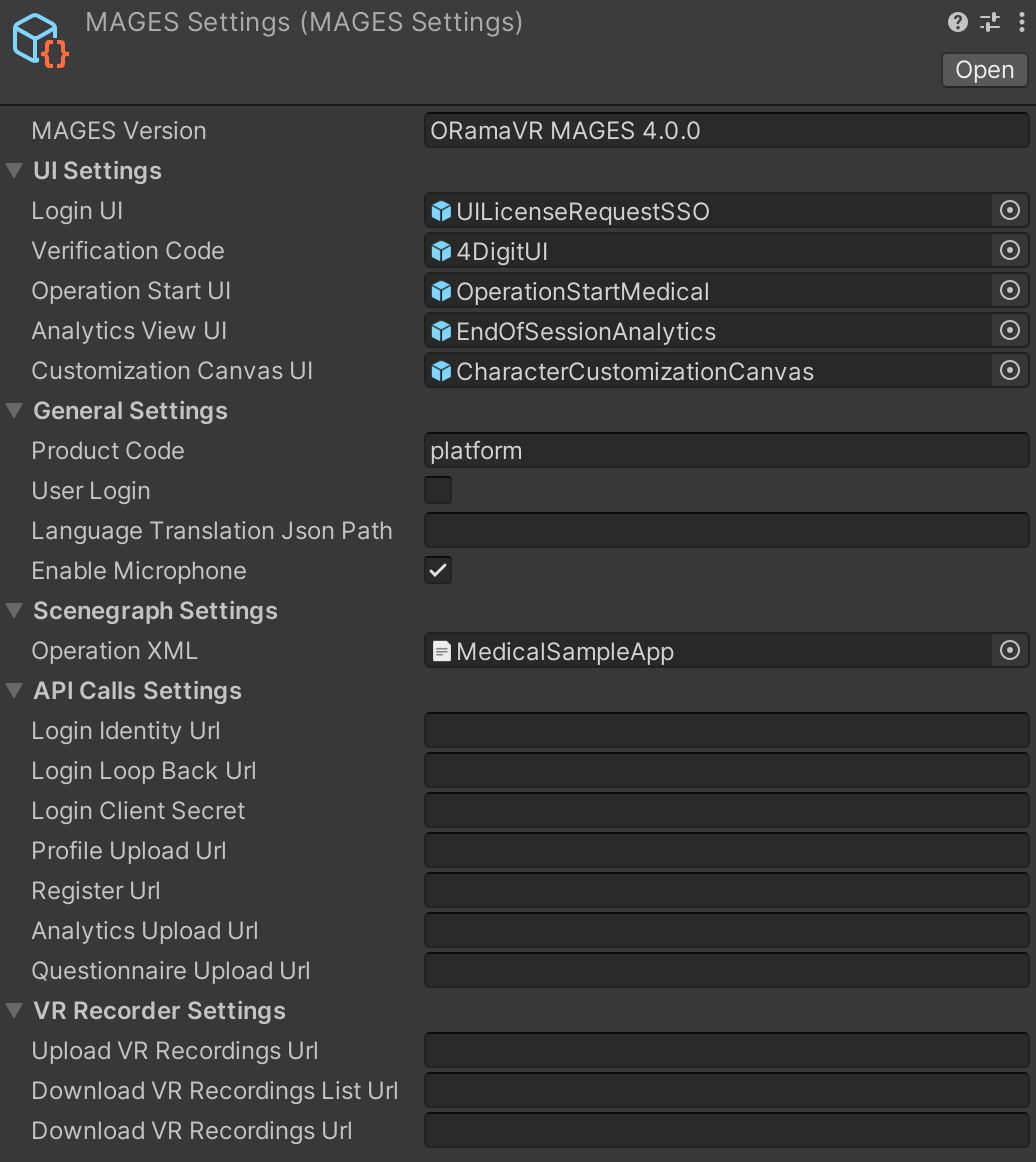
The first step is to set the Product or Application name via the
stringpropertyMAGESSetup.Get.ProductCode;.By default, ProductCode is set to “platform” for the Unity Editor.
Warning
If you are running inside the Unity Editor do not change the ProductCode, otherwise, your application will crash.
The ProductCode gets appended to the path under Documents
{User}/Documents/ORamaVR/Story/{ProductCode}where your application will be looking to load the Storyboard, in built-mode (i.e., when you have produced an executable).However, in the Unity Editor, Storyboard is by default looking under
/Assets/Resources/Storyboard/platformto load your storyboard.Then, you can proceed to set the Quality settings through the
enumpropertyMAGESSetup.Get.QualityConfig;.These are the graphic quality settings that are set into Unity.
The
enumtakes one of the following three values[Low, Medium, High]. Default is set toHigh. However, in certain builds (e.g., Android) you might need to lower the quality.Afterwards, you can specify a region for your COOP (–Multiplayer) servers by setting the
enumpropertyMAGESSetup.Get.Region;.Default is set to
Auto.Other available options are:
[UnitedStates, Europe, Signapore].Further, you can configure the difficulty of your application towards the end-user behaviors through the
enumpropertyMAGESSetup.Get.Difficulty;.Default value is set to
Easy.Other available options are:
[Medium, Hard].Note
Difficulty utilizes the
enumfromUserAccountManager.Difficulty.Finally, you need to set the names of the XML files your Storyboard will load from.
To do so, invoke the function
MAGESSetup.Get.SetXMLNames(string arg1, string arg2, string arg3, string arg4);.You can configure these values from the Unity Editor/Inspector under
SCENE_MANAGEMENT/Scene GraphgameObject.Empty/Null values for AlternativeLessons, AlternativeStages and AlternativeActions are allowed.
initializeSceneGraph()
After you have set all pre-initialization options, initializeSceneGraph(); will run and load your Storyboard and everything related to your specified settings.
Post-Initiliazation
You can proceed to set custom properties for your analytics.
For instance, the OnlineURL where your user analytics will be uploaded, alongside with custom
FormFieldsand potentially customHeaderFieldsfor token authentication (if your platform supports that).In addition, you can also set the local file paths your analytics will be exported to.
A full list of available Analytics configurations is provided in the code snippet below.
#region Analytics
public static string EditorPathToAnalytics { get; set; }

public static string OverrideLocalWindowsPath { get; set; }

public static string OverrideLocalAndroidPath { get; set; }

public static string OnlineURL { get; set; }

public static List<AnalyticsExporter.FormField> FormFields { get; set; }

public static List<AnalyticsExporter.HeaderKey> HeaderKeys { get; set; }

#if UNITY_ANDROID
    public static string PathToAnalytics { get; set; } = "/data/data/" + PackageName + "/Analytics/";
#elif UNITY_STANDALONE_WIN
    public static string PathToAnalytics { get; set; } = "";
#endif
#endregion
Note
Alternatively, you can set important information for your project through the MAGESSettings.asset.