Xray Monitor
In this tutorial we will demonstrate how to develop a real-time X-ray monitor.
This mechanic is useful in scenarios that you need to have a real-time visualization of the human skeleton to proceed with a particular Action or come up with a conclusion regarding the patient.
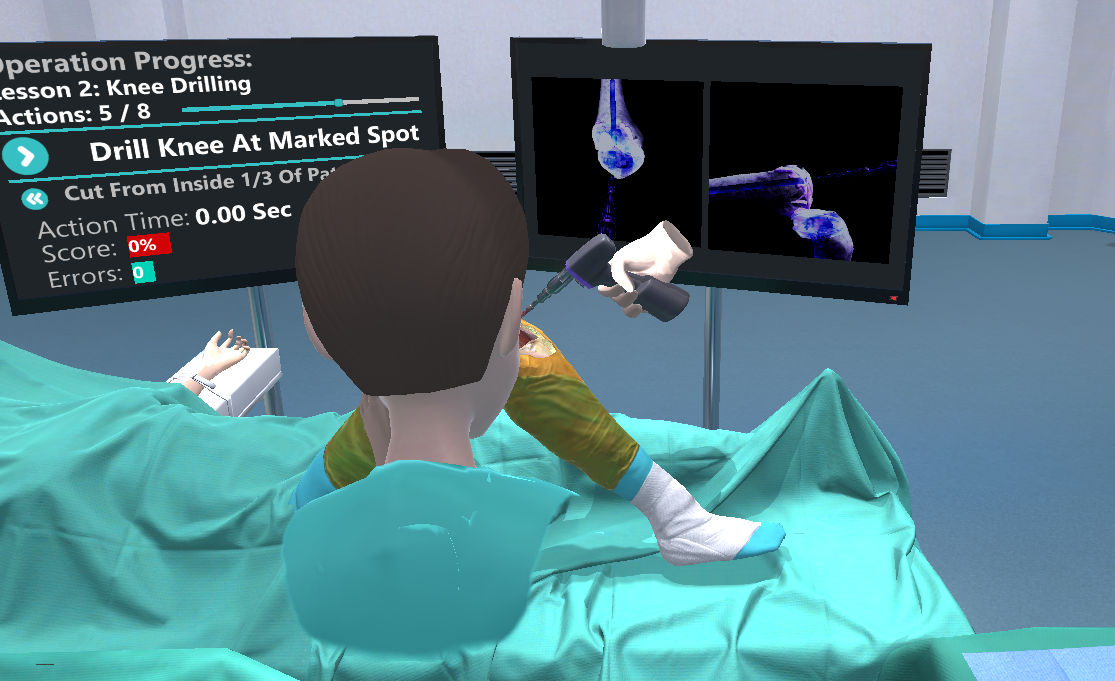
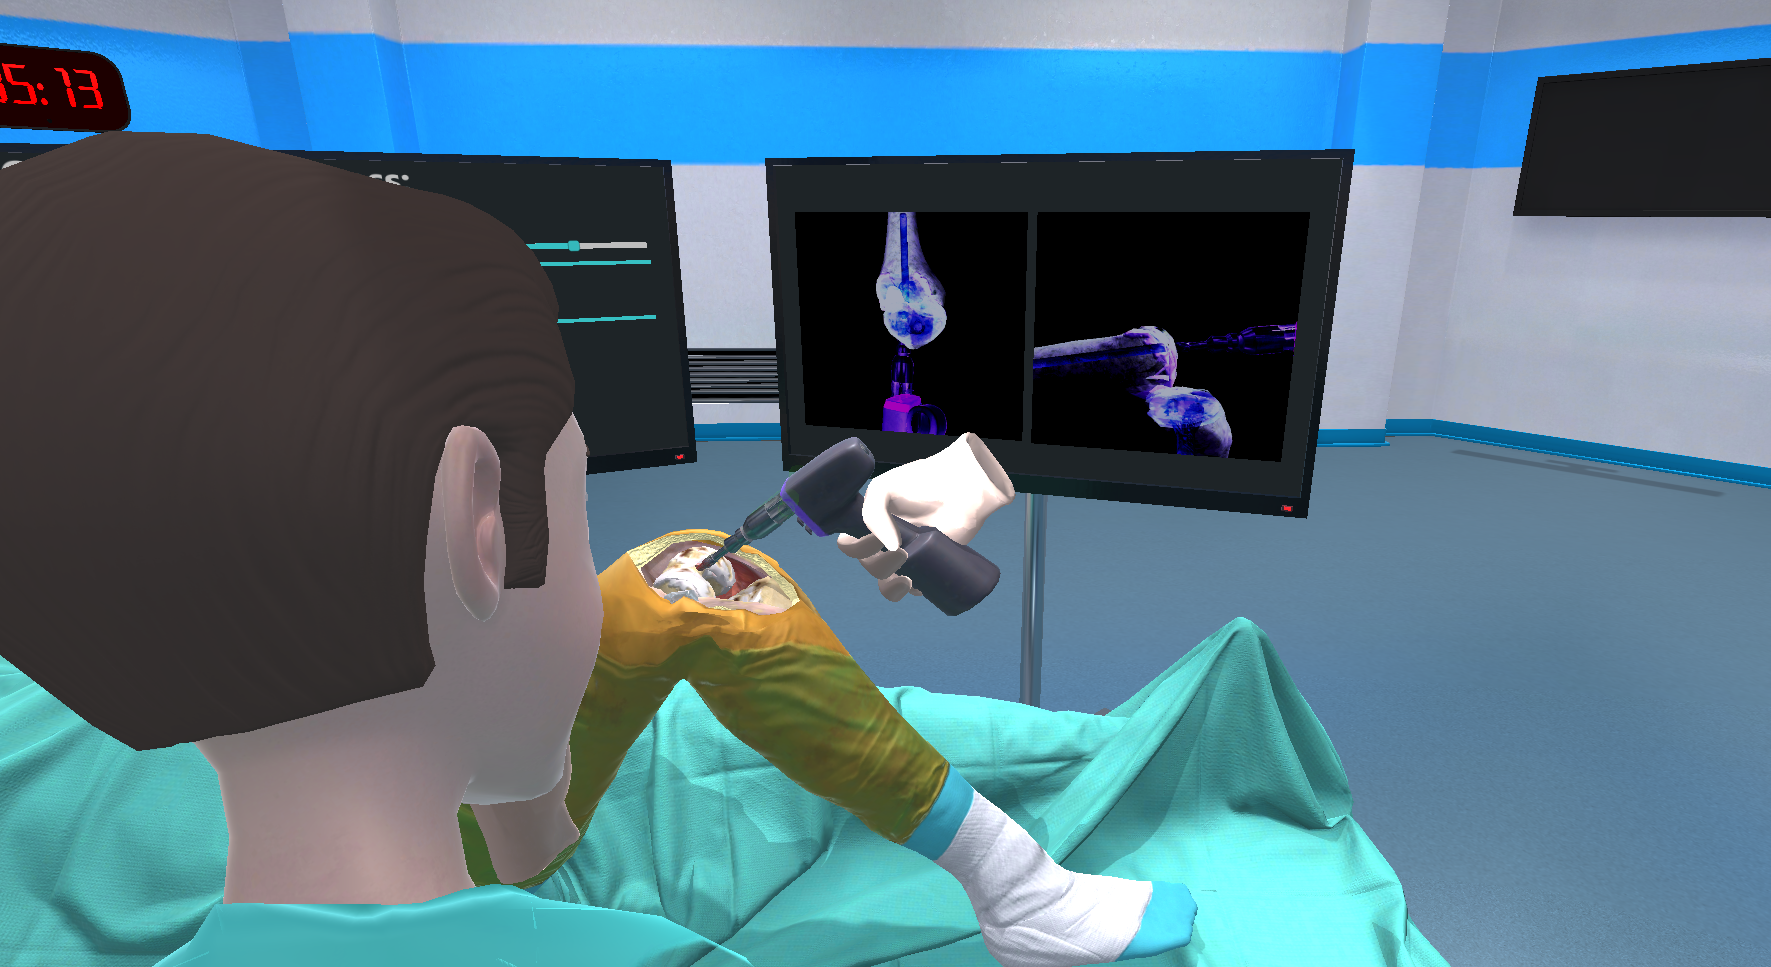
In this example, we will extend the MedicalSampleApp scenario by adding a real-time X-ray monitor to provide guidance during the femur drilling.
In short, we will do the following steps:
Attach two cameras on femur to follow the knee movement.
Make the cameras render only the bone and the tools (using layers).
Set the cameras to render on render textures.
Set the render textures as Albedo textures on a material.
Attach the materials on two planes (X-ray monitors).
Apply post process effects to the cameras.
Setting the scene
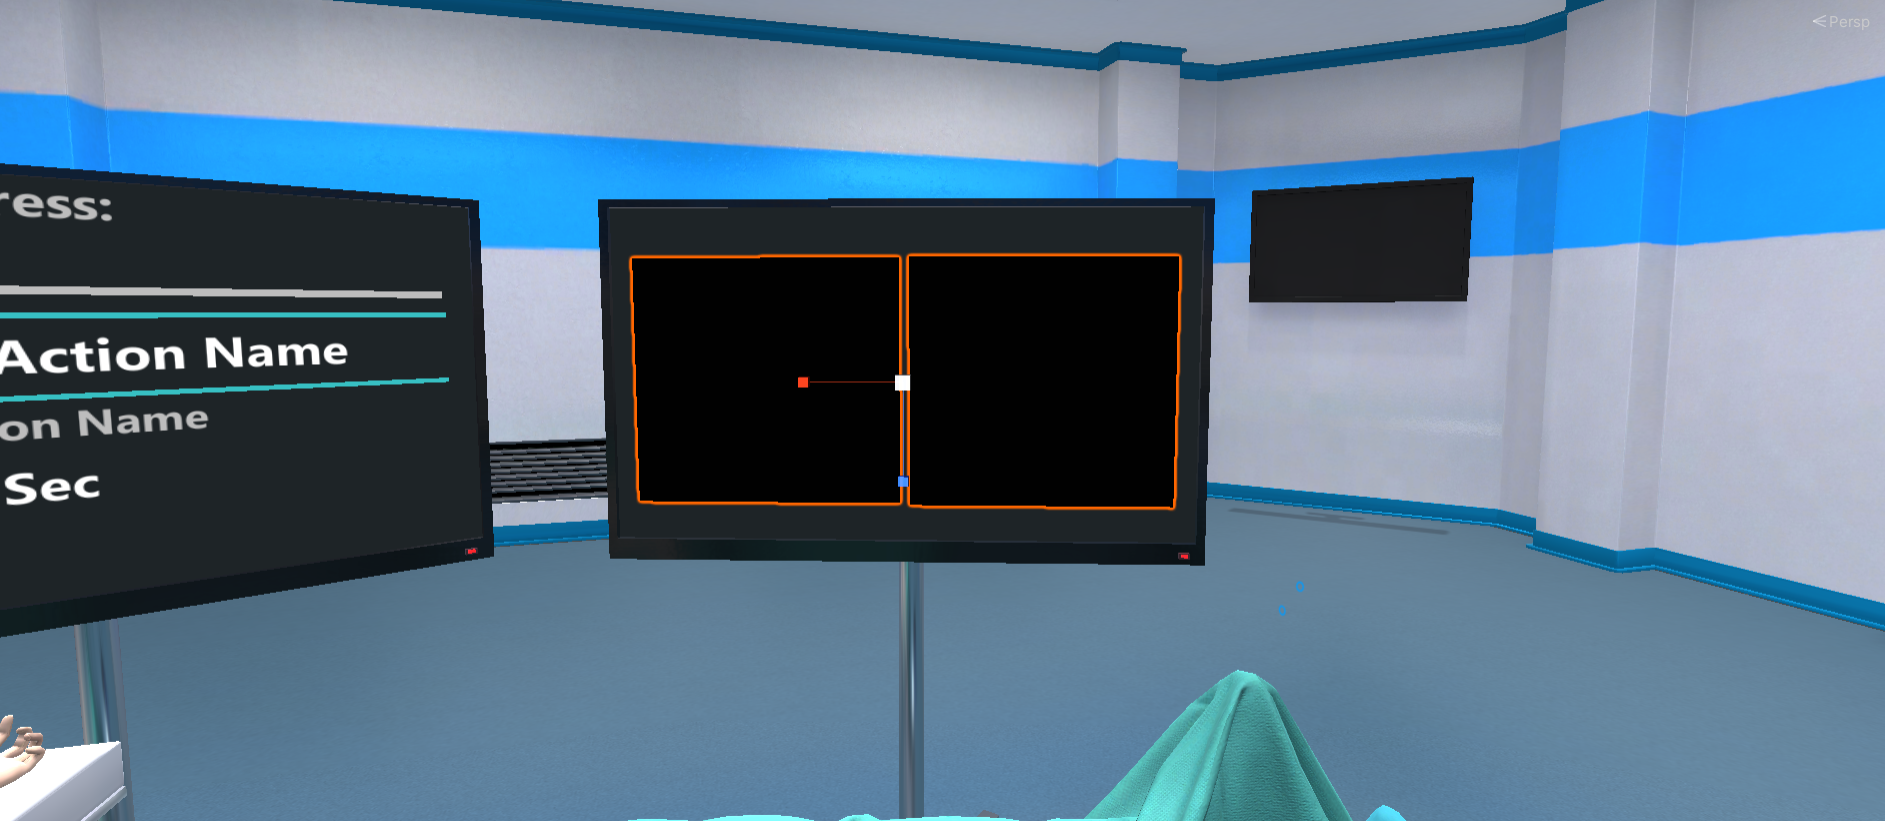
We begin by setting the scene. We need an additional monitor to visualize the X-ray. Furthermore, we duplicate the Action’s monitor, remove the texts (Action names, score etc) and create two planes that will render the two X-ray visualization from two different angles. Below you can see the xray monitor:
The X-ray cameras
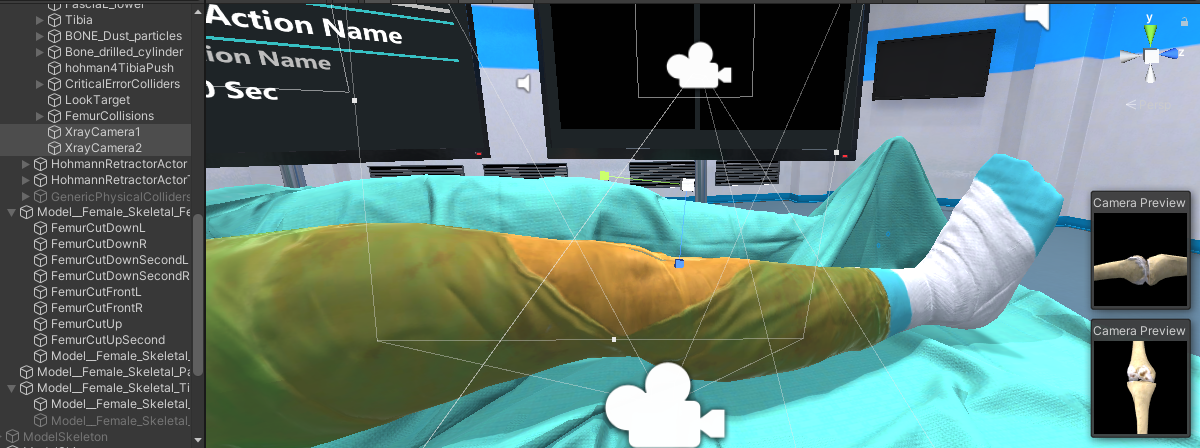
The next step is to generate two cameras that will render the X-ray image.
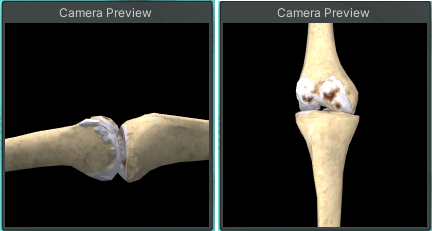
Here you can see the two cameras we created (XrayCamera1 and XrayCamera2). For our scenario we attached both cameras to the Femur joint to follow the movement of the femur when rising.
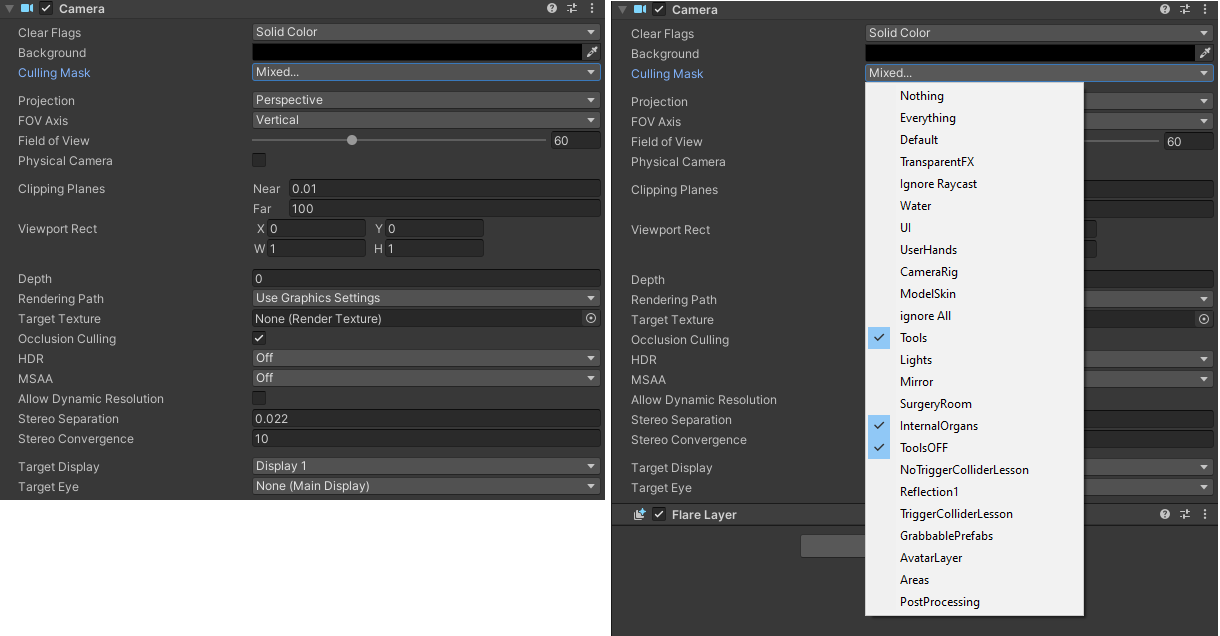
The cameras should to render only the bones and the tools (drill). To implement this, we select from the Culling Mask option within the Camera script the appropriate Layers. We set the Tools and ToolsOFF layers to render the tools and the InternalOrgans layer to render the bones.
Note
Make sure you set the bones of the patient to the InternalOrgans layer, otherwise the cameras will not render them.
Here you can see the preview of both cameras.
Render textures
However, we don’t want to render those two cameras in our main viewport. We should render them on the monitor that we created. For this reason, we will use render textures.
Right-click on the assets editor Create > Render Texture to generate your render texture.
Note
It is important to set the Depth Buffer to No depth buffer. This will create the X-ray effect as it will render the bones without paying attention to any culling.
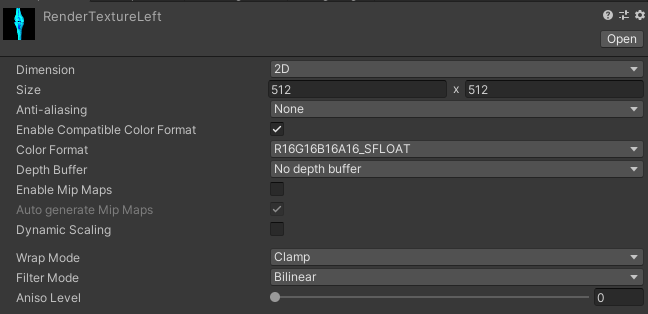
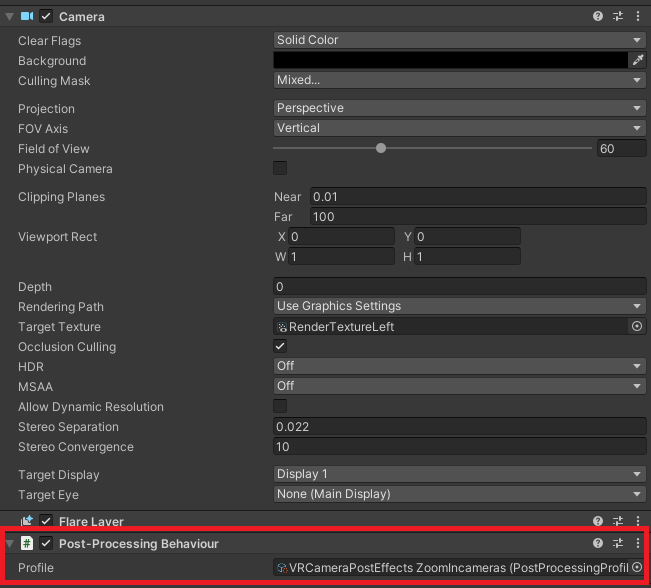
Then, link the render texture to your camera by drag and drop it to the Target Texture field.

Now this camera will render on this texture.
Finally, we need a material to attach this texture and apply the material to our X-ray monitor.
Create a new material, right-click on the assets editor Create → Material and drop the render texture at the Albedo field.
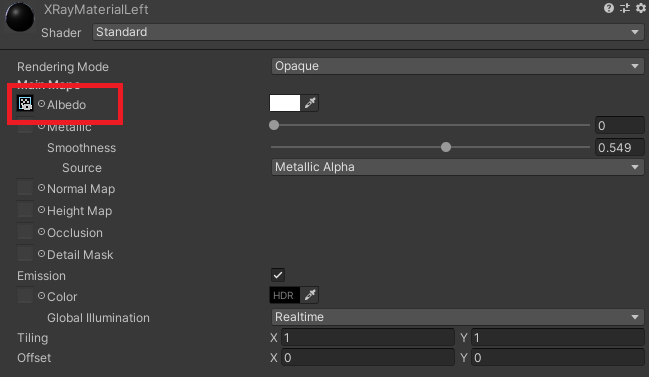
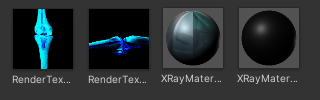
Below you can see the two rendered textures along with their materials.
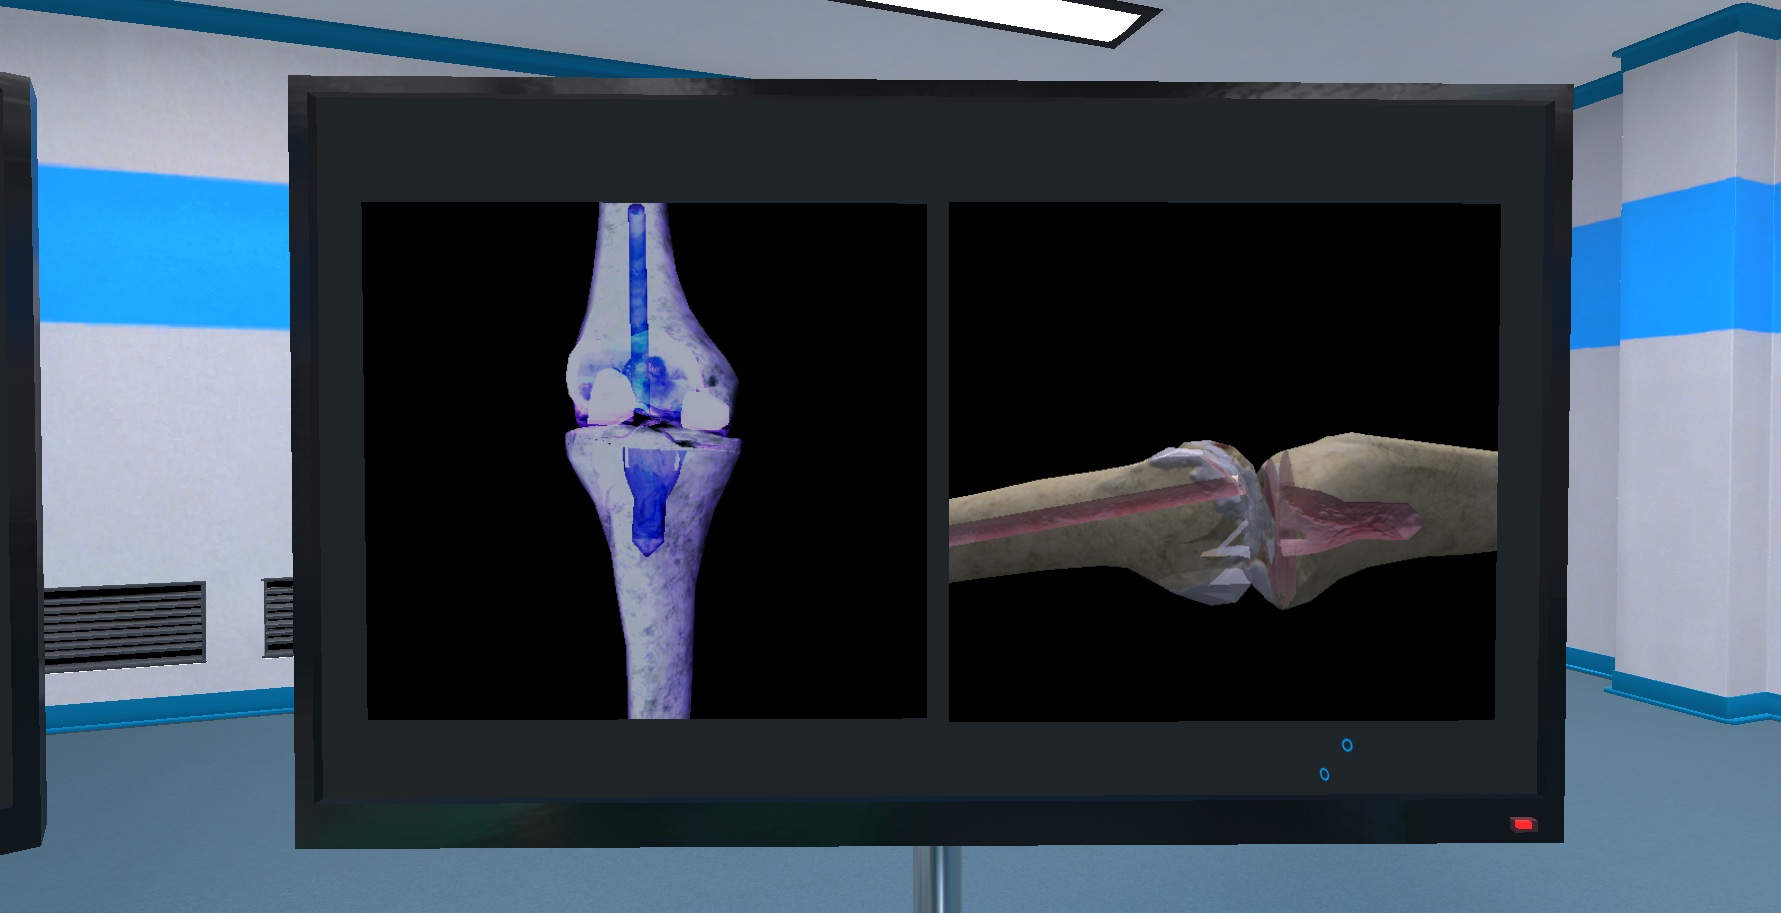
Drag and drop the materials we created on the X-ray monitors. Below you can see the result.
Post process effects
Note
This step is optional and depends on your design choices.
In this step we will add post process effects to our camera to replicate the X-ray effect.
In this tutorial we will use the deprecated post process effects (not from the package manager). The updated post process effects caused an unwanted behaviour by overriding the depth buffer. There are solutions to fix this issue on URP, but this project uses the standard pipeline, and you cannot modify it.
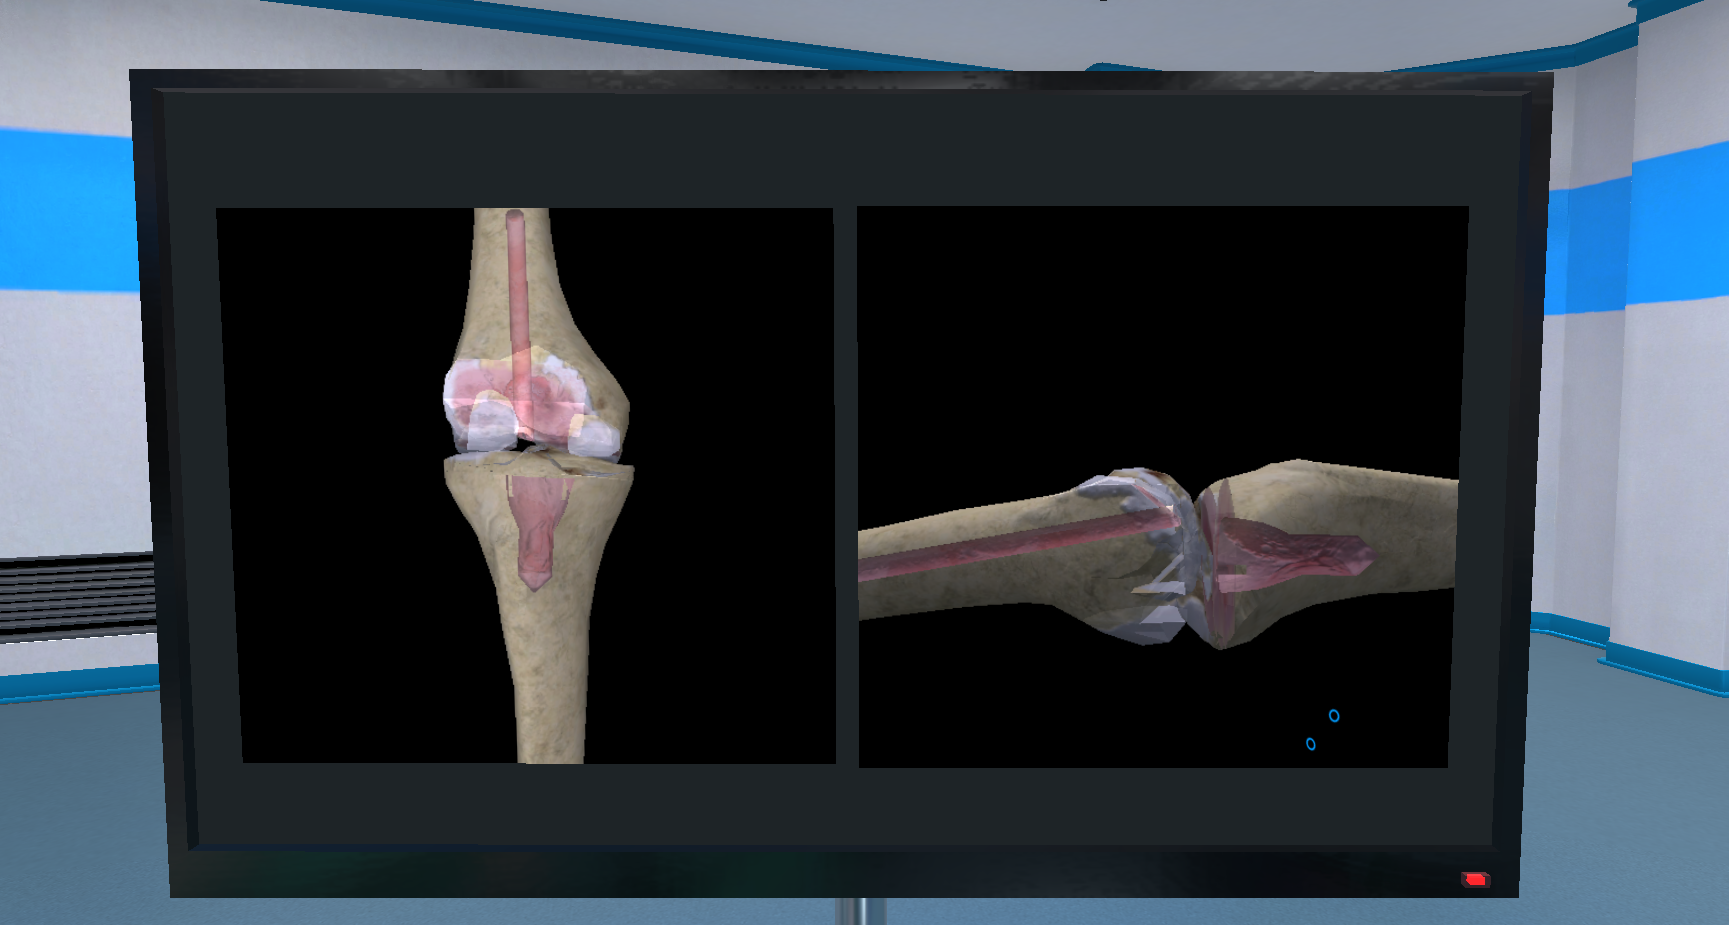
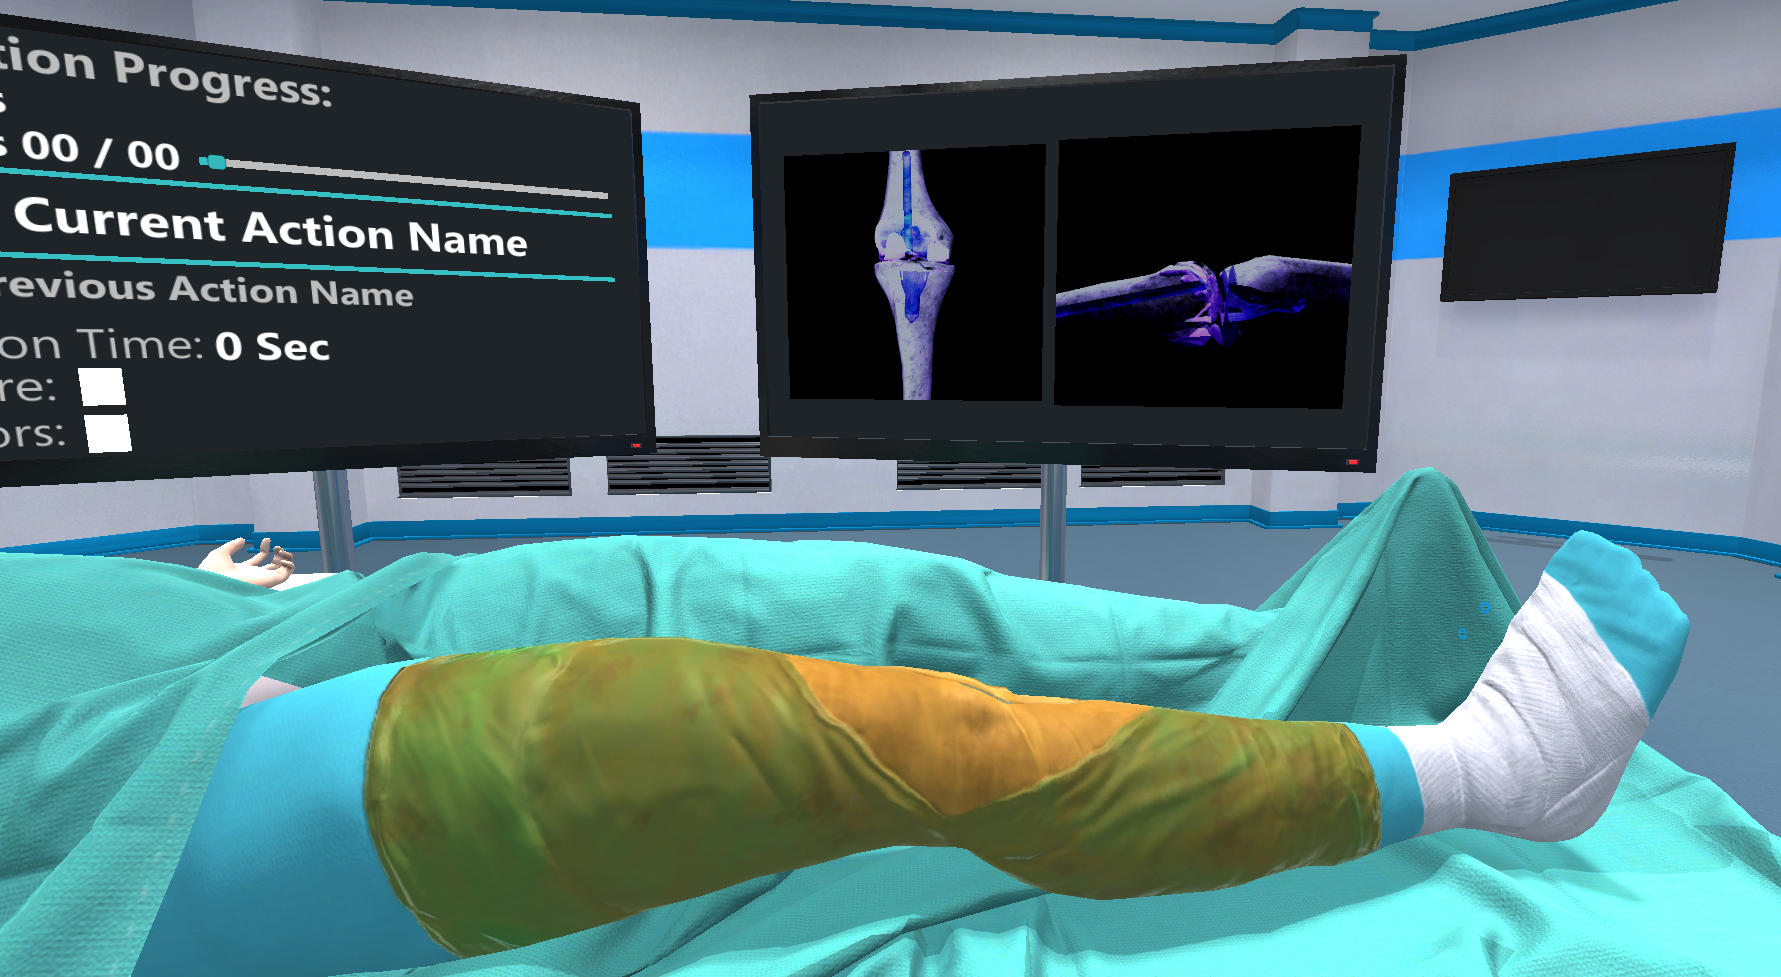
Below you can see the left camera with the post process effects applied and the right camera without any post process effect.
We attach the PostProcessingBehaviour script on the cameras.
Rigt click on the assets editor Create > Post-processing profile to generate a post-processing profile.
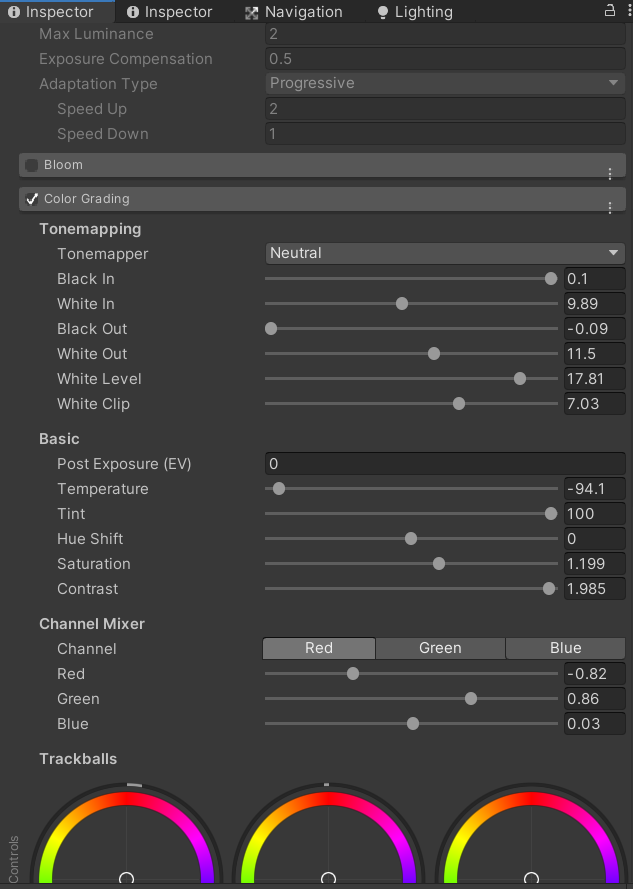
Enable the Color Grading option and experiment with the Saturation and the Channel Mixer till you have the desired X-ray effect.
Finally, drag and drop the post-processing profile to the PostProcessingBehaviour script on the cameras. This will apply the X-ray effect.

Results
As you see both the skeleton and the drill are visible to the X-ray monitor.
In this way the user can practice the femoral drilling, visualizing real time the angle in both axes.