Realtime Cut
Warning
Note that this feature is in Beta stage, therefore it is not stable and it can create artifacts on the newly created meshes.
MAGES gives you the ability to perform realitme cuts in meshes, by providing a Cuttable Mesh and a Cutter script. A combination of these can achieve results like the following:
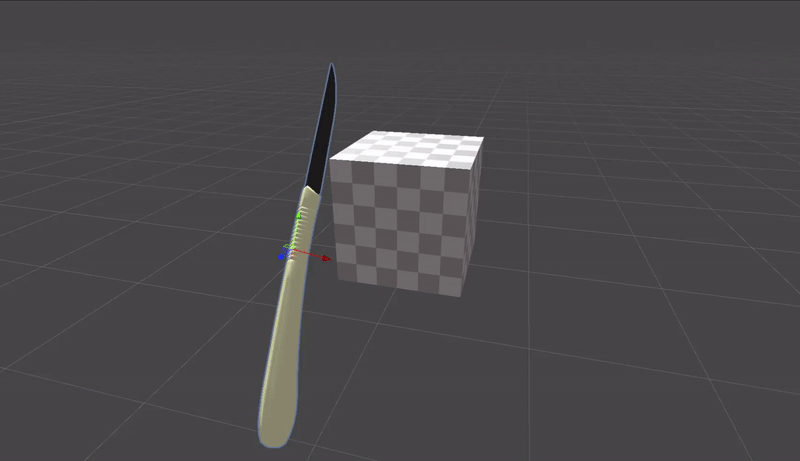
In this tutorial we will demonstrate how to setup the cube as a cuttable mesh and how to setup a custom cutter.
Cuttable Mesh
First drag and drop the mesh you want to setup as cuttable in the scene (The box in this case). Then go to Add Component > MAGES > Mesh Deformations > Cuttable Mesh and add the Cuttable Mesh script to the object.
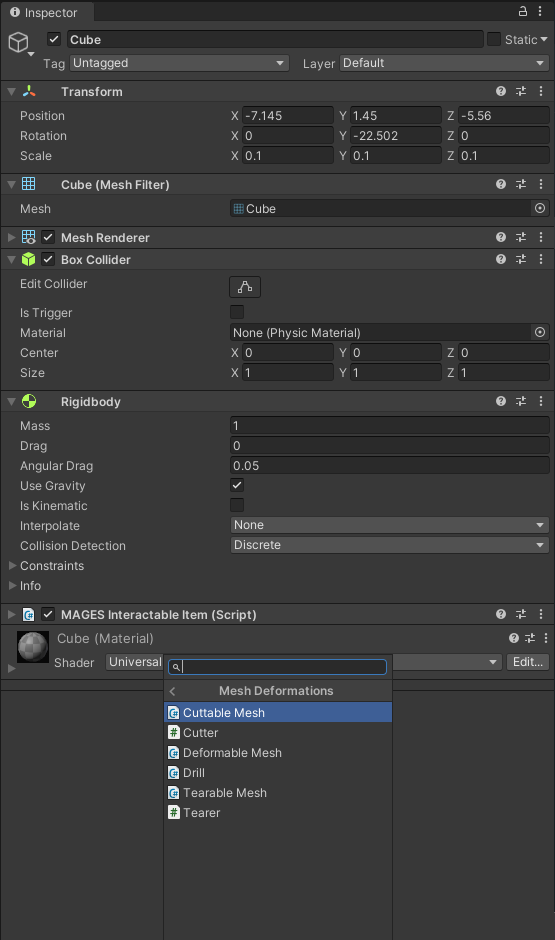
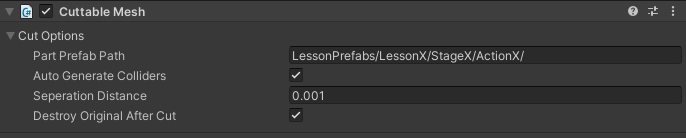
This will expose the following properties:
Afterwards, we will create an empty GameObject and we will add:
a MeshRenderer
an empty MeshFilter
the same material as our cube
a Rigidbody
the MAGESInteractableItem script
We will then save our prefab under the Resources folder in a desired path. In the CuttableMesh inspector we will specify that path in the field partPrefabPath. For the other options we will keep their default values.
We can now use our Cuttable Mesh by calling the public void Cut(Plane cutPlane, out Mesh positiveSide, out Mesh negativeSide, out GameObject final, bool handleMeshReconstruction = true) function,
or by using the already made Cutter Script as described below.
Note
You can find the above example, already set up, in the Mesh Deformations Sample Scene.
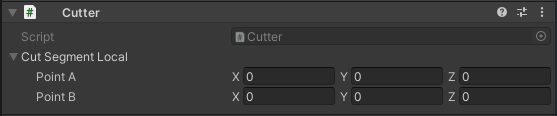
Cutter
First drag and drop the tool you will use to cut the mesh (here we will use a knife). Then go to Add Component > MAGES > Mesh Deformations > Cutter and add the Cutter script to the tool.
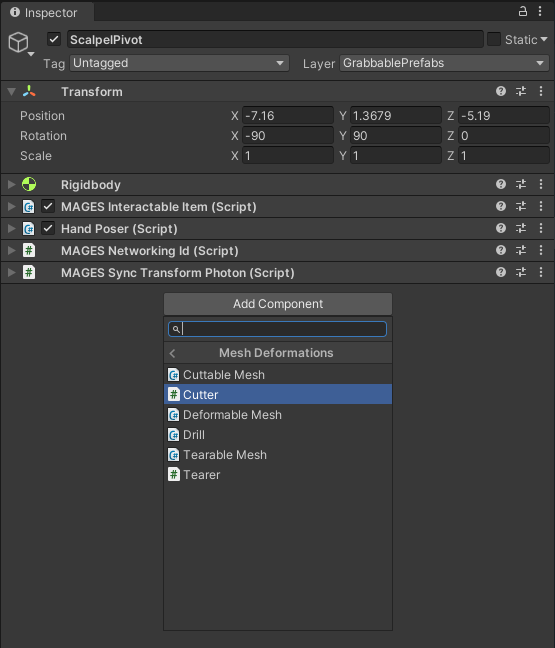
This will expose the following properties:
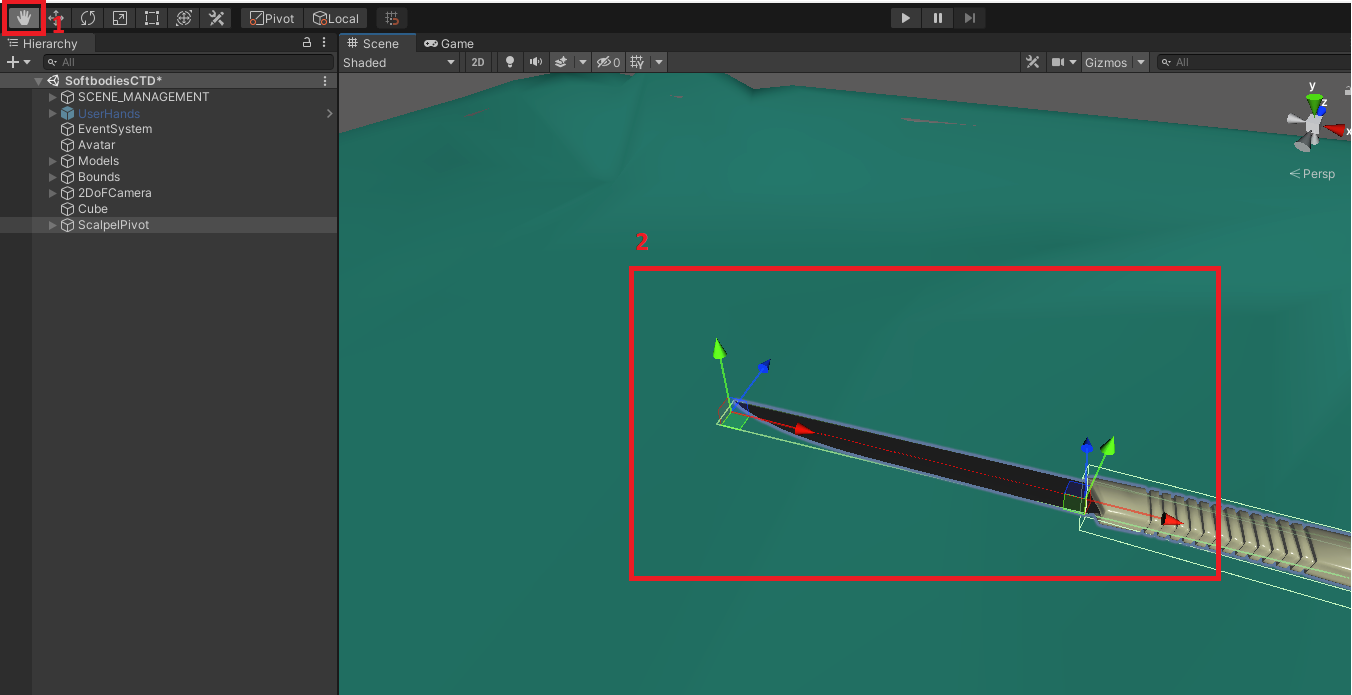
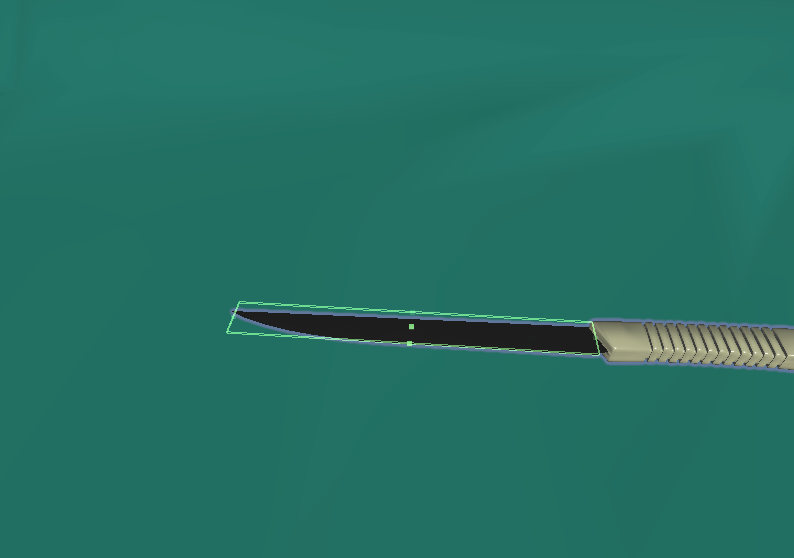
We will then (1) click the hand tool to hide the unity tool gizmos and then (2) move the two handles to match the knife’s blade.
The next step is to add a trigger collider containing the blade of the knife.
Finally, we need to add a collider (either triger or not) on the GameObject containing the CuttableMesh script in order to specify the area a cut can be done.
We can now use the knife to cut our Cuttable Mesh inside the specified area.
Note
You can find the above example, already set up, in the Mesh Deformations Sample Scene.