IOS Build (iPad, Iphone)
This step-by-step guide will let you build a Unity3D application that uses MAGES-SDK for the iOS operating system. This build runs on Apple mobile devices (iPhone/iPad) as well as desktop PCs (iMac/Macbook), provided they have an M-series processor (M1/M2). This procedure has two significant steps.
Note
You will need an active Apple developer membership program to distribute your application massively, upload it to testflight or test it on multiple devices. Of course, you do not need one if you only want to create test/development builds to run on a single device.
Warning
It is essential that this procedure takes place on a Macbook/iMac device. Devices running Windows cannot build for the iOS platform.
Unity-Side Build
Create a new project with your desired version of Unity. (add the version that you tested it here)
Note
You don’t need a Mac device to export ios the build. It can be done on any platform.
Add and download the latest MAGES-SDK version, as mentioned here .
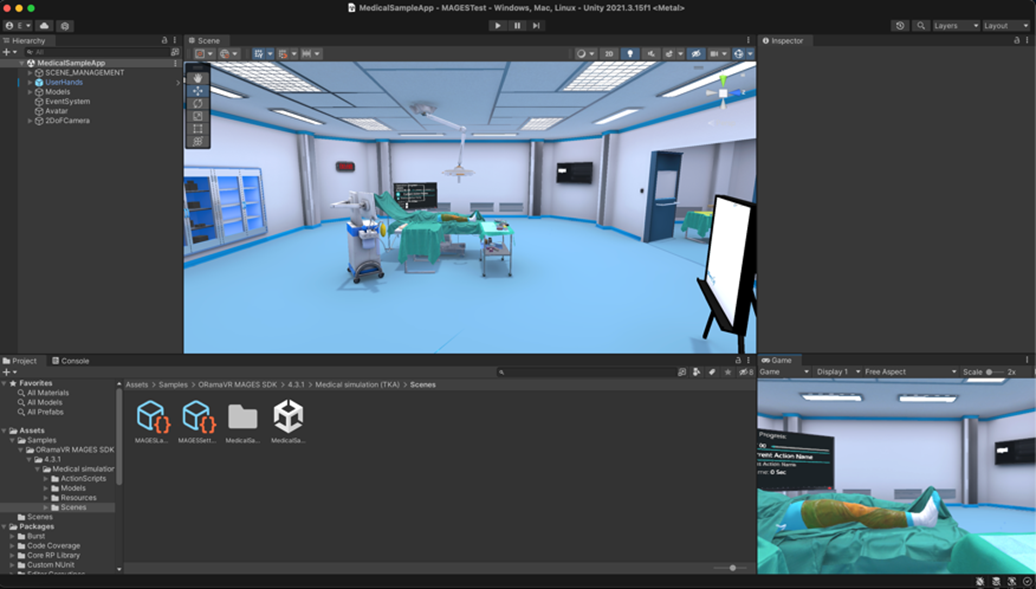
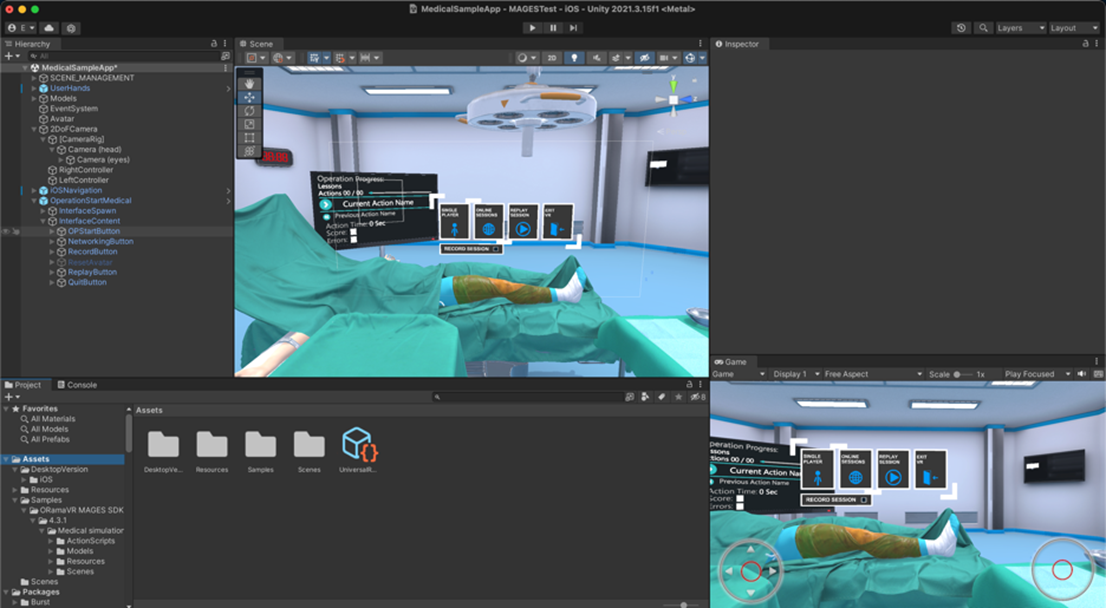
Open the MedicalSampleApp scene. You will see something like this:
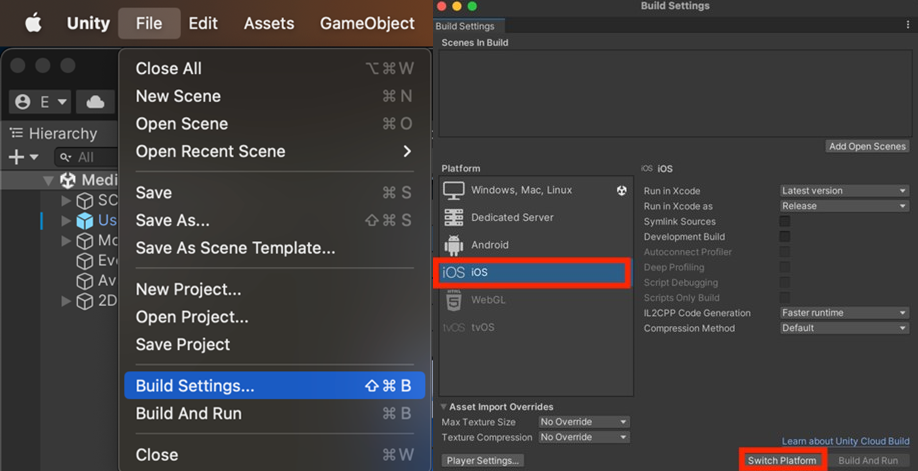
To build an iOS application, you must ensure that your Unity project is set for the iOS platform. To switch the active platform to iOS, head to File -> Build Settings… select the iOS platform, and click Switch Platform.
Note
If you did not install the iOS support during Unity installation, there will not be a “Switch Platform” button available for the iOS platform. Instead, click the “Install with Unity Hub” button and return to this step after the installation.
You can ensure that you are on the correct platform by noting the title of your Unity project window.

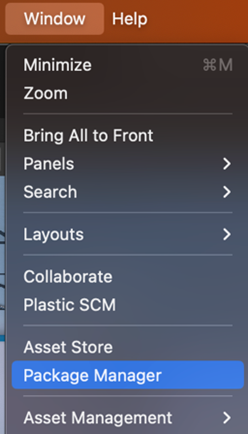
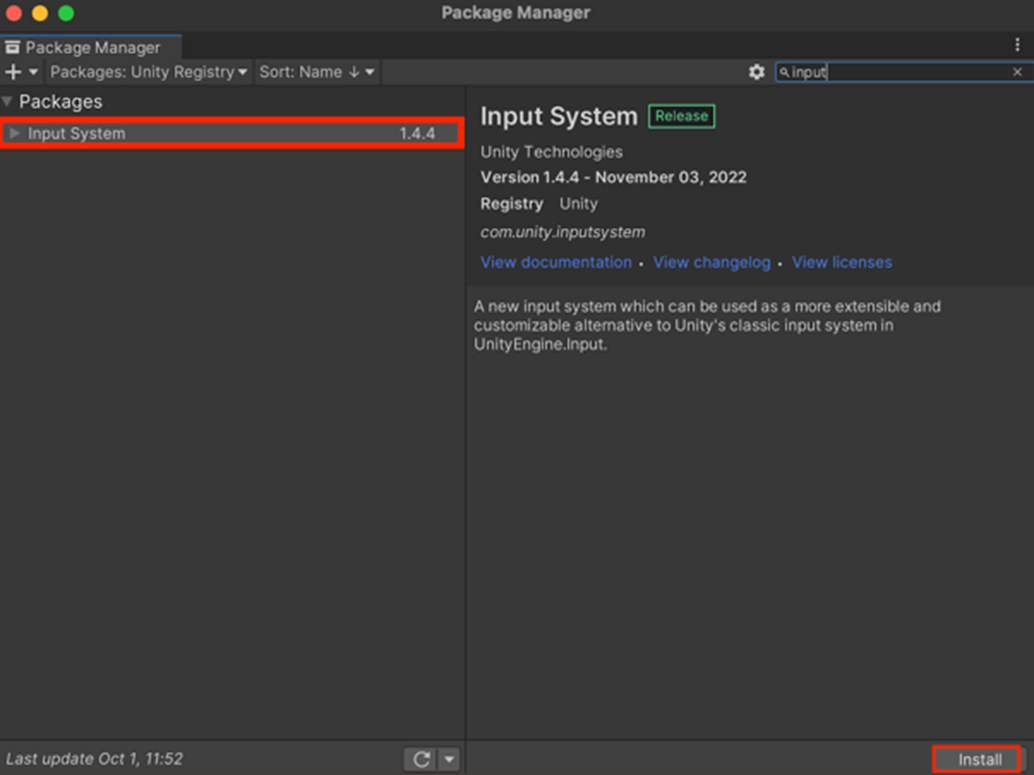
You will also need a new package for your project to handle the input from the touch screen. To install this package, navigate to Window -> Package Manager…
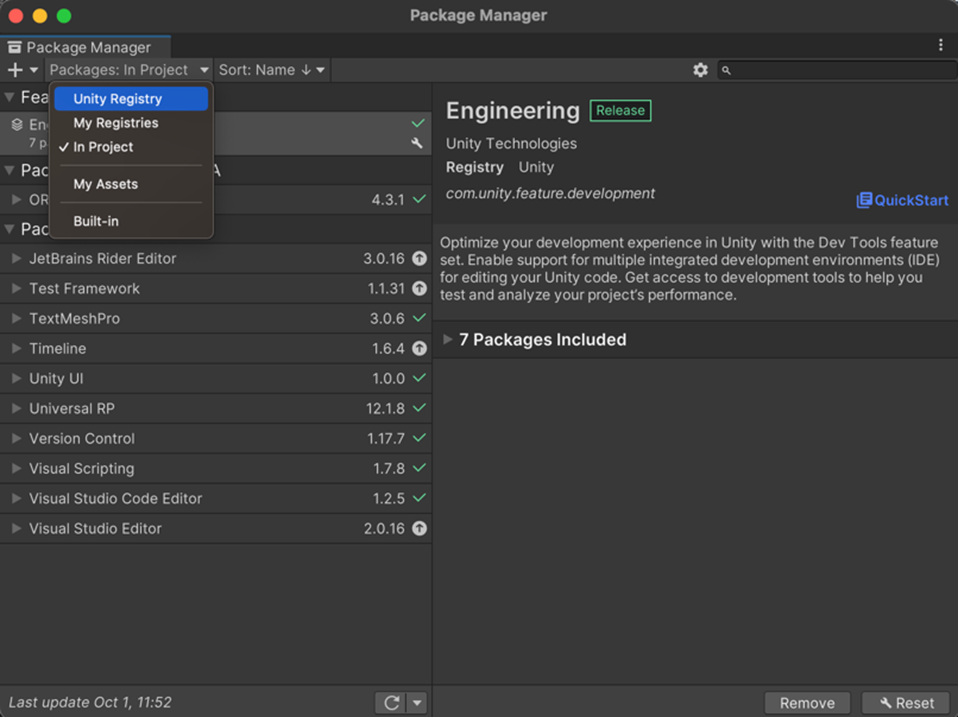
Then click Unity Registry from the dropdown menu on the top left of the package manager window:
Then, on the top right search bar, type “input”. You will be able to see the correct package appear on the left. Select it and click “install”.
Once the input system package has been installed, you may download this link additional package for the navigation system.
Once downloaded, you can import it by navigating to Assets -> Import Package -> Custom Package. Locate and import the package. Then click the import button.

8. If imported correctly, you should now see a “DesktopVersion” folder in your Assets folder. Inside, you will find a prefab called “iOSNavigation”. This prefab has all the components to offer basic movement in an iOS environment using the touch screen. Just drag and drop this prefab to your scene. You should be able to see something like this in your game view.

You should be able to see two thumbsticks like the image above. The left thumbstick corresponds to player movement, whereas the left thumbstick corresponds to player rotation. They are designed to work both with a touchscreen and the mouse cursor in case of a desktop computer.
Note
This prefab is configured and tested to work with the “2DoFCamera” gameobject of the MAGES-SDK. If you have made changes to this gameobject, it is advisable to create a new one by navigating to MAGES -> Cameras -> Desktop3D (replacing the old one).
By entering play mode while the “iOSNavigation” prefab is in the scene, the user’s hands will disappear. They will be replaced by these two thumbsticks, which can be used for player movement.
Warning
There is no interaction in this mode. Due to the limitation of the touch screen, players cannot use their hands to interact with objects. Thus, iOS mode is mainly recommended for spectator mode.
Another important fact is that it is impossible to interact with 3D UIs since touch screens only support UIs rendered in screen space instead of world space. For this reason, you should bring each UI that the player must interact with to screen space. We will show you an example of the “OperationStart” UI. Once you understand the procedure with this one, the others are almost the same.
Drag and drop the OperationStartMedical UI to your scene. You should see something like this:
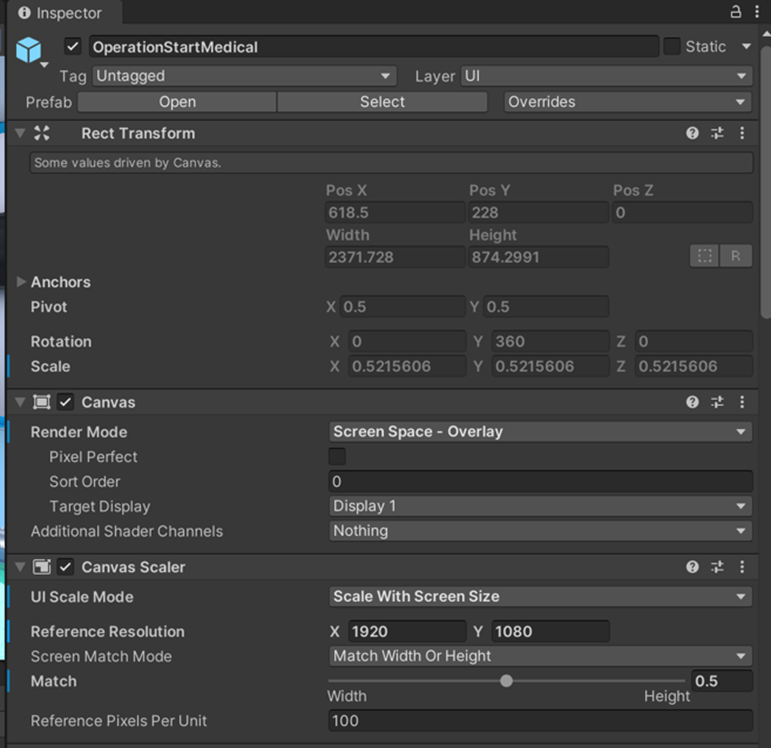
Select the parent of the OperationStartMedical prefab and perform the following changes to the specified components:
Canvas Component: Set the render mode to “Screen Space - Overlay”.
Canvas Scaler Component: Set the UI Scale Mode to “Scale with Screen Size”.
Canvas Scaler Component: Set the Reference Resolution to X:1920 Y:1080.
Canvas Scaler Component: Set the Screen Match Mode to “Match Width or Height”.
Canvas Scaler Component: Set the match float to 0.5.
In the end, these two components should look like this:
Set the InterfaceSpawn gameobject (first child of the OperationStartMedical) scale to (800,800,1).
Expand the InterfaceContent gameobject (second child of the OperationStartMedical), select all its children (buttons), and set their scale to (800,800,1).
Note
Step c and d (rescaling) are necessary for the specific UI but that does not necessarily apply to all UIs. Some UIs might not even need rescaling at all when moving to screen space.
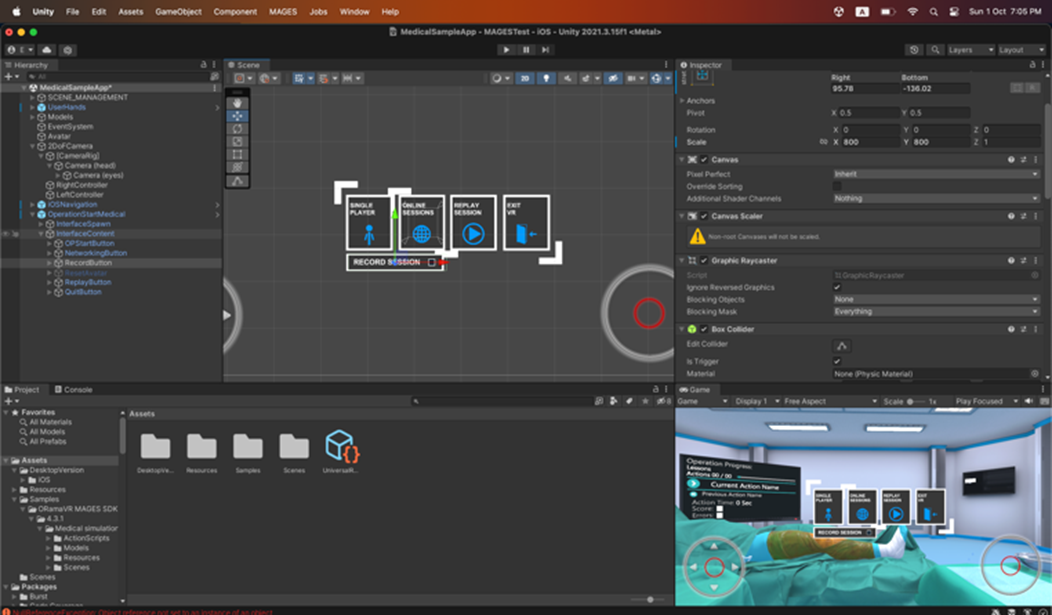
Now, due to rescaling, the UIs will look a bit disoriented. Feel free to re-order them to look like the following image:
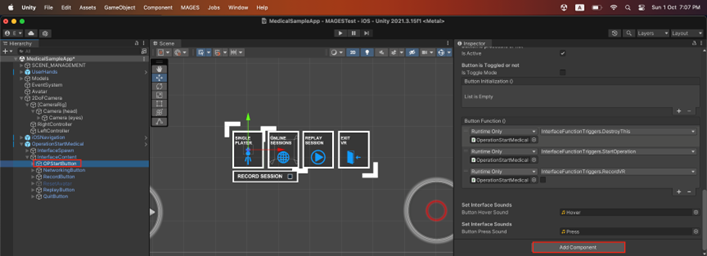
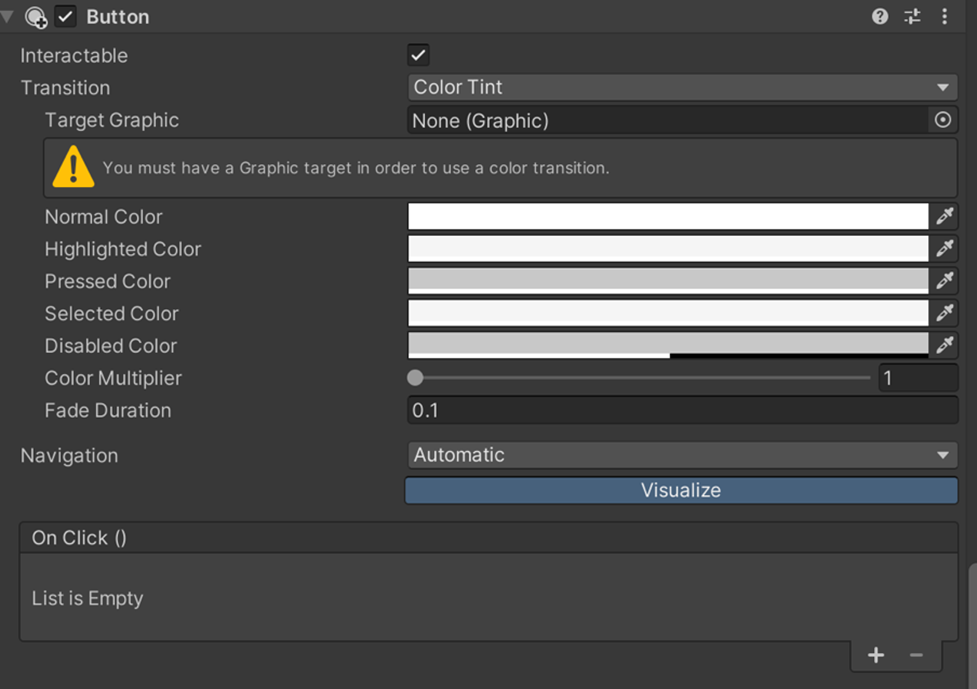
f. We are ready in terms of the UI appearance. Now, the only thing that remains is to make the buttons interactable and clickable. Let us do this with the Single Player button. Select the Single Player “OPStartButton”, click “Add Component” in the inspector and add a “Button” component.
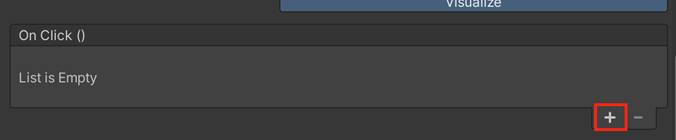
Click the “+” button in the OnClick list of the button component to add a new event.
Drag and drop the “OPStartButton” from the scene to this empty field. This is, in fact, the same object to whom we added the Button component.

Click the dropdown next to it and set the “No Function” to “ButtonBehaviorButtonPress()”.
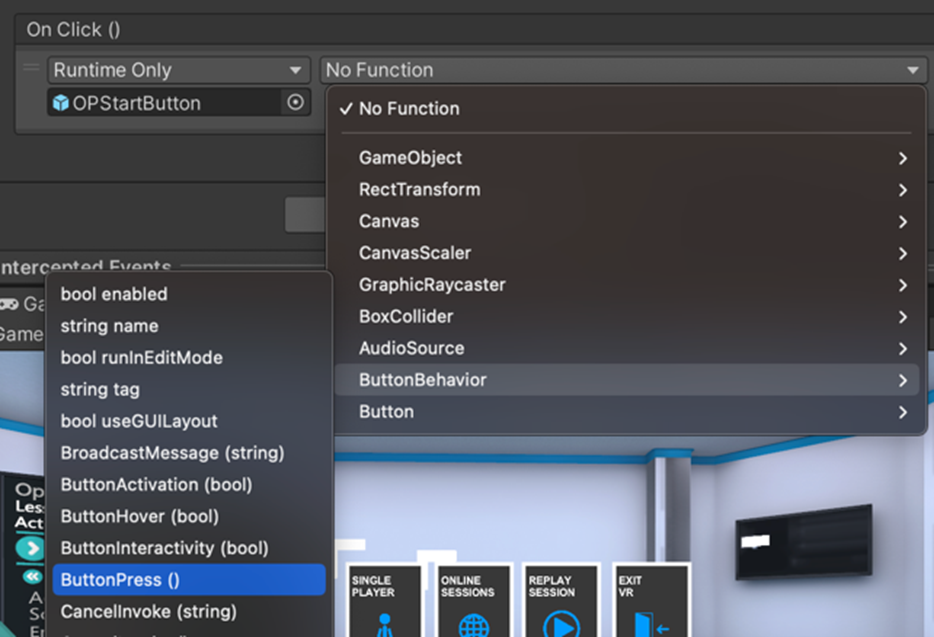
Now, practically, we set the event of the Unity button (which can be clicked through the touch screen) to be the ButtonPress event of the MAGES-SDK ButtonBehavior.
As a last optional step, we can set the button to maintain its hover effect when the cursor is over it in the case of Desktop mode. To do this:
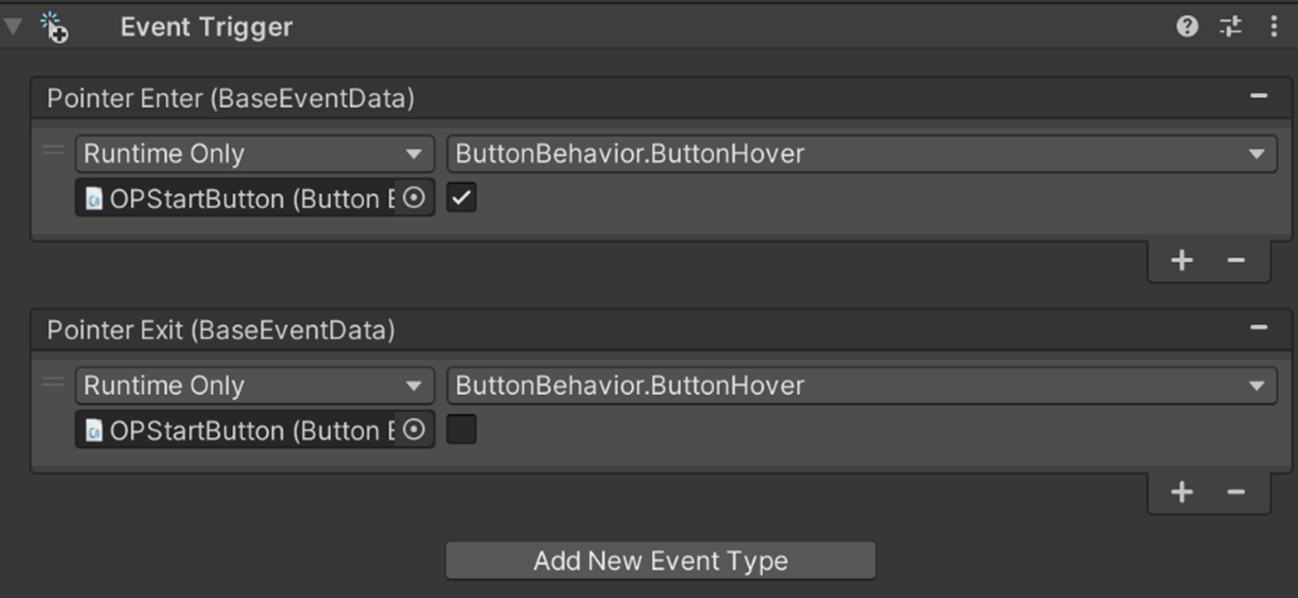
Add an “Event Trigger” component.
Add two event types, namely “Pointer Enter” and “Pointer Exit”.
For both of these event types, click the “+” button to add an event, and as you did in step (h), drag and drop the same button, “OPStartButton” in the empty field.
For both of the events, click the “No Function” dropdown and set it to “ButtonBehavior -> ButtonHover (bool)”.
You will notice a checkbox next to each event. Tick the one under the “Pointer Enter” event type and leave the one under the “Pointer Exit” event type unchanged.
In the end, the Event Trigger component should look like this:
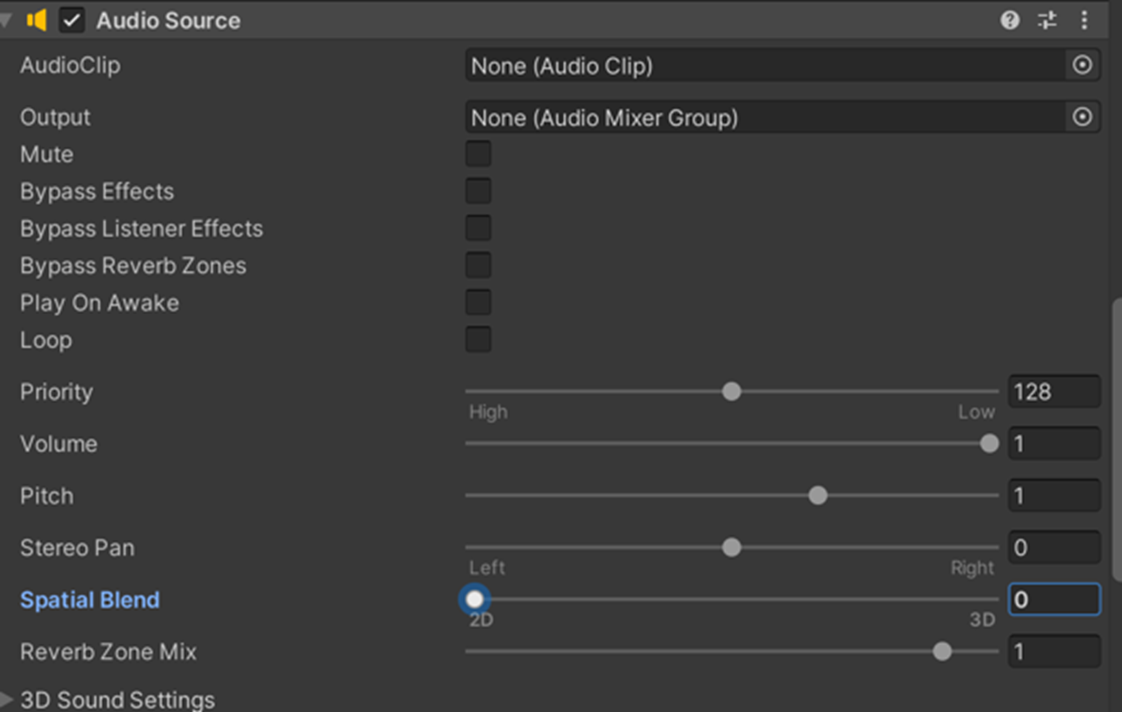
Since we are in the 2DoF space, the audio sources from the screen space UIs will be silent. To listen to them, ensure that the spatial blend of each audio source is set to zero.
Repeat the above steps for each button.
11. The final Unity-side step is to build the actual application. To do so, navigate to File -> Build Settings. Ensure your scene is in the “Scenes in Build” section; otherwise, click “Add Open Scenes” to add it. Ensure the platform is set to iOS and click build.
Warning
After building, you will have an Xcode project, which you must open using Xcode to build and deploy to your target device. Instructions on how to build your application from the Xcode project follow.
Congratulations! Now, you have basic movement inside the scene and interactive UIs! Feel free to create your UIs and buttons using the Unity UI button component, connecting it with the MAGES-SDK ButtonBehavior component, or adding your events so that these buttons will be interactable while on the iOS platform!
Xcode-side Build
You’ll also need to have Xcode, which is the program used to build iOS apps.
When you build the Unity iOS game an Xcode project is generated. This project is required to sign, compile and prepare your game for distribution.
Set up an Apple Developer Account:
You need to have an Apple Developer account to distribute apps through TestFlight. You can enroll in the Apple Developer Program here.
If you want to test the app locally on your own iPhone or iPad and you doesn’t need to distribute the app to a wider audience, you can use your personal Apple ID (iCloud account) and enable “Automatically manage signing” in Xcode. This approach is suitable for personal testing and doesn’t require a paid Apple Developer Program membership.
Create an App in App Store Connect:
Log in to App Store Connect. App Store Connect using your Apple Developer account and create a new app listing for your app.
Add Developer Account to Xcode
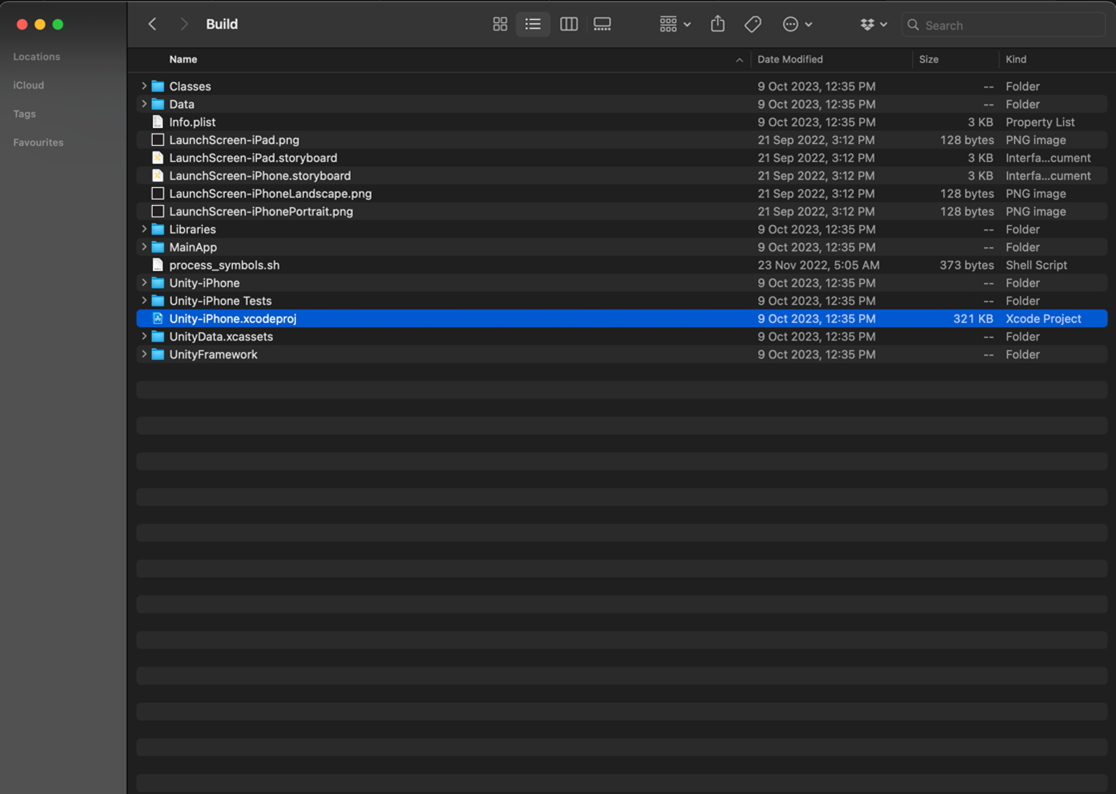
Open the Unity iOS generated project, by clicking the Unity-iPhone.xcodeproj file on the unity build file.
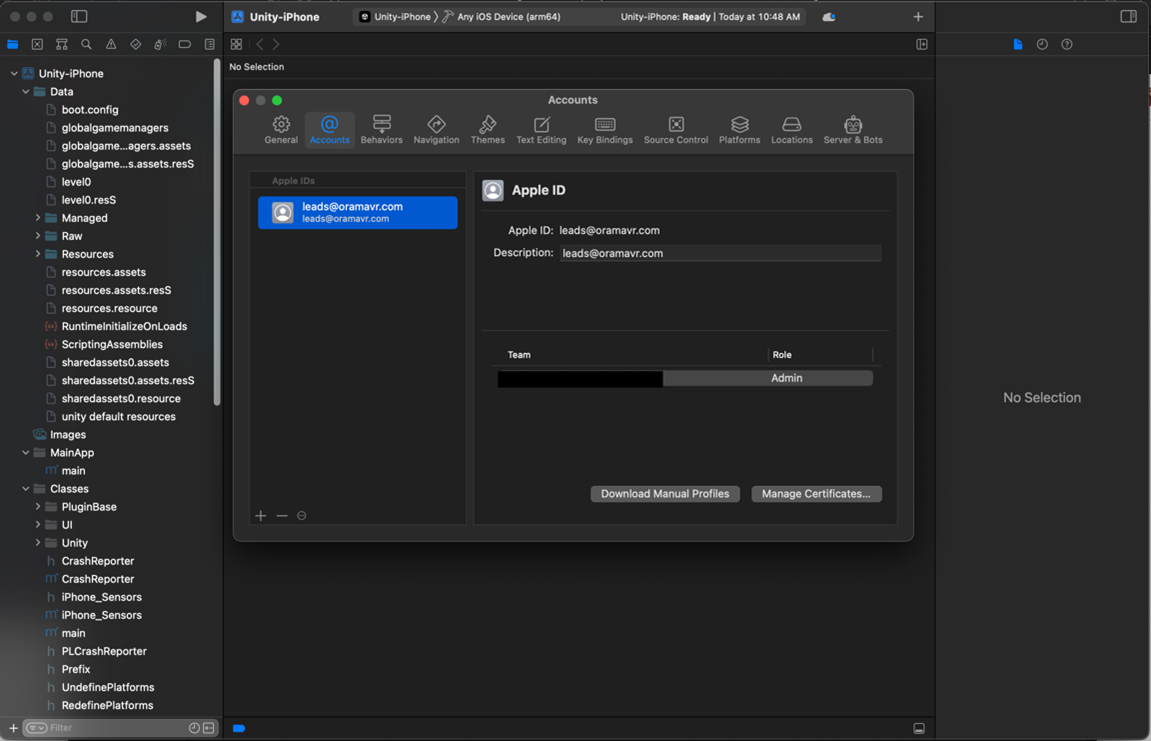
Go to Xcode in the top menu bar and select Settings. In the Preferences window, click on the Accounts tab. here you can add or manage your Apple Developer account. Click the “+” button and sign in with your Apple ID associated with your developer account.
Provisioning Profiles and Certificates
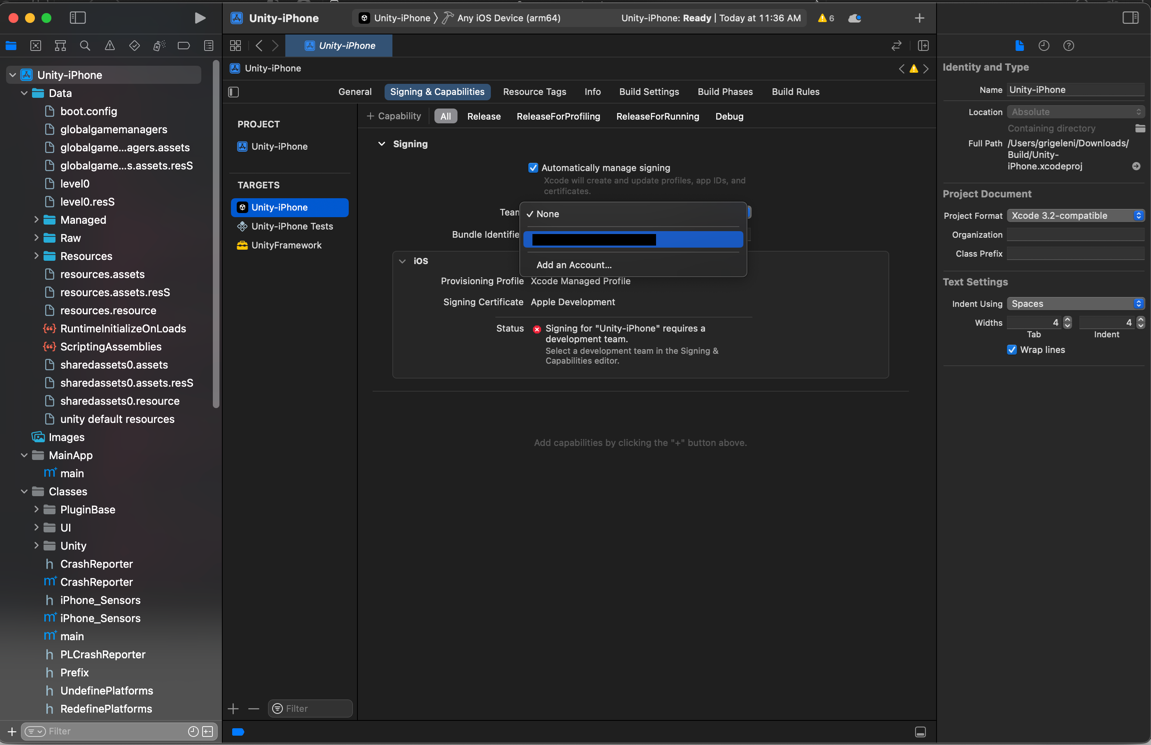
If you haven’t already, you’ll need to set up provisioning profiles and certificates for your app. To manage provisioning profiles and certificates in Xcode, go to the Signing & Capabilities tab of your target settings in the Xcode project. Xcode will request or create the necessary provisioning profiles and certificates based on your developer account.
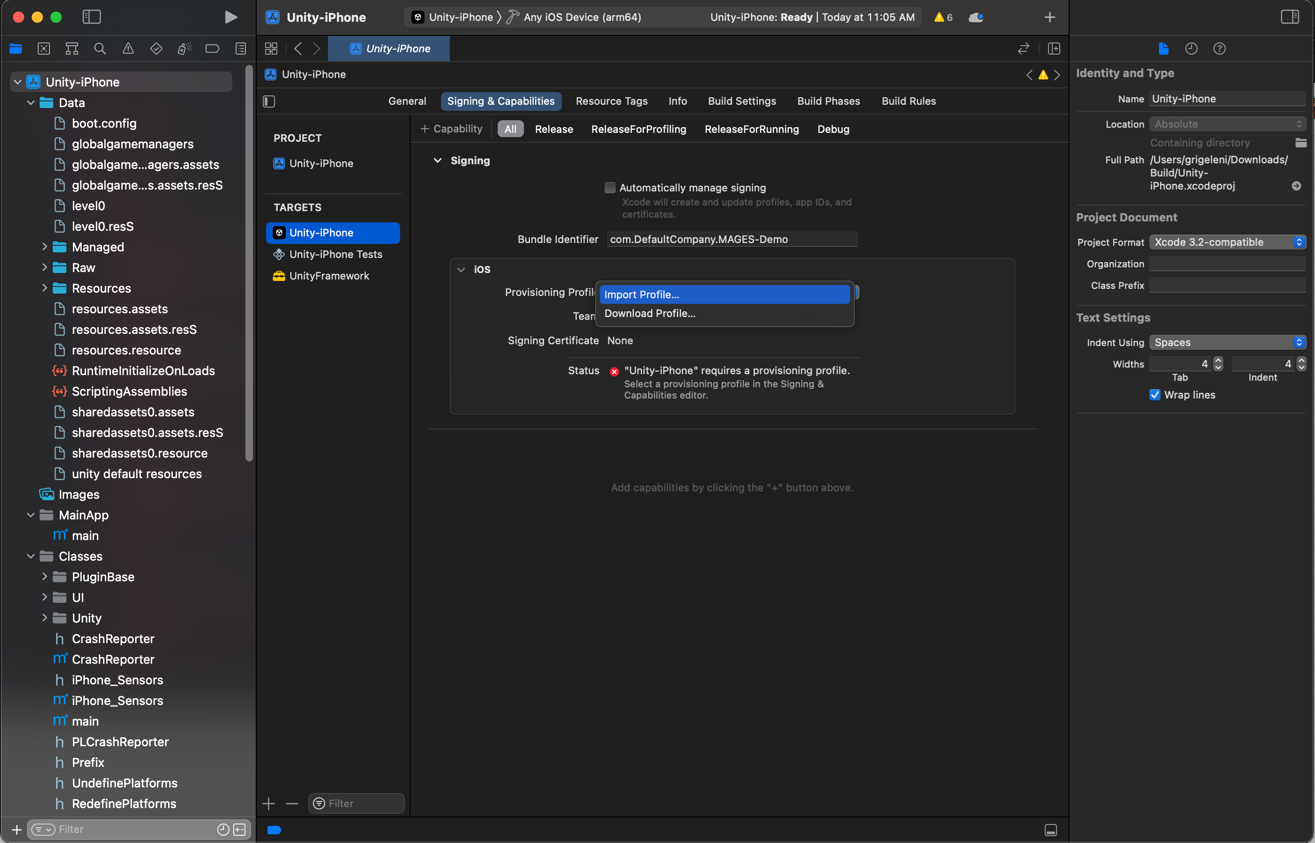
If you have provisioning profiles and certificates that are not automatically managed by Xcode, you can import them as follow:
To import your own provisioning profiles, click the Import button next to the Provisioning Profile dropdown. Select the provisioning profile you want to import from your Mac. Xcode will guide you through the process.
Set Supported Destinations
On General Tab on Supported Destinations dropdown, select Mac (Designed for iPad) and remove it from the list by click the “-“ button.
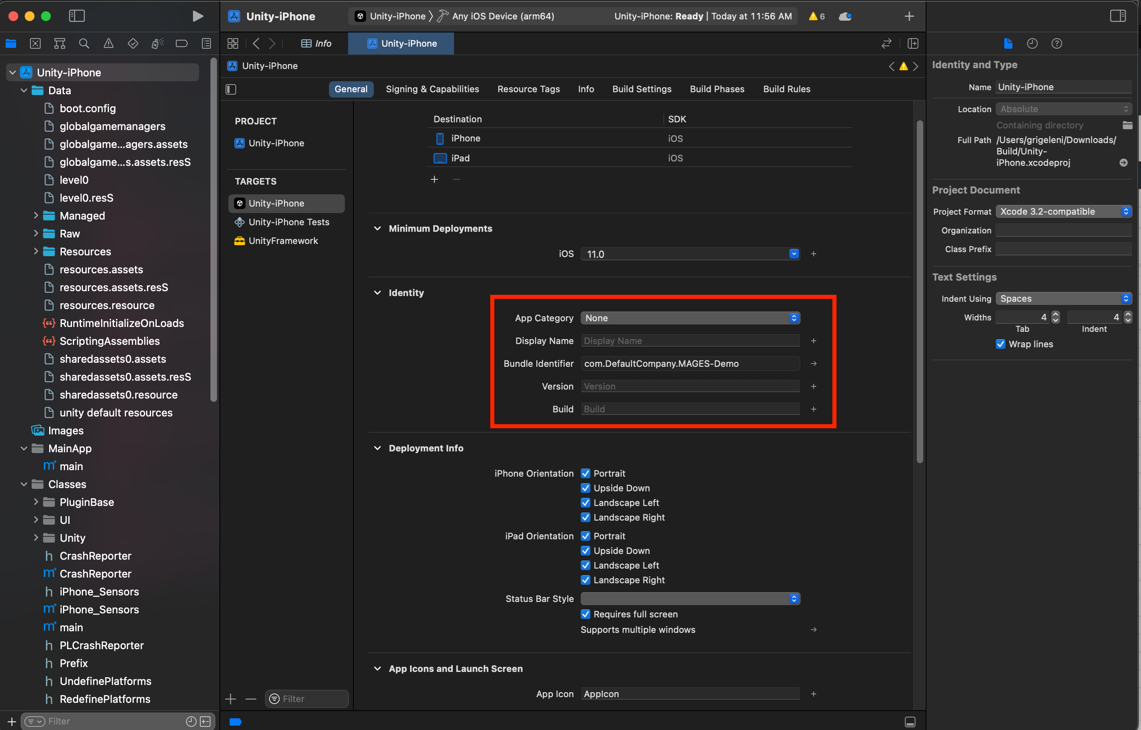
Set Identity of the app
Set the Display Name. Is the name that will be displayed under your app’s icon.
In the Identity section, you’ll find a field labeled Version. The version number is typically a format like “1.0” or “1.0.1”, and it represents the user-visible version of your app.
Just below the Version field, you’ll find a field labeled Build. Edit the field to set the desired build number of your app.
The version number is typically a format like “1.0” or “1.0.1,” and it represents the user-visible version of your app. The build number is an incremental number that can help you keep track of different builds of the same version. For example, you might start with build number 1 for version 1.0, and increment it for each subsequent build of that version.
Remember to update these numbers appropriately each time you release a new version of your app or create a new build. Consistency in version and build numbers is essential for managing and tracking app release.
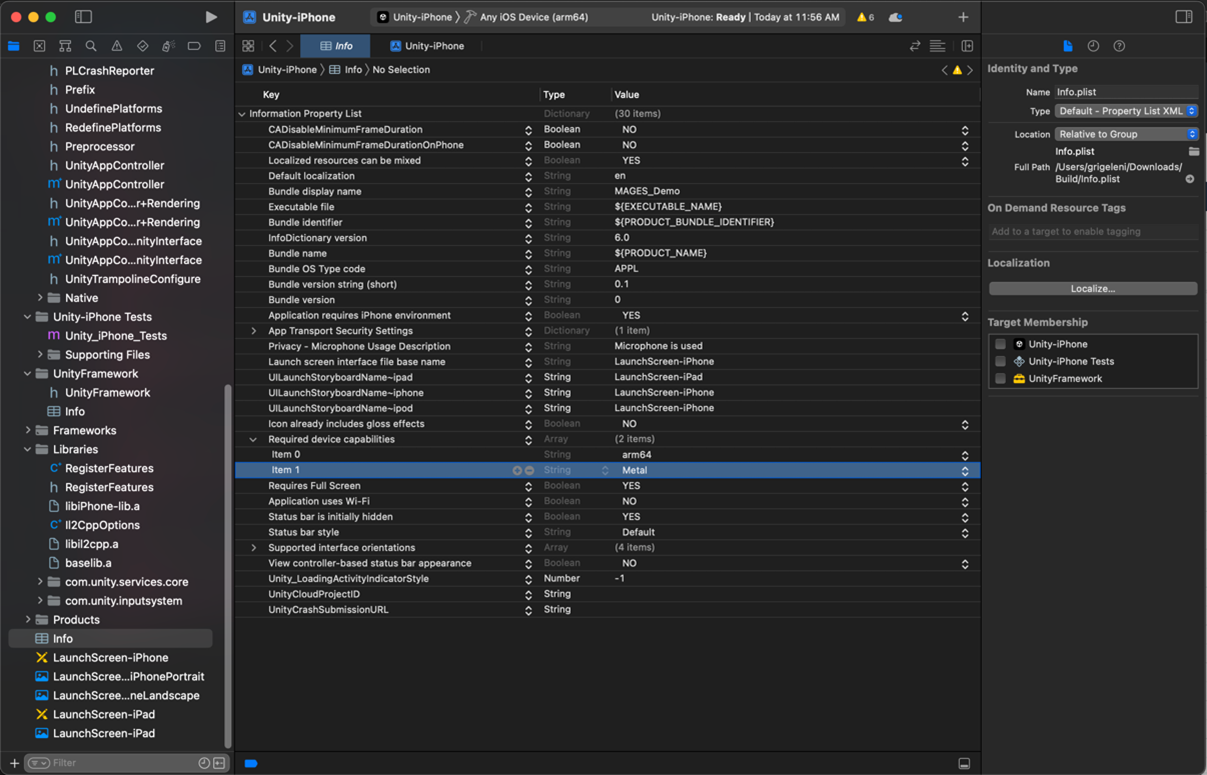
Edit info file
In your Xcode project, find and open Info.plist file. In the plist editor, look for the Required device capabilities. Under the Required device capabilities key, you should see an array of values. If Metal is listed as one of the values, you can simply select it and press the delete key to remove it.
Build and Run
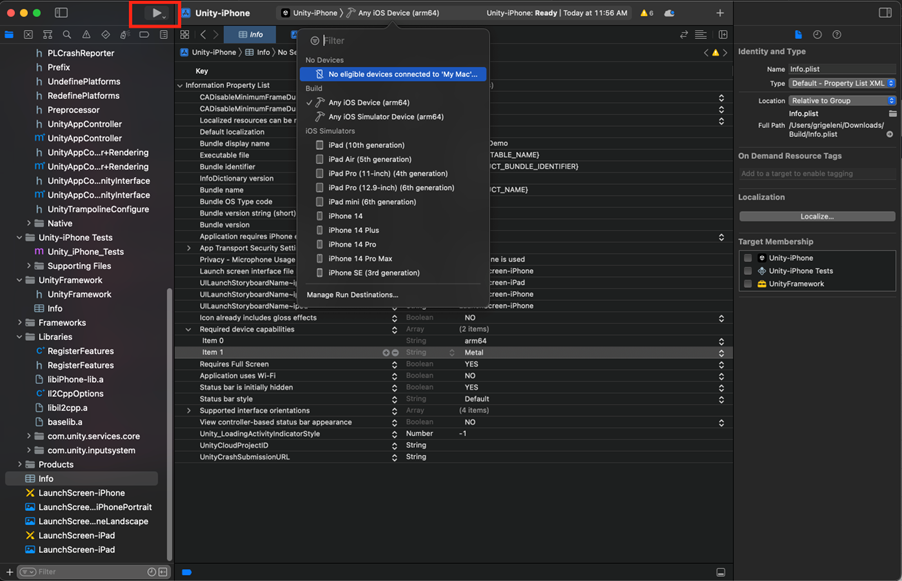
To run your iOS app on a physical device you should connect your iOS device to you Mac. Ensure that your device is set up for development. To do this, you need to register the device’s UDID (Unique Device Identifier) on your Apple Developer account.
In Xcode, select your connected device as the target for running the app. You can do this by choosing your device from the list of available devices in Xcode. Click the Build and Run button in Xcode to compile and run your app on the connected iOS device.
If you don’t have a physical iOS device, you can still develop and test your app using Xcode’s simulators. However, for distribution and testing on physical devices or through TestFlight, you will need a valid Apple Developer account and provisioning profiles.
Uploading to TestFlight (For Beta Testing)
Now that you’ve successfully built and tested your iOS app, the next step is to upload it to the TestFlight for distribution.
Open your Xcode project and choose Product -> Archive. Follow the steps to archive your app.
After archiving, go to App Store Connect.
In App Store Connect, go to the Apps and select the app that you previously created. Then navigate to TestFlight tab. After few minutes you’ll be able to see the build that you just upload.
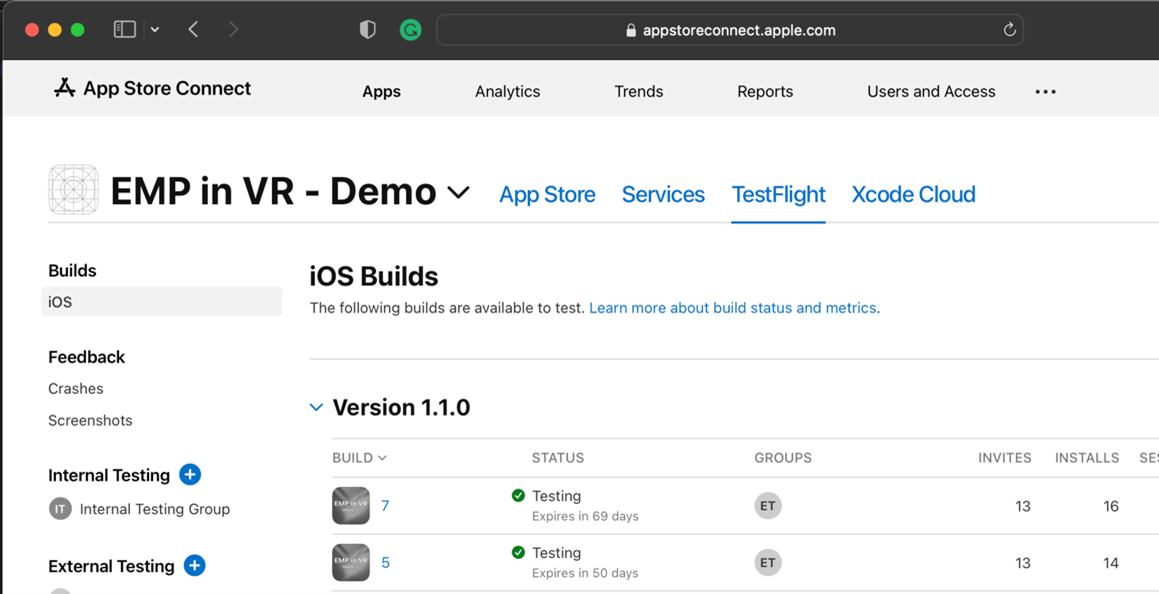
Select the build you uploaded earlier in Xcode. You have to wait few minutes to finish the processing and then click on Manage to fix the Missing Compliance.

Set Up External Testing Groups
Create a New Group (If needed): If you haven’t already created an external testing group, you can do so by clicking the “Groups” tab within the TestFlight section. Click the “+” button to create a new group. Give it a name and select the desired testers to include in this group.
Add Testers to an Existing Group: If you already have a testing group set up, select the group you want to add external testers to.
Add External Testers
a. For Individual Testers: Click the “Add External Testers” button. Enter the email addresses of the external testers you want to invite. You can also include a message with the invitation.
b. For Groups of Testers: If you’ve created a group, select it from the list. Click the “Add External Testers” button. Enter the email addresses of external testers you want to invite to this group.
Invite External Testers:
Click the Invite button to send email invitations to the external testers. They will receive an email with a link to join the beta test.
Once your build is approved (if required), your testers will receive an email notification to download and test the app using TestFlight.
You can also see this video for more details.
If you want to distribute your app to a wider range of users beyond beta testing and make it available to the general public, you should consider publishing your app on the App Store.