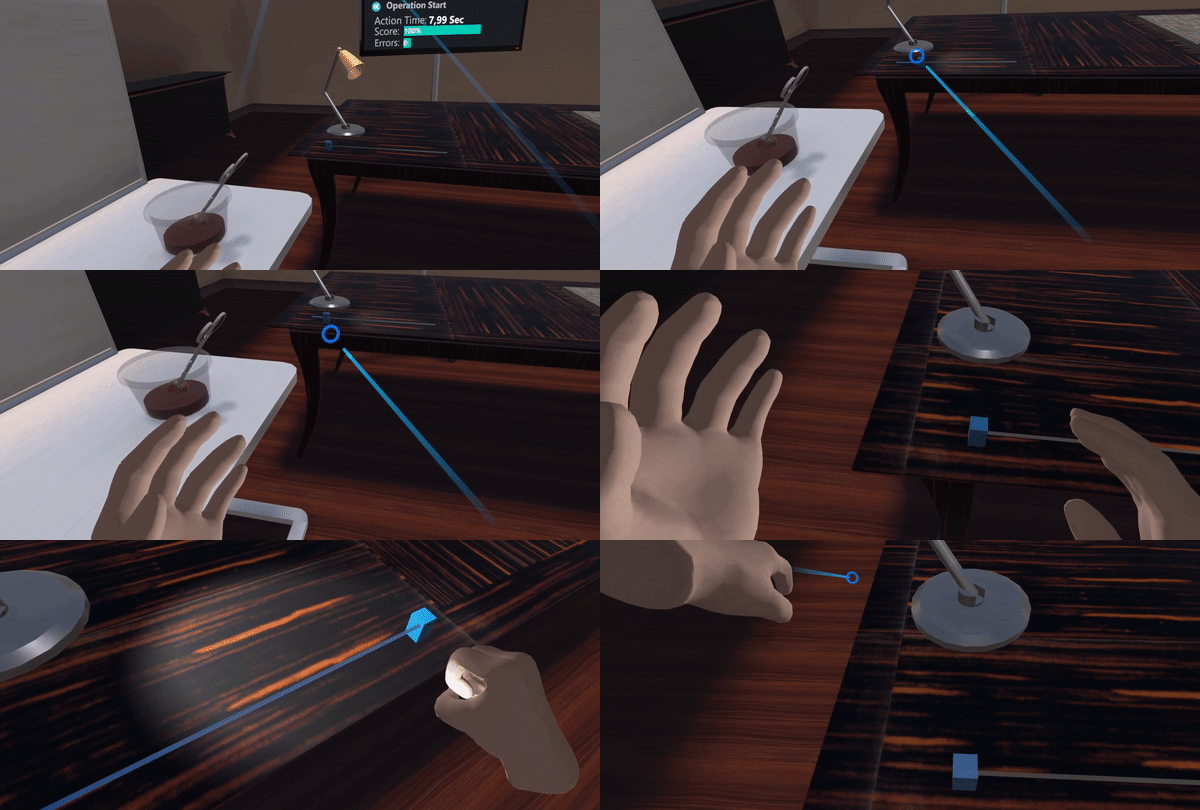
VR Slider
The MAGESSlider script is responsible for creating a VR interactive Slider with ease.
The MAGES SDK provides an already configured generic VR Slider Prefab, but the VR Slider component is easily modifiable to meet any developer’s need.

How-To
Below there are tutorials not only on how to use the default Slider Prefab included in the MAGES SDK, but also how to create one yourself and customize it according to your likings.
Using the existing VR Slider Prefab
In order to use the default VRSliderExample Prefab, found in Packages → com.oramavr.mages → Runtime → MAGES → SDKAddons → VRSlider → Prefabs, simply drag and drop it in your scene.
The Slider should now be working and be interactable both with the ray and the hands.
In order to get/set the slider’s value you can read/write the float sliderValue variable of the MAGESSlider script.
Warning
The float sliderValue variable of the MAGESSlider script must be a value from 0 to 1.
Note
Remember you can toggle the raycast using the following command:
InterfaceManagement.Get.InterfaceRaycastActivation(bool);
The raycast can be used to interact with the slider. Make sure you have enabled the InteractWithRaycast value from the InteractableItem component.
Creating A Custom VR Slider
In order to create a Custom VR Slider we first need to create some GameObjects.
First we need 2 Transform references for the Slider Start position and the Slider End Position.
We need a GameObject which will represent the handle of our slider. Here we have used a Sphere Mesh with a sphere Collider for our handle.
Note
We created 2 Empty GameObjects (SliderStart and SliderEnd), which will be used for the Transform References, in order to signify the start and end positions of the slider. The Handle is the actual handle the user has to grab to move the slider. I have also created a parent Empty GameObject Called Slider in order to wrap all the slider components and make them easier to manipulate.
Finally we attach the
MAGESSliderscript to our handle gameobject and attach the SliderStart and SliderEnd Transforms to the Start Point and End Point fields in the inspector.
Note
As soon as we attach the Start Point and End Point transforms in the inspector we shall see gizmos showing the slider’s range in the scene. We can also try changing the sliderValue from the inspector and see the handle move across the slider line in the scene.
We are now ready to use the slider both with raycast and the hand.
Adding Slider Graphics
In order to add graphics to the slider line we will use 2 line renderers.
For simplicity, instead of creating new gameobjects, we can attach them in the already existing SliderStart and SliderEnd gameobjects.
Then we can attach them in the MAGESSlider script in the inspector fields Progress Line and Remaining Progress Line.
Note
The line renderer attached in the Progress Line script will represent the slider line portion from the start point to the handle, when the line renderer attached in the Remaining Progress Line script will represent the slider line portion from the handle to the end point. These line renderers will update automatically to cover the span of the mentioned line portions.
Inspector Fields
Below there is the table of the inspector extra slider parameters and what they do.
class MAGESSlider :: MAGESInteractableItem
Parameter |
Description |
|---|---|
|
Is the slider handle able to be used with the raycast? |
|
The position of the handle between |
|
The transform of the start position of the line segment the slider will move in. |
|
The transform of the end position of the line segment the slider will move in. |
|
The LineRenderer that will be used to display the line segment from |
|
The LineRenderer that will be used to display the line segment from the handle’s current position to the |