Actions with deformable skinned meshes
In this tutorial we will demonstrate the complete pipeline on creating an Action with a deformable skinned mesh. From the 3D model to the unity importing then all the configurations and finally the Action script. We will implement a medical example, in particular the initial incision from the Total Knee Arthroplasty operation.
Tutorial overview:
Generate the animated 3D model
Import the 3D model to Unity
Split the animation into clips
Animator setup
Configure the CharacterController
Generate the Action prefabs
Implement the Action script
Generate the animated 3D model
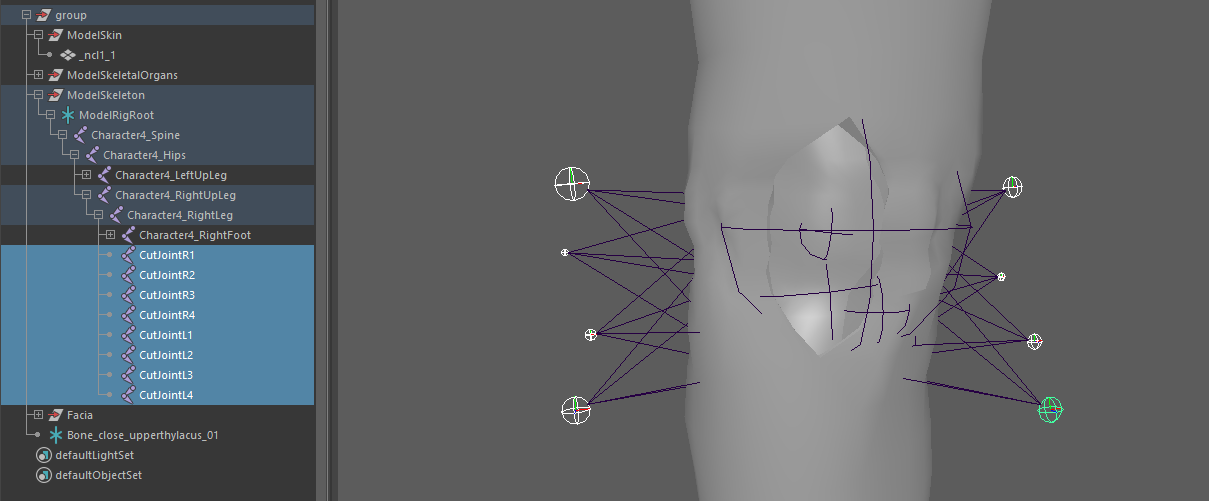
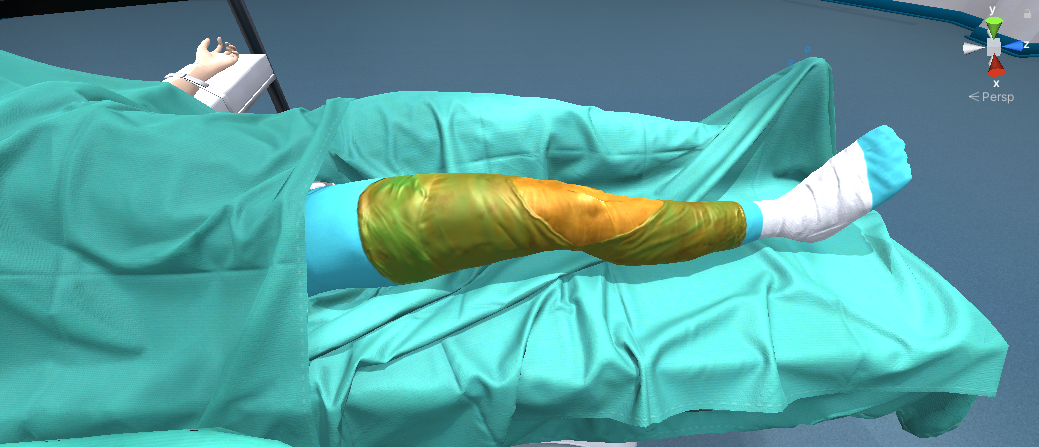
In this scenario we will use an animated leg, with various baked skinned deformations. The image below shows our 3D model in Maya.

As you can see, in Maya we design the full animation using standard joints and key frames. The animation process depends on the scenario you want to design. In this case, we rigged the right foot adding joints to cut the skin and the different muscle layers until we have a clear view of the knee.
The image below shows the joints we used for the skin animation along with their key frames.
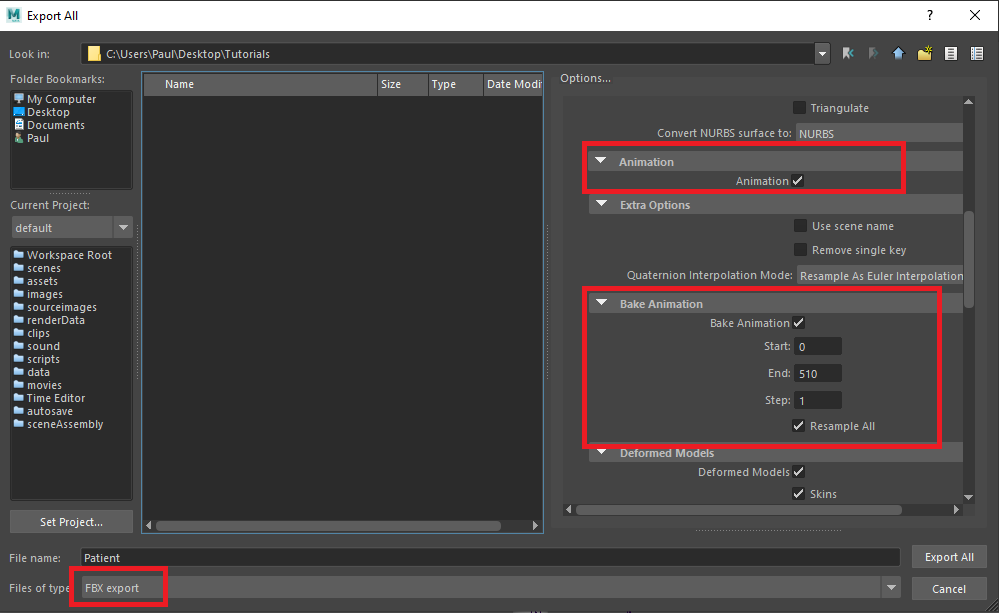
Now we have to export the 3D model. We use the FBX format to export our 3D models since it is the most reliable format to work with unity.
From the Maya menu bar navigate to File/Export all. Now you need to configure some options first. Make sure the Animation option is checked to export the animation as well. Make sure the Files of type option is set to FBX export.
There are specific situations where you need to bake the animation instead of exporting it without the bake option. If the animation has complex animation behaviors or blends there is a chance that they will not import right in Unity. If you face some issues on the importing and the animation does not appear to work right check the Bake Animation option at the export window.
Warning
If you bake the animation, Maya will generate key frames for all joints. After that, the modifying the animation would be really inconvenient. Remember to keep the Maya binary file to modify the animation when baking.
Import the 3D model to Unity
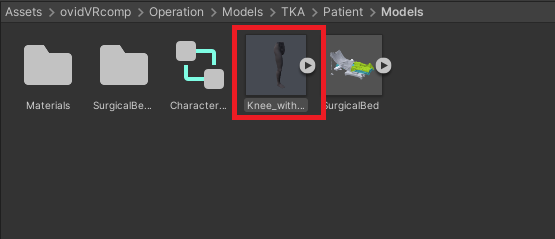
To import the model into Unity just drag and drop the FBX to your project, as seen below.
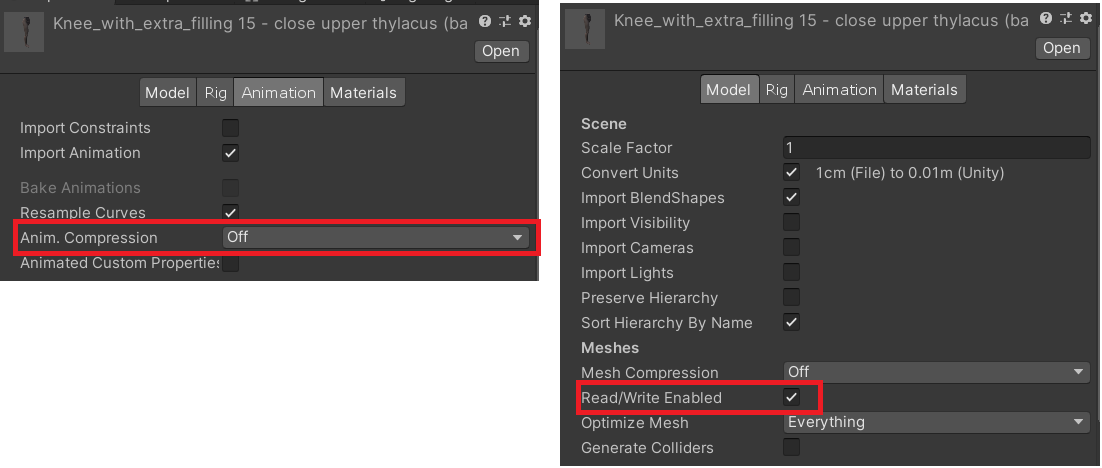
Click the FBX model and from the inspector navigate to the model tab and make sure the Read/Write Enabled is checked. Also in the Animation tab turn off the Animation Compression. Animation compression may cause unwanted animation behavior in certain situations.
This is the final result
Split the animation into clips
We will split the animation into smaller clips to feed our CharacterController, a class that controls our patient’s animations.
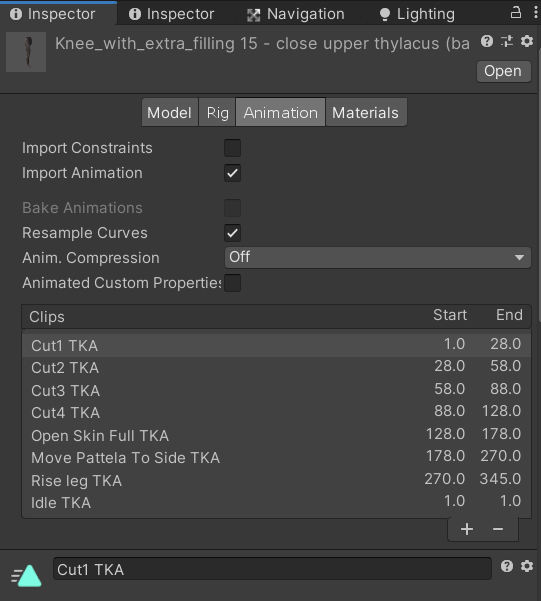
To split the animation into smaller clips, click on the FBX, then at the Inspector navigate to the Animation tab. At the Clips window click the “+” icon to add a new animation clip and then select the Start and End point from the original animation. In our scenario we will split the four parts of the initial incision animation (Cut1 TKA, Cut2 TKA, …)
To save your changes click the “Apply” button at the bottom of the inspector.
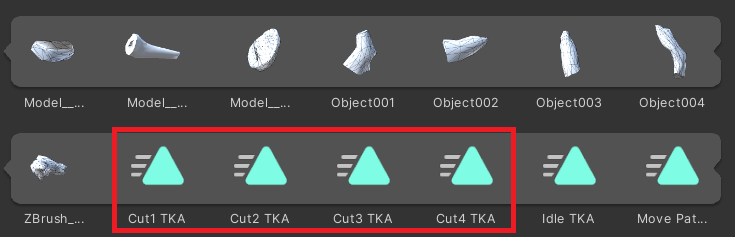
Below you can see the clips we made for this operation. In this tutorial we will use the first four.
The clips will also appear within the FBX model
Animator setup
To properly execute the animations and manage their transitions we have to set up an Animator for our model.
From the Unity scene, navigate to your prefab (in this case the leg), then from the Window menu on the top bar select Animation/Animator. Here you need to configure your own Animation to match your needs. In this operation we designed a sequential state Animator since our animations will always play in the same linear order.
Below you can see our Animator.

Note
We are using Booleans to traverse the animation states.
Configure the CharacterController
The next step is to setup the CharacterController that will control our Animator. This step is optional, you can play your animations in your own way, but we figured out this was the most convenient solution for our needs.
CharacterController is a Singleton class attached on our animated prefab. You can find this script in our SampleApp project. The basic idea is to have a script that controls the Animator and more specific the boolean parameters to switch between the states.
In the CharacterController you can see functions as the following
public void PlayCut1Animation()
{
    animator.SetBool("Cut1", true);
}

public void PlayCut2Animation()
{
    animator.SetBool("Cut2", true);
}
In this way we can call the following method from an Action script to play the Cut1 animation
CharacterController.CharacterController.instance.PlayCut1Animation();
Generate the Action prefabs
As we mentioned, the MAGES metaphor of the skin incision will be a ToolAction. We use the ToolAction in cases where we need to grab a certain tool (pliers, saw etc) to complete an objective by “touching” the tool on a predefined area.
For the ToolAction we need to prepare the following prefabs
Tool Collider
The actual tool (a scalpel)
Tool Collider
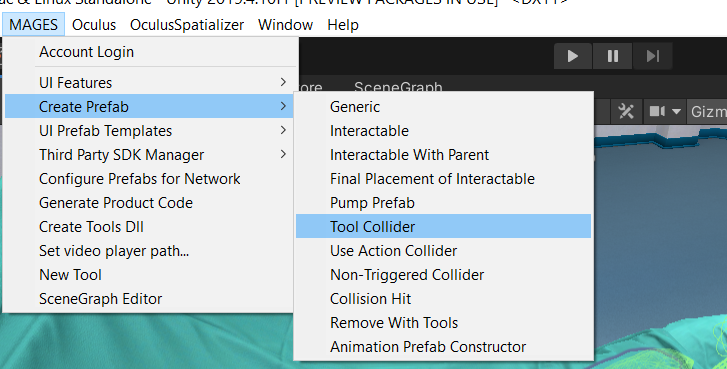
To generate the tool collider navigate to MAGES/Create Prefab/Tool Collider and the tool collider prefab template will appear.
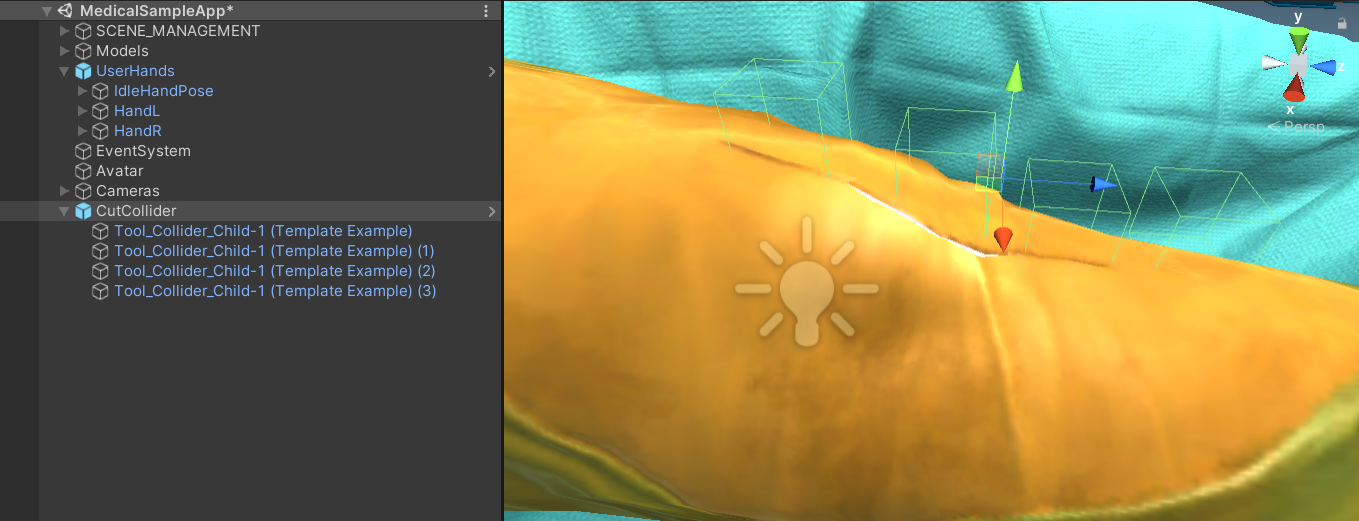
The tool colliders are waiting for the tool to trigger them. Once all the colliders are triggered the Action will perform. In this scenario we will use four colliders since we have four cut animations. The image below shows our tool colliders. Pay attention that all the colliders have the same parent.
Warning
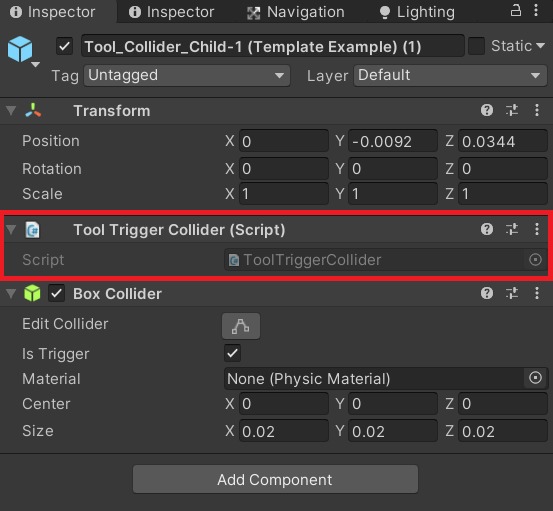
All the tool colliders should have the ToolTriggerCollider script attached.
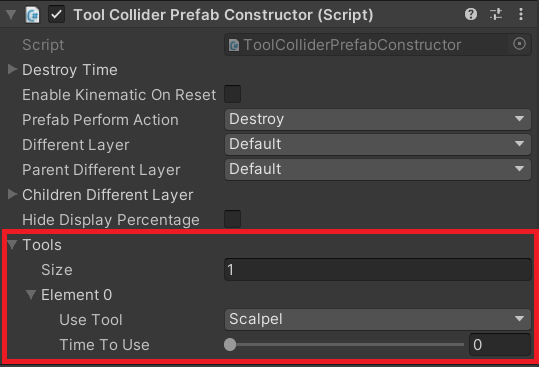
Now we need to assign that only the scalpel will trigger these colliders. To do that, navigate to the root object and at the ToolColliderPrefabConstructor add a new tool element at the Tools list, then select the scalpel (image below)
Implement the Action script
The final step is to write the Action script. Below you can see the basic ToolAction script that describes this ToolAction.
using MAGES.ActionPrototypes;

public class SkinIncisionAction : ToolAction
{
    public override void Initialize()
    {
        SetToolActionPrefab("Medical/Lesson0/Stage0/Action1/CutCollider", MAGES.ToolManager.tool.ToolsEnum.Scalpel);

        SetPerformAction(MAGES.CharacterController.CharacterController.instance.PlayCut1Animation, 1);
        SetPerformAction(MAGES.CharacterController.CharacterController.instance.PlayCut2Animation, 2);
        SetPerformAction(MAGES.CharacterController.CharacterController.instance.PlayCut3Animation, 3);
        SetPerformAction(MAGES.CharacterController.CharacterController.instance.PlayCut4Animation, 4);

        base.Initialize();
    }
}
Let’s explain the Action a bit. You can see that we call the SetToolActionPrefab method to instantiate our tool colliders and set the tool that we will use to trigger them (MAGES.toolManager.tool.ToolsEnum.Scalpel)
The SetPerformAction method takes a Unity Action (method) as the first argument and an integer as the second.
The second argument indicates the trigger callback ID. For example when the user hits the first collider with the scalpel, the PlayCut1Animation method will invoke.
Hitting the second collider will invoke the PlayCut2Animation method and so on.
Below you can see the cutting animation playing when triggering the tool colliders.

Note
To perform the ToolAction, the user needs to hit all the registered tool colliders.