Remove Action
The Remove Action is used when we need to remove a specific object from the scene using our hands or a tool.
To generate a Remove Action you need the Interactable prefab (the one to be removed) and a hologram.
Remove object with hands
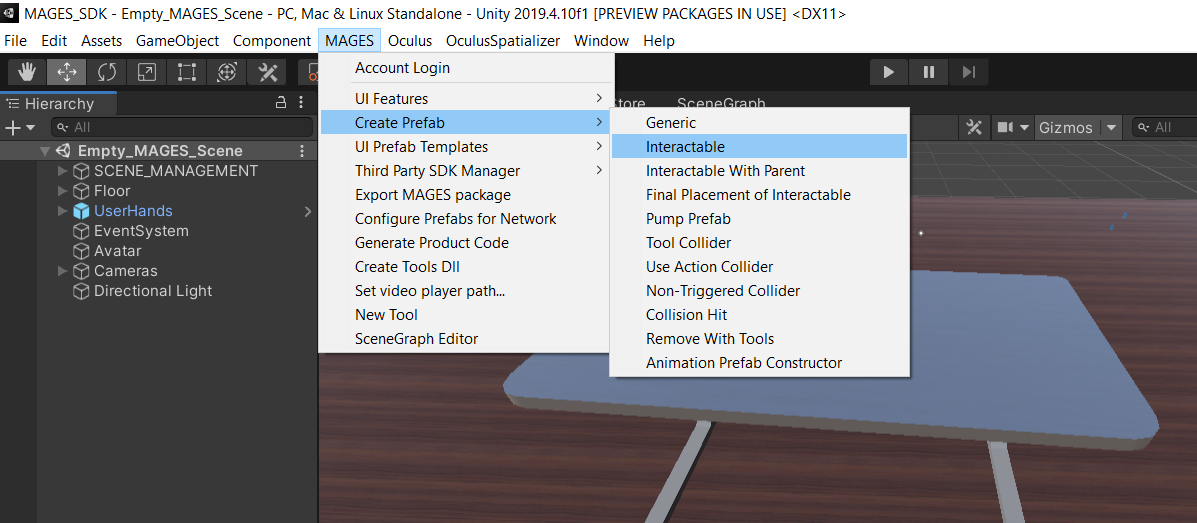
From the MAGES menu select the option CreatePrefab/Interactable
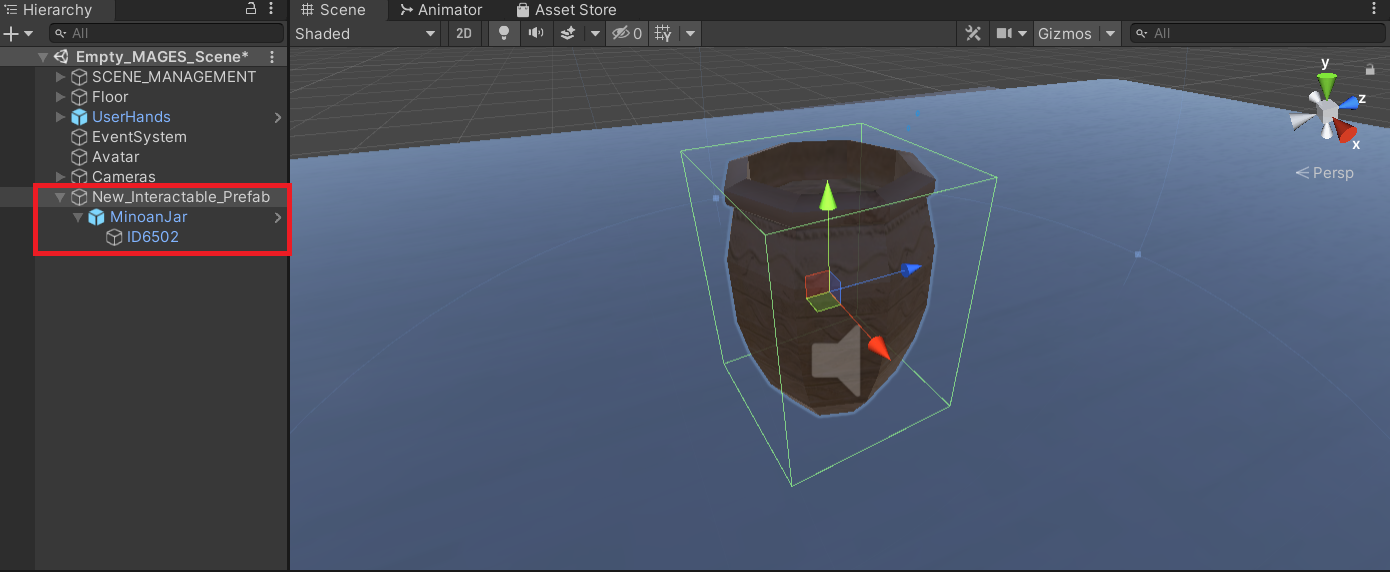
The Interactable prefab template will be instantiated. In this example we will remove a jar, thus we populate the prefab template with the jar model as seen in the image below.
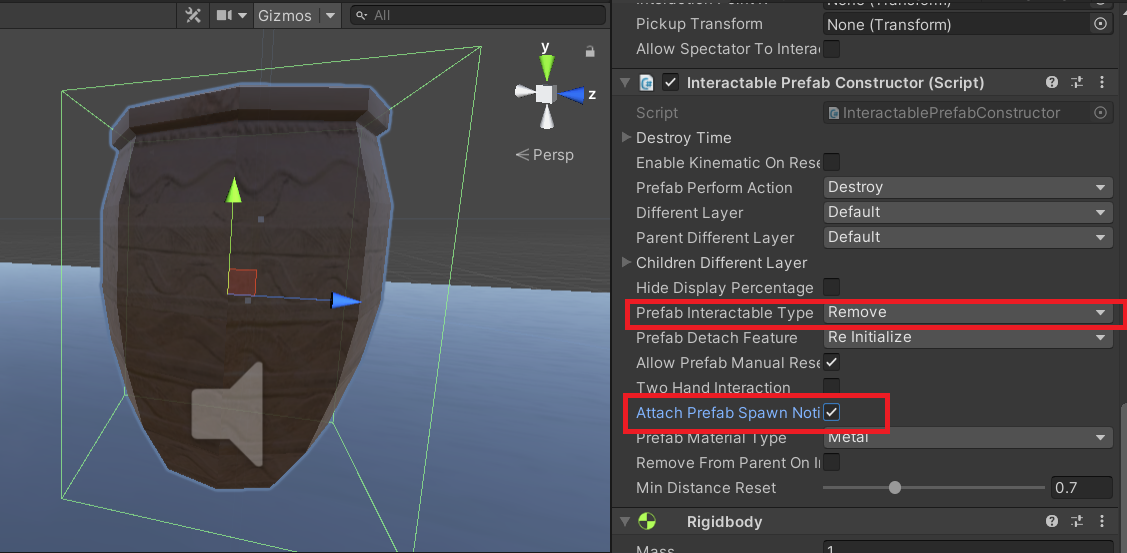
The only configuration we need is to set from the InteractablePrefabConstructor script the prefabInteractableType value to Remove
It is also recommended to set the AttachPrefabSpawnNotifier value to True. This will set a flashing animation to the object, indicating its removal.
Don’t forget to add proper physical colliders to the object.
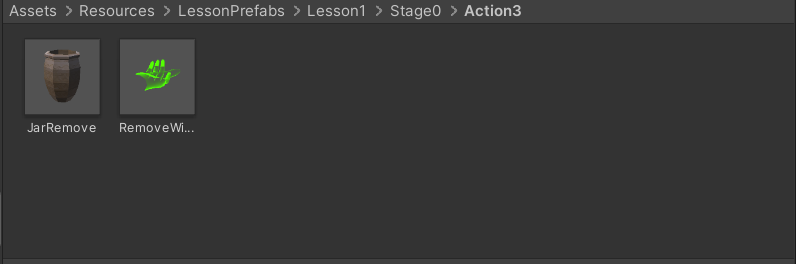
Additionally, we generate an animated hologram showing a holographic hand removing the jar.

Finally, we save the prefabs in our LessonPrefab folder
Action Script
The script below initializes the interactable prefab and spawns the hologram as well.
using MAGES.ActionPrototypes;
public class RemoveJarAction : RemoveAction
{
    public override void Initialize()
    {
        SetRemovePrefab("Lesson1/Stage0/Action3/JarRemove");

        SetHoloObject("Lesson1/Stage0/Action3/RemoveWithHandHologram");

        base.Initialize();
    }
}
Remove object with tools
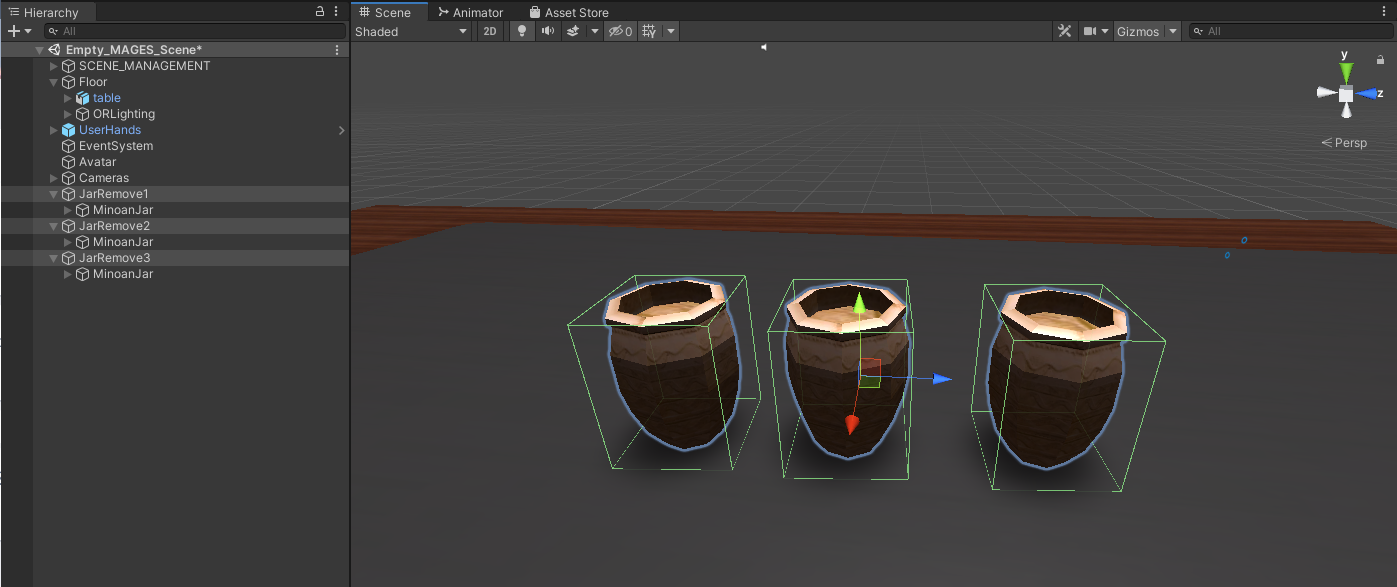
In this case, we will remove three jars using a tool (the pliers) instead of our hands.
From the MAGES menu select the option CreatePrefab/Remove With Tools

This time we will generate three prefabs as seen below.
Now, we will configure our remove prefabs to be removed with the pliers tool.
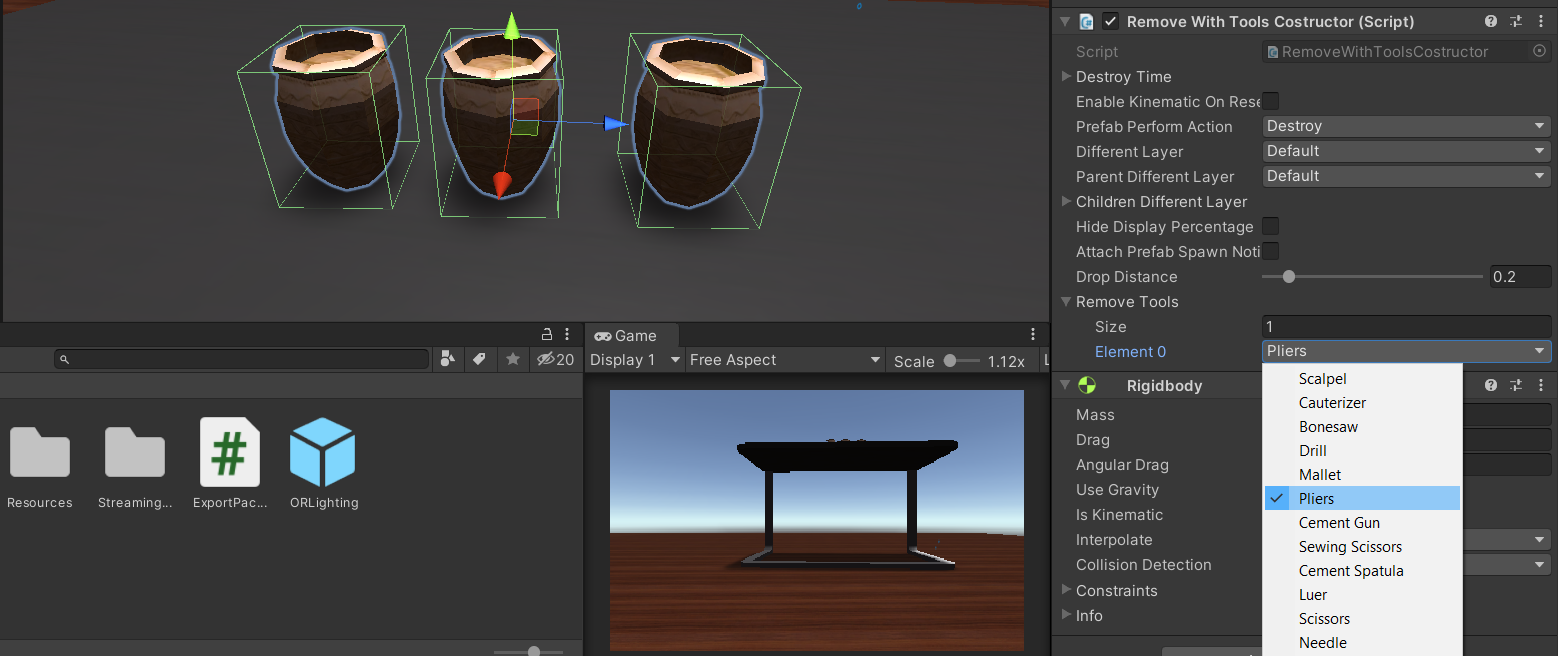
At the RemoveWithToolsConstructor script which is attached to your prefab, set the RemoveTools size to 1 and from the dropdown menu select the tool you want.
In this case we selected the Pliers.
We will do the same configuration to all the three remove prefabs.
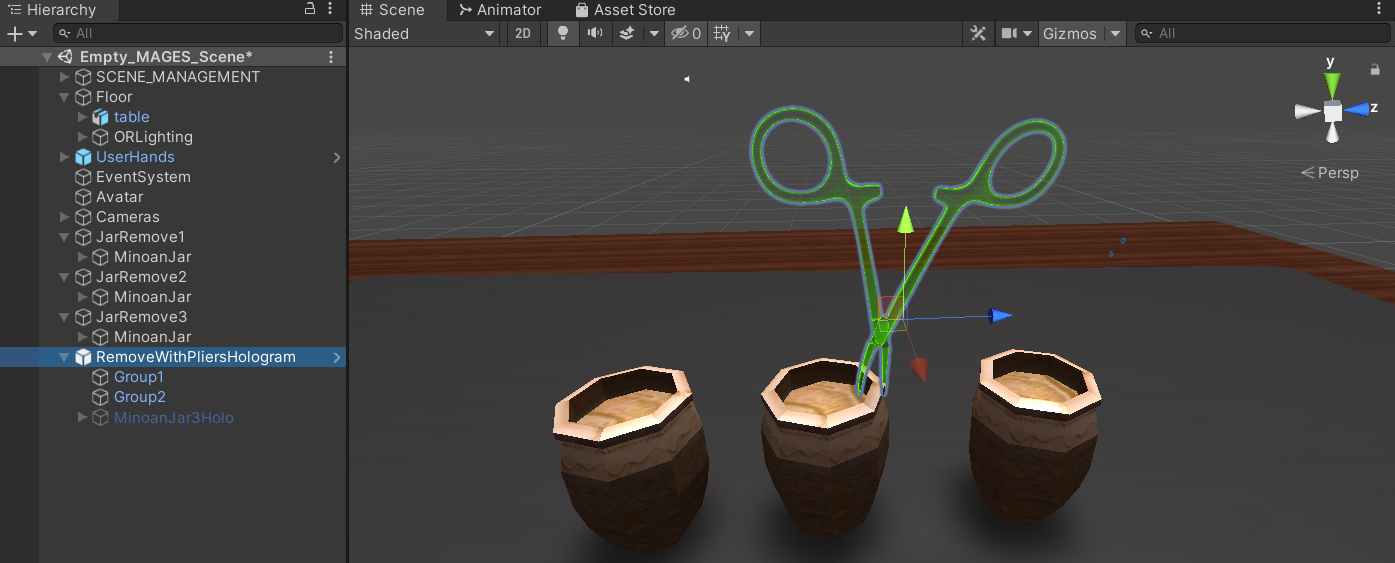
Additionally, we make an animated hologram.
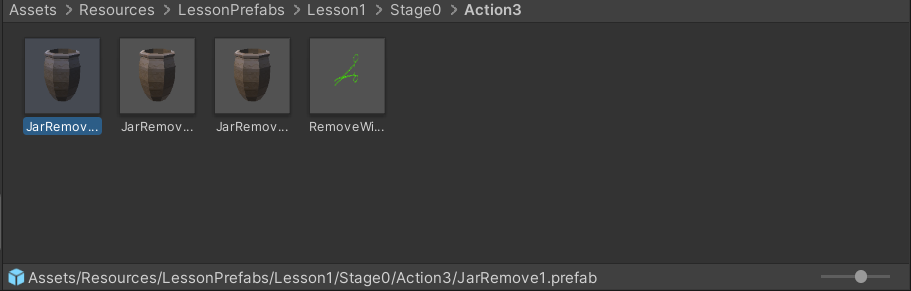
Finally, we save the prefabs in our LessonPrefab folder
Action Script
In this Action we would like to remove three jars using the pliers instead of one, thus the Action script will be the following.
using MAGES.ActionPrototypes;
public class RemoveJarsWithPliersAction : RemoveAction
{
    public override void Initialize()
    {
        SetRemovePrefab("Lesson1/Stage0/Action3/JarRemove1");
        SetRemovePrefab("Lesson1/Stage0/Action3/JarRemove2");
        SetRemovePrefab("Lesson1/Stage0/Action3/JarRemove3");

        SetHoloObject("Lesson1/Stage0/Action3/RemoveWithPliersHologram");

        base.Initialize();
    }
}
Note
The above RemoveAction script sets three removable prefabs. In this case, the Action will Perform when all three are removed with the pliers.