Realtime Drill
Warning
Note that this feature is in experimental stage, therefore it is not stable and it can create artifacts on the newly created mesh.
MAGES gives you the ability to perform realitme drilling in meshes. In order to achieve this you will need to attach the Deformable Mesh script to the object containing the mesh and the Drill script to the tool.
Deformable Mesh
Setting up a deformable mesh
To convert a mesh into a deformable mesh, attach the “Deformable Mesh” component on the Game Object that contains its renderer.
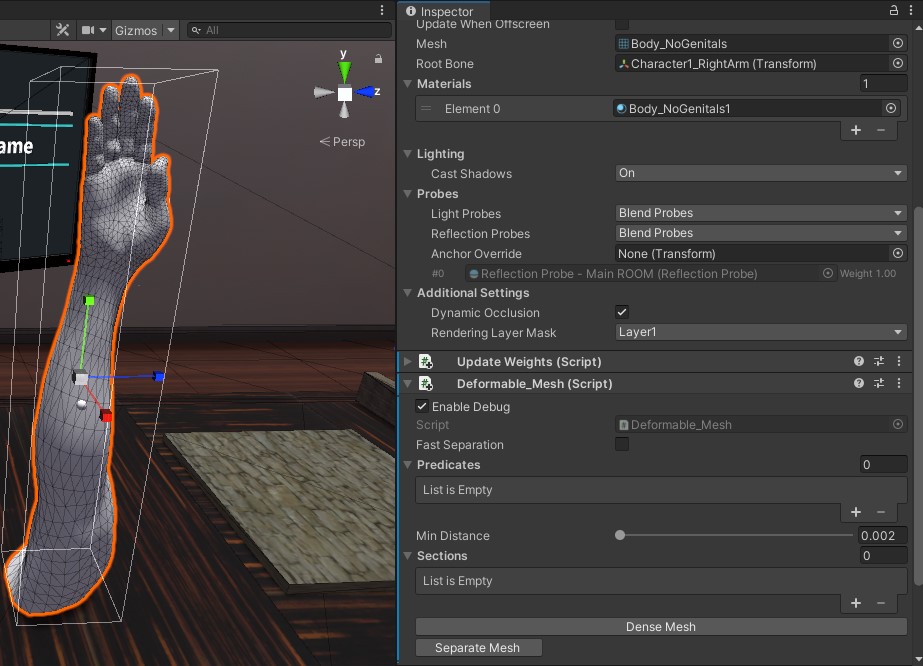
The deformable mesh can be separated into multiple sections, based on what parts of it may be changed, as well as for optimization purposes. To separate a mesh, a list of predicates is used, which are gameobject hierarchies that contain colliders:
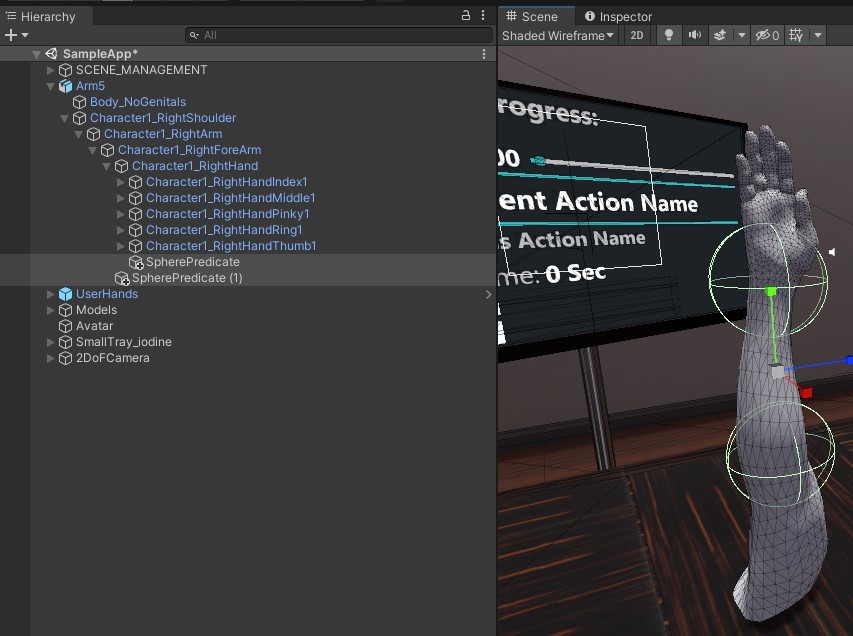
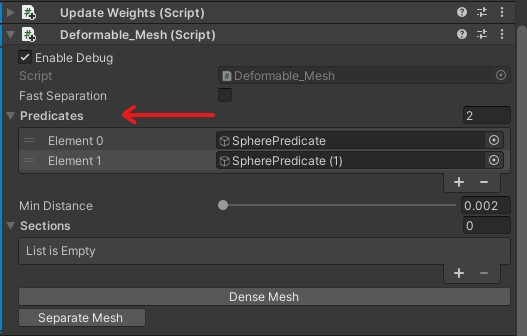
You can add predicates by adding to the “Predicates” property in the Deformable Mesh component:
After adding the colliders, you can convert the mesh to a deformable mesh, by clicking on the “Separate Mesh” button. This may take a few moments, based on the complexity of the mesh in question:
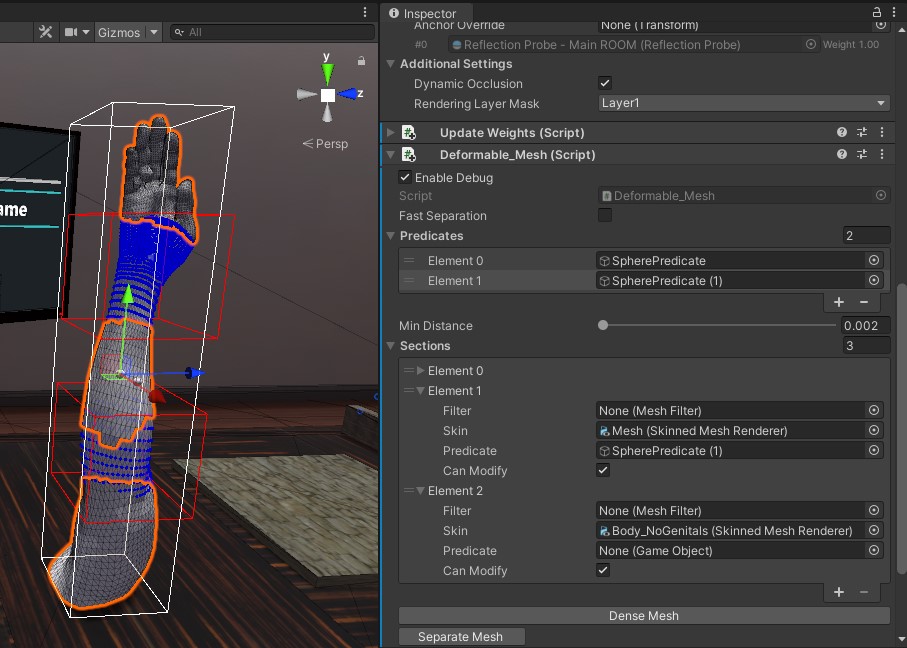
In this case, since we used, 2 predicates, there are a total of 3 different mesh sections:
The original mesh
And the two separated sections from the vertices that were inside the sphere colliders
In the sections list, you can check the property “Can Modify” to disable modification of the mesh section in question by all CTD scripts.
Finally, in order to be able to save the deformable mesh as a prefab select a valid path and name in the fields shown below and click Save Sections.

Then you can simply parent all the deformable mesh’s components in an empty gameobject and drag n drop it in your assets to create a reusable prefab.
Drill
The drill module enables the developer to set up a Unity GameObject as a drill tool, in order to achieve real time drilling of holes on 3D rigged and static models.
Set up
To use the Drill Module, you need to attach the Drill component onto the gameobject that we want to use as a drill.
Simply click Add Component> MAGES > Mesh Deformations > Drill to add the component.
Note
The scale of the gameObject that this script is attached to, affects the scaling of the drill area.
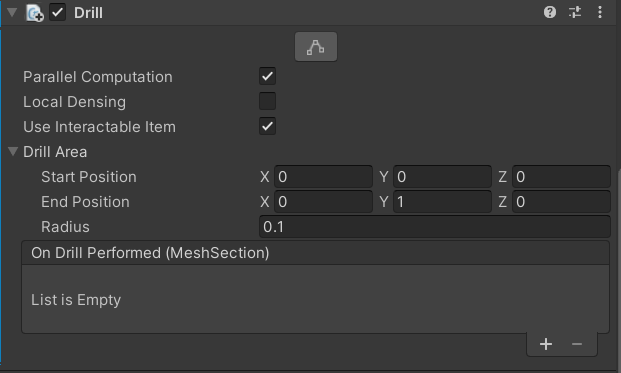
This gives you the following properties:
Parallel Computation:
Option to run the code in parallel for increased performance.
Local Densing:
Option to split every affected triangle of the drilling into four smaller ones, in order to prevent the smaller diameter holes looking like polygons.
Use Interactable Item
Option to use this script in combination with an interactable item, such that when you have this object in your hand and then press the trigger button a drill is performed.
Drill Area:
Option to set up the drilling axis and the radius of the drill.
Note
Make sure Gizmos are enabled on the Unity editor.
Click the edit button shown in the image below:
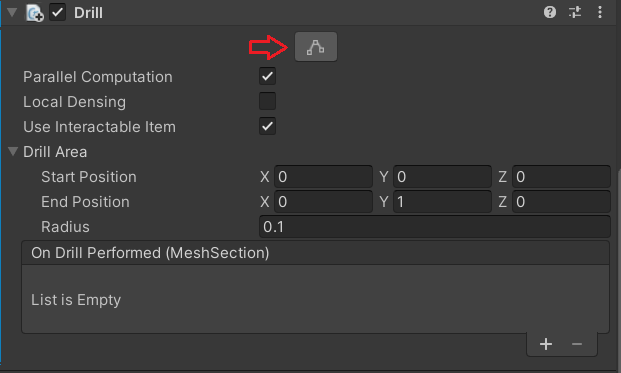
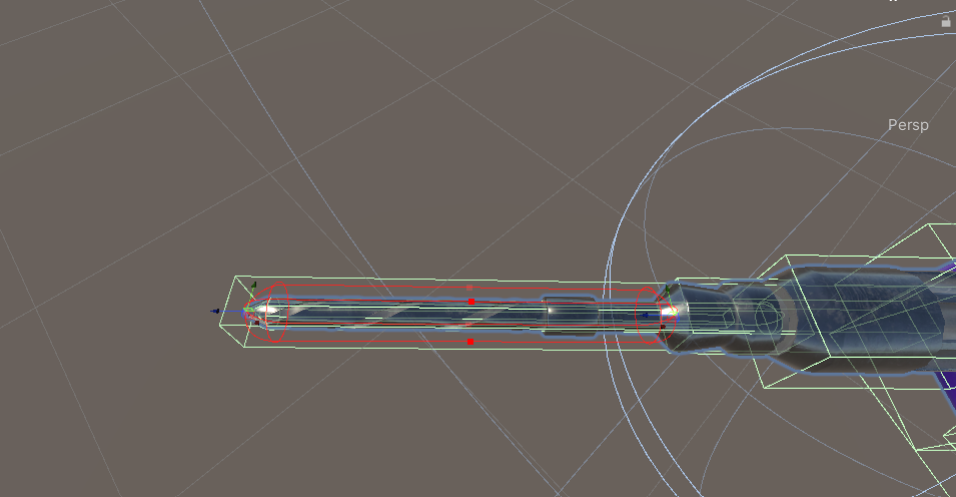
Use the handles shown in the scene to adjust the drill area to your requirements as shown below:
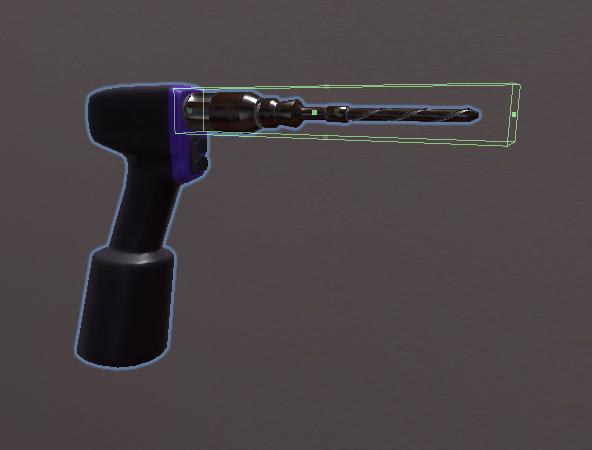
That last step that remains is to add a trigger collider component to the gameObject, that is aligned with the drill axis GUI that we created before:
In our example we are going to add a Box Collider.
Properties
Property |
Description |
|
Minimize running times by executing the code in parallel. |
|
Split every affected triangle of the drilling into four smaller ones, in order to prevent the smaller diameter holes looking like polygons. |
|
Set up the drilling axis and the radius of the drill |
|
Called whenever after this script successfully modifies a mesh section. |